
THE SPICE IS RIGHT!
SHOP NOW!
38
Days2
Hours43
Minutes51
Seconds Until Labour Day
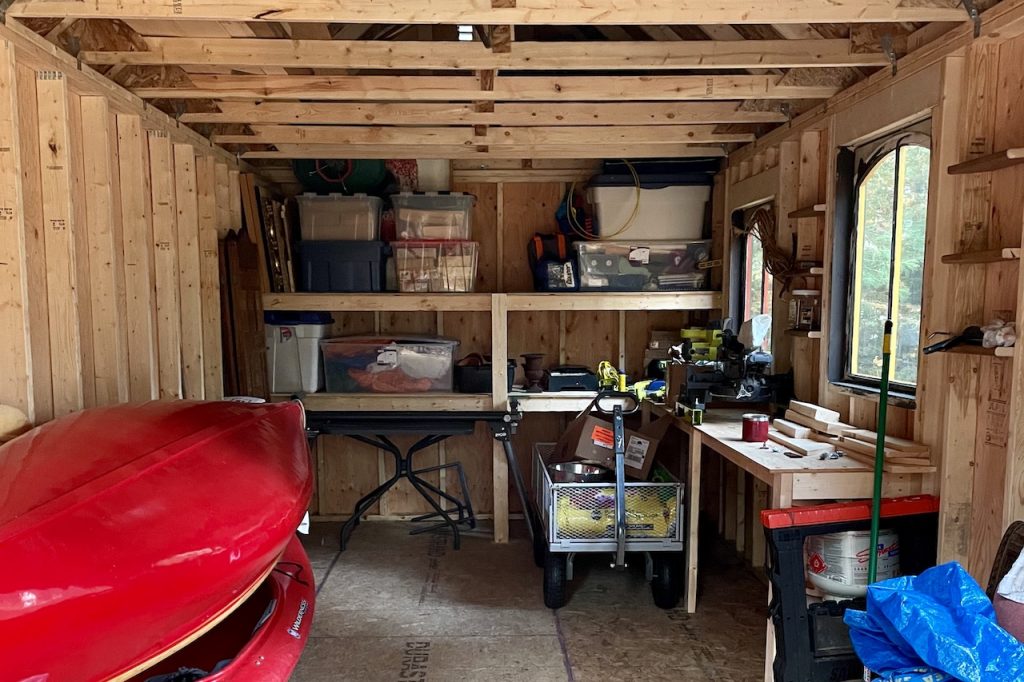
Learn HOW TO BUILD A STORAGE SHED with our easy-to-follow step-by-step guide.
Weekend projects, DIY makeovers, and general property maintenance are often the things people with weekend and getaway properties have to tackle. Some simply call in professionals, paying them to get the job done. Others, like yours truly, get it in their head that they’re handy. HOW TO BUILD A STORAGE SHED is for all the do-it-yourselfers out there. We’re sharing our experience of building a 10 x 20-foot storage shed. You’ll need the right plans, the proper tools and a little help from your friends. That’s it! Let’s get started.
Embarking on a build, DIY, or weekend project can feel like a daunting task. Before we begin, let’s ask a few key questions.
We did some research to answer these questions and, suggest you do the same. Speak with professionals and canvass friends who’ve done similar projects. Learning from experts and other DIYers is smart!
After researching options, we concluded that building the storage shed from scratch is less expensive than assembling a shed kit. It’s also cheaper than having an already-built shed delivered to the property. The cost to build a shed is based on size plus, the materials used and the finishes. In the end, we went with a 10 x 20-foot storage shed with a peaked gable roof. That space under the peaked roof gave us additional storage space.
HOW TO BUILD A STORAGE SHED was produced in sections. Each of the headings that follow is going to let you zero in and focus on a specific part of the build. Our shed-building journey was also filmed so you’ll see links to videos showcasing the key steps of the project. Those links are listed below.
BONUS! We created THIS 2-MINUTE TRAILER. Make sure to watch it to get a quick recap on the entire project. Sure hope you come away with one important thing after watching the trailer; this shed project was an absolute joy to complete!
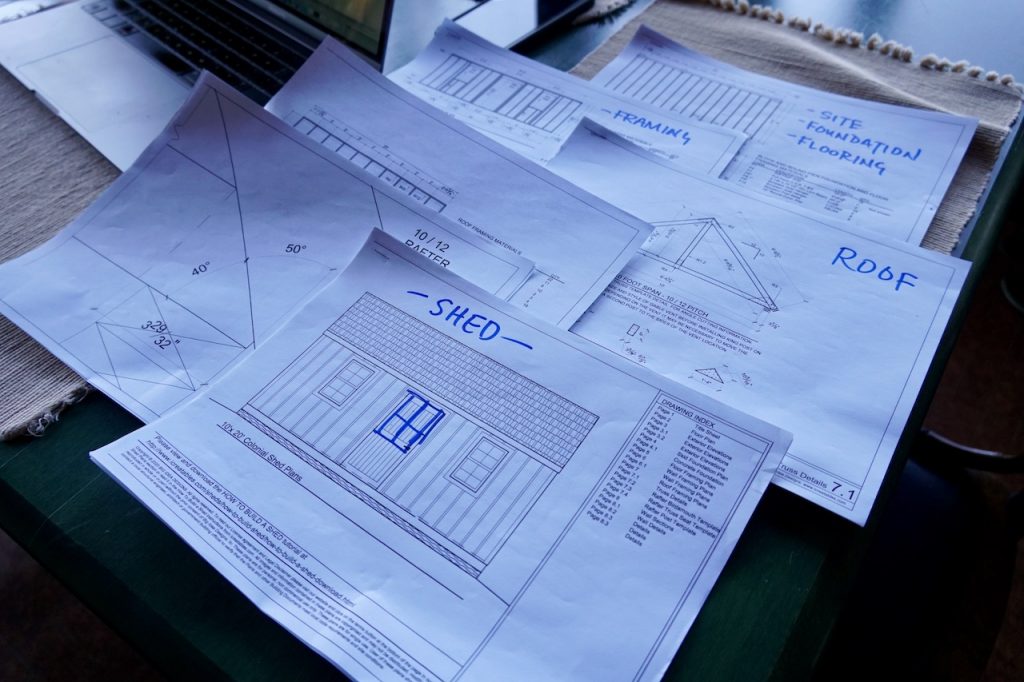
Looking for garden shed plans or plans for a storage shed online provides lots of options on the size and style. In the end, I selected shed plans from a site called icreatables.com. The shed is a colonial-style structure with a high-pitched roof. It has a few windows plus, double doors. The double doors allow for the wheeling in and out of lawnmowers, wheelbarrows, small boats, equipment, and outdoor furniture. I also wanted enough space to install a potting bench, hooks, and shelves. The plans were inexpensive. They cost less than $30 at the time of purchase. With lots of shed designs online, pick the one that best suits your purposes.
The plans I purchased also came come with a material list. This helped answer my questions about how many materials I needed to order. With the list in hand, I visited a few building supply stores and asked professionals for their opinion on what I needed. They in turn were then able to give me their best quote. Building your own shed will cost about the same as a shed kit, yet, some shed kits don’t allow for customization. This ended up being way less expensive than having one built by professionals. That said, don’t expect the project to be quick and easy. It’ll take time and does require lots of manual labor.
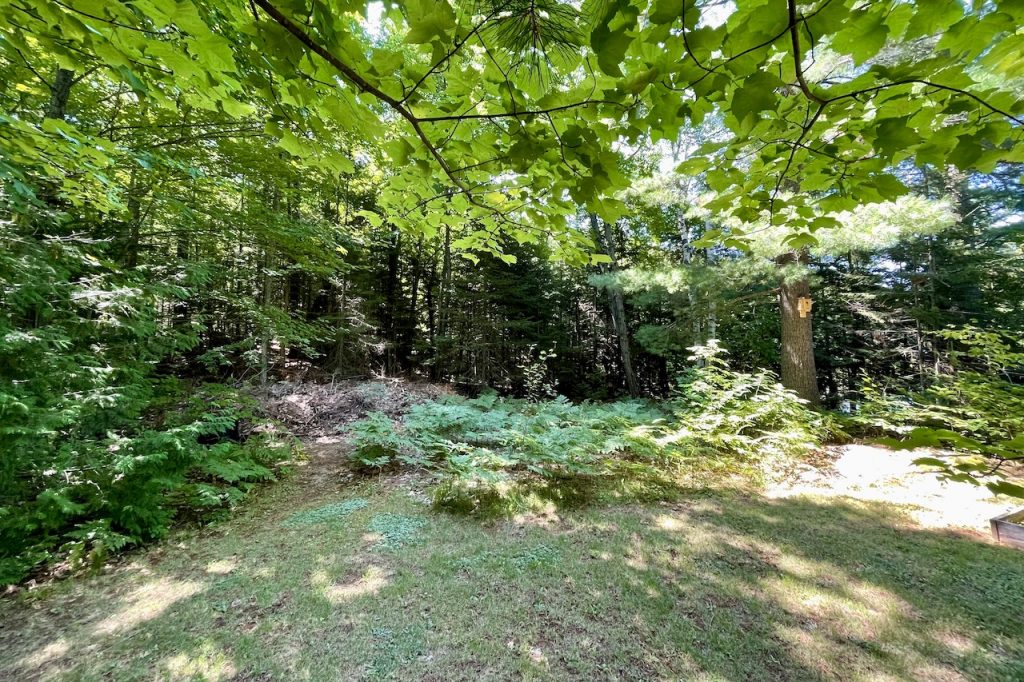
With the shed plan chosen and the materials ordered, the next important important decision is about the location. In picking the site for your shed, look for level ground, preferably away from the foot of a hill or an area where water collects. One expert also suggested building the shed in an open area to avoid damage from tree debris. Keep this in mind when you build your own shed, whether in the backyard or up in cottage country as we did.
Once you select your site, remove any plants, trees, rocks and debris remembering a clear level area will help with a smooth build. Something else you may have to consider; building permits. Check the building code requirements in your area before beginning any project. This shed was set back on the property and had no power running to the structure, therefore, a permit wasn’t needed.
The VIDEO showcasing HOW TO PREPARE the site for the shed is HERE!
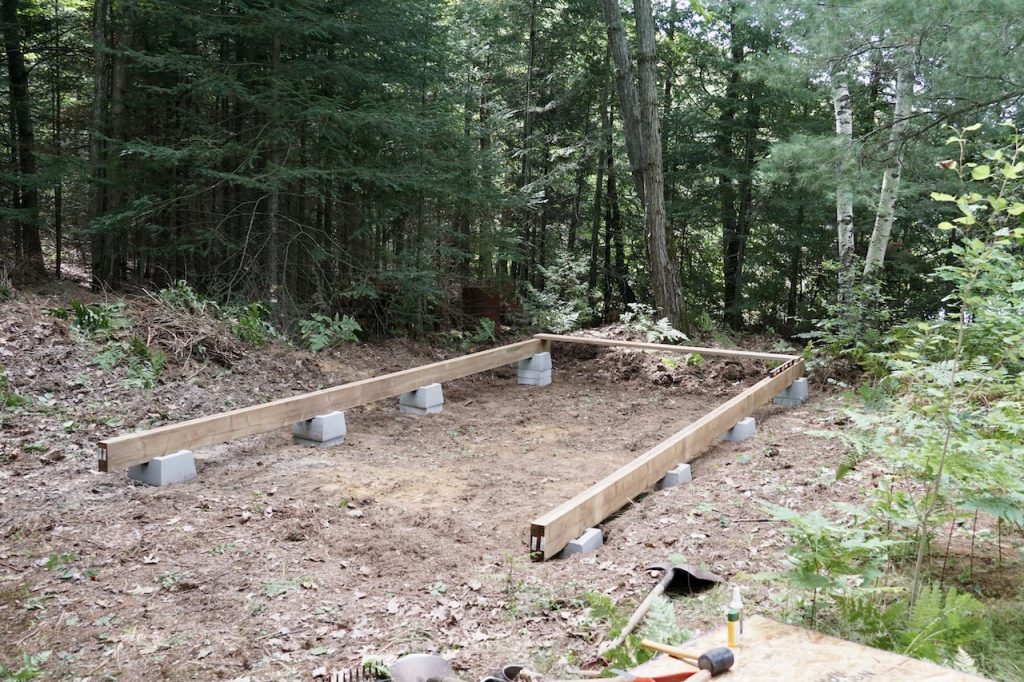
The plans for this storage shed came with options for the foundation. We went with concrete blocks. Thankfully my friend Mark and his sons were up for a weekend at the cottage. Mark has experience with weekend build projects, so his advice was very helpful. We started placing the first concrete block in the high corner and made sure it was level. Next step was to repeat the above with the three remaining corners. An additional two-block grouping was also added to support the 20-foot lengths of wall. Above all, it’s important to do double checks around the floor frame perimeter using a level. After that, the blocks can be adjusted, lifted or lowered simply by adding or removing dirt fill. It’s fiddly work but someone has to do it!
The VIDEO showcasing HOW TO BUILD THE FOUNDATION for the shed is HERE!
FOUNDATION IS DOWN, NOW IT’S TIME TO BUILD!
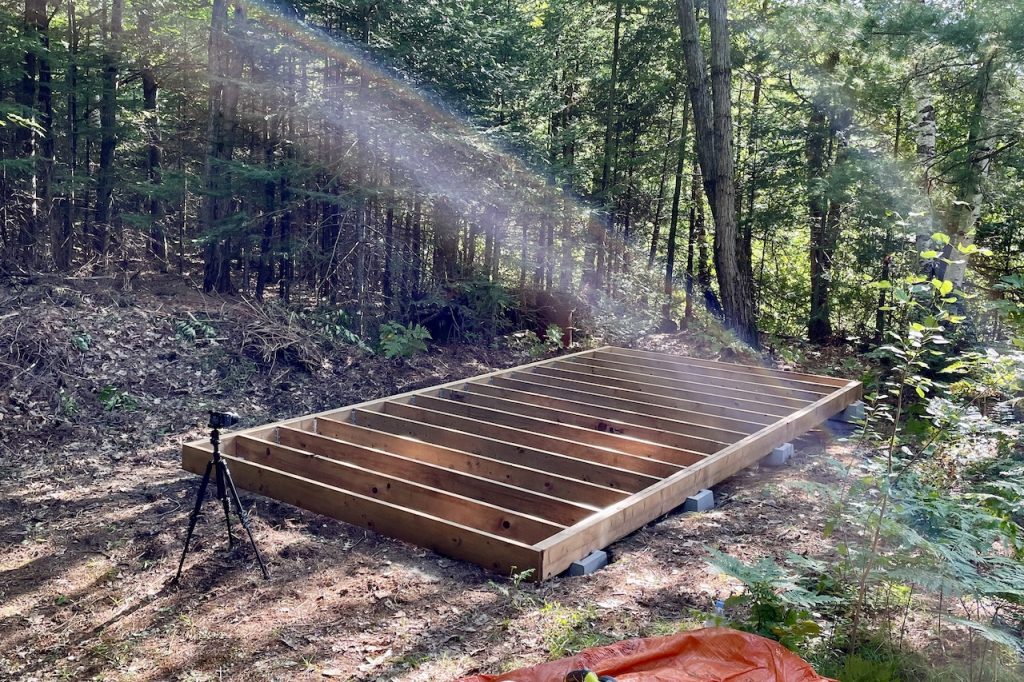
The next step in the build is to construct the floor frame. After placing the two 20-foot floor joists in place, we continued by butting additional joists every 16-inches, on center. Galvanized joist hangers acted as guides and indicated where the floor joists needed to be nailed.
My friend Mark squared the floor framing by measuring from corner to corner on the diagonal. All of these details were clearly explained in the iCreatables plan. This ensured the build happened seamlessly.

Having the correct tools for a project like this is really important. I’ve listed Amazon links down below if you need essential tools such as a level, square or a tape measure. Additionally, check out the RYOBI TOOLS website to learn more about the battery-operated tools we used for this project.
The VIDEO showcasing HOW TO BUILD THE FLOOR FRAME AND JOISTS is HERE!
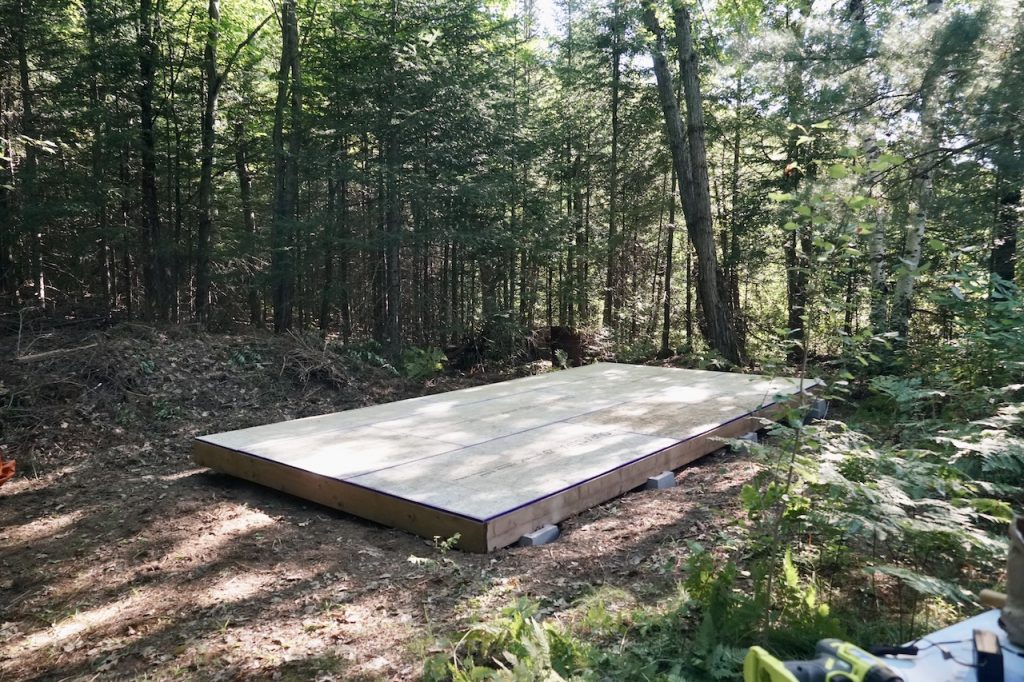
Installing or attaching the floor sheathing to the floor frame is pretty easy although the sheets of flooring are quite heavy. Having a friend to help is a good idea. To begin, lay the first piece of 3/4-inch plywood sheathing into one corner. Then, drill it in place using 2-inch wood screws. The floor sheathing comes complete with painted guidelines. This interesting feature guarantees the screws travel through the sheathing and attach it to the floor joists below. Brilliant!
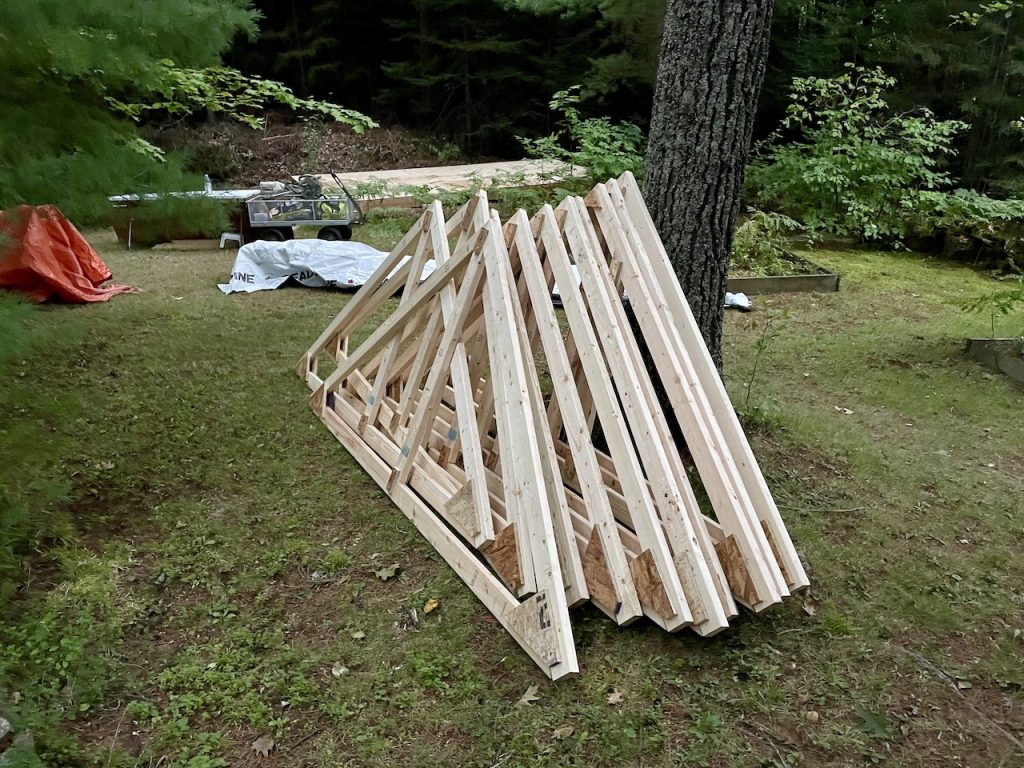
Depending on the type of roof specified for your plan, you may need to build roof trusses. That’s what we did. Roof trusses are constructed using two rafters, also known as top cords. The top cords are joined at the peak while the bottoms meet a third cord that stretches between the two to form a triangle. The rafters and bottom cords are then joined together by plywood gussets at each joint. Thankfully the plans came with details on how to make gussets. Purchasing ready-made gussets was not an option at the time due to supply shortages. Making our own from leftover sheathing was an additional cost saver.
Here are the VIDEOS showcasing HOW TO LAY THE FLOOR SHEATHING and ROOF TRUSSES!
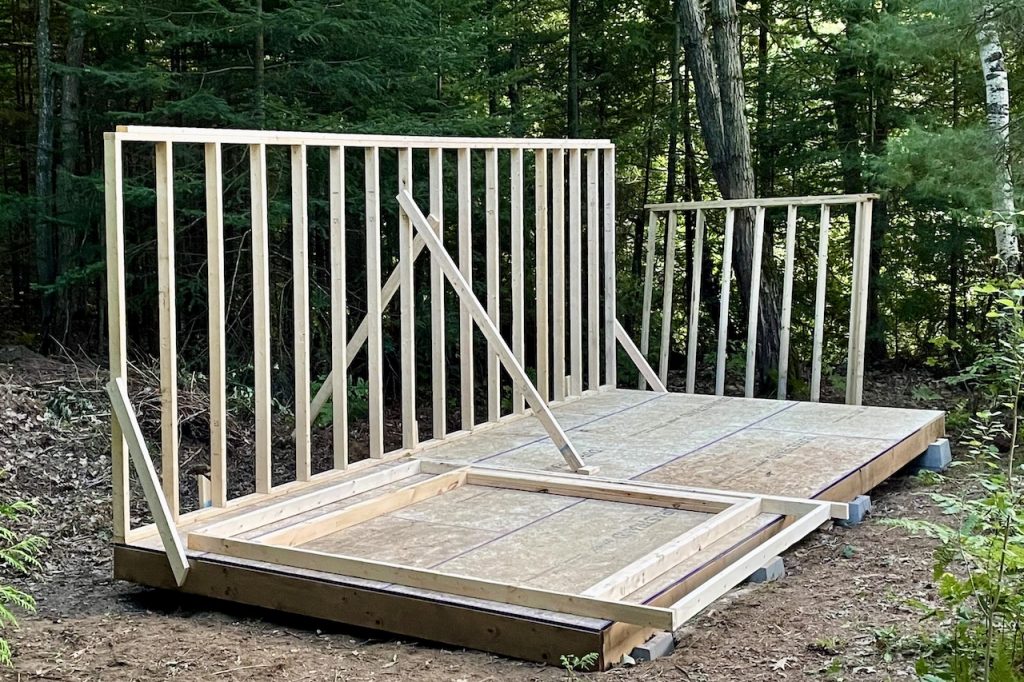
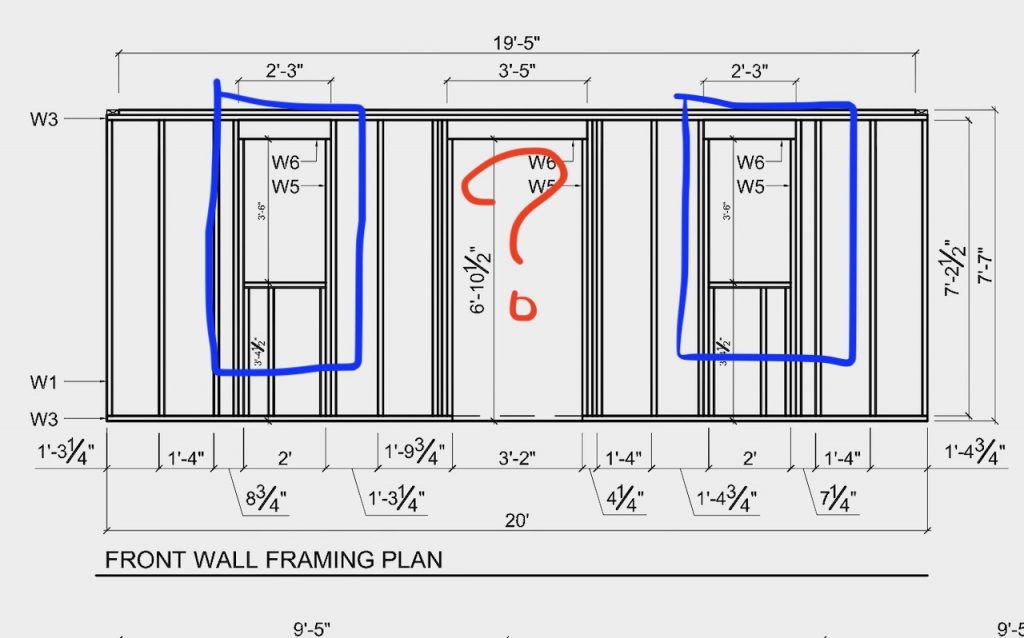
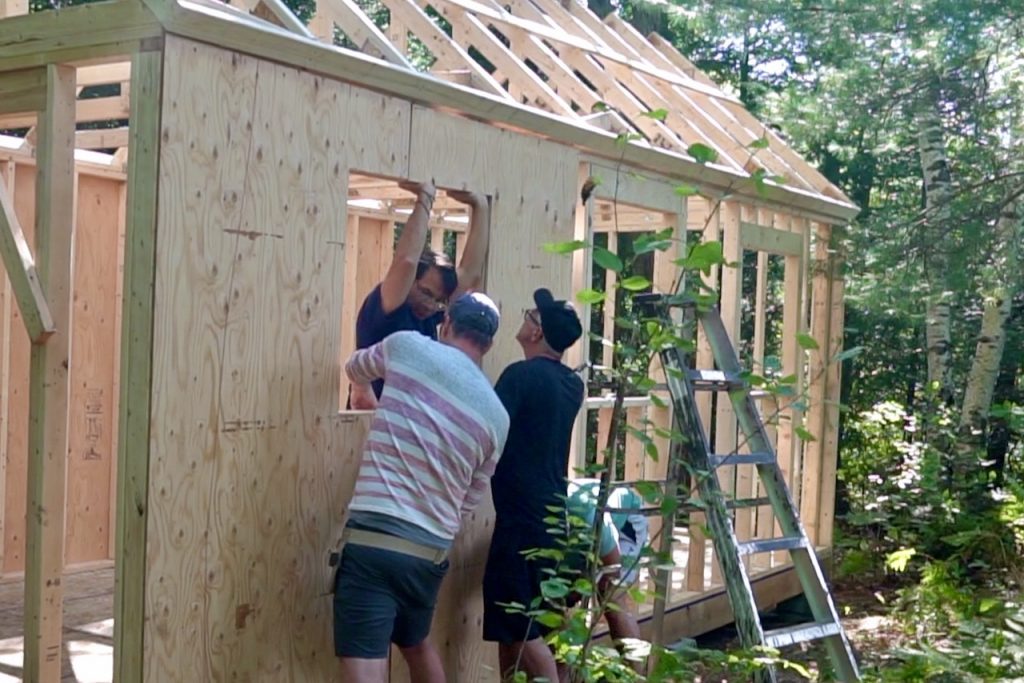
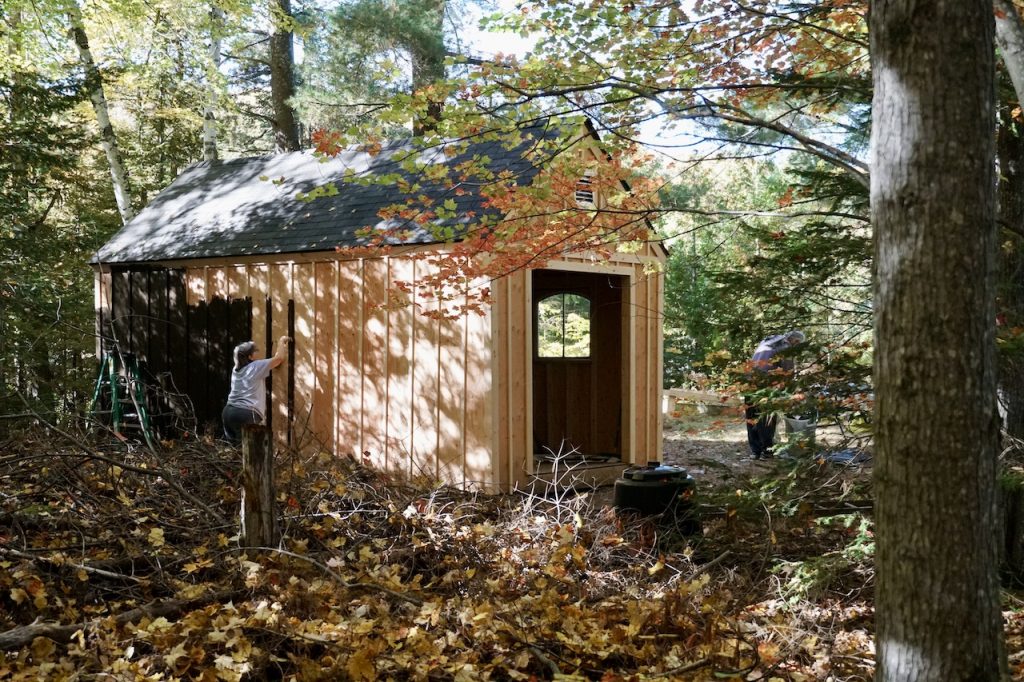
Framing the walls for the shed is an exciting part of the build. Lifting and securing them in place provides the first real sense of the shape of the shed. Assembling each wall on top of the floor sheathing is a good idea This allows you to tip the wall up and into place once built. Framing the walls for the shed is heavy work so, having friends to help is suggested.
Here’s another PRO TIP! When you go to construct the walls for the shed, start with one of the longer, load-bearing walls. In this case, the first wall has no window or door openings which made it easy to put together. Then, once the wall frame is nailed together, square it by pulling diagonals from opposite corners as you did with the floor framing. Lift the wall up so it’s plumb. Then, nail through the bottom plate into the floor framing. Temporarily brace the wall in place using diagonal 2 x 4s. Attach them from the sides of the wall to the floor framing.
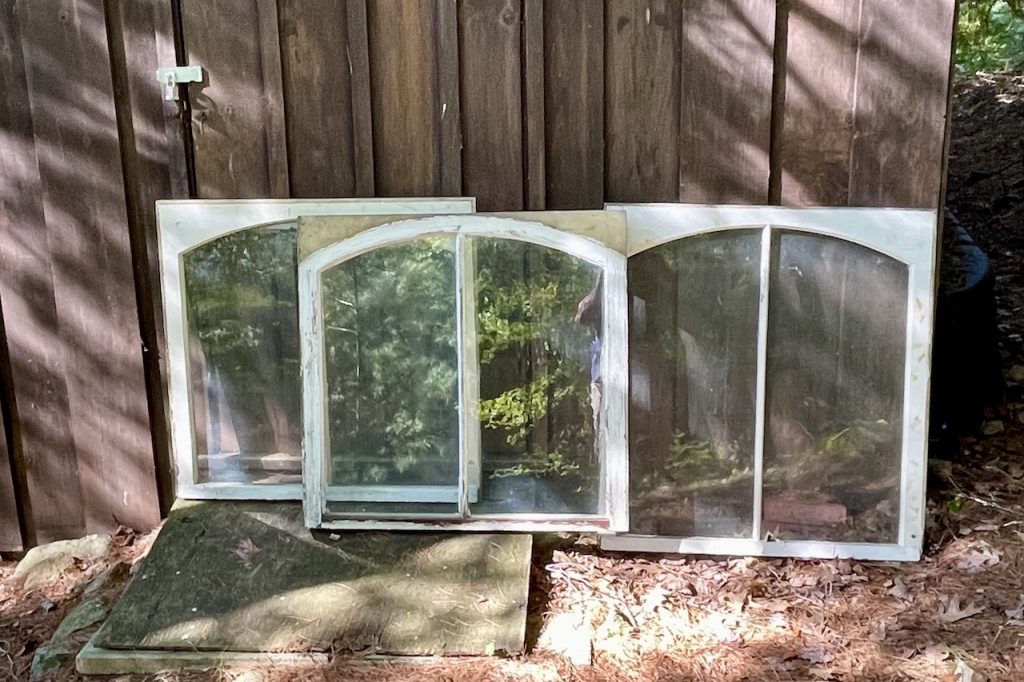
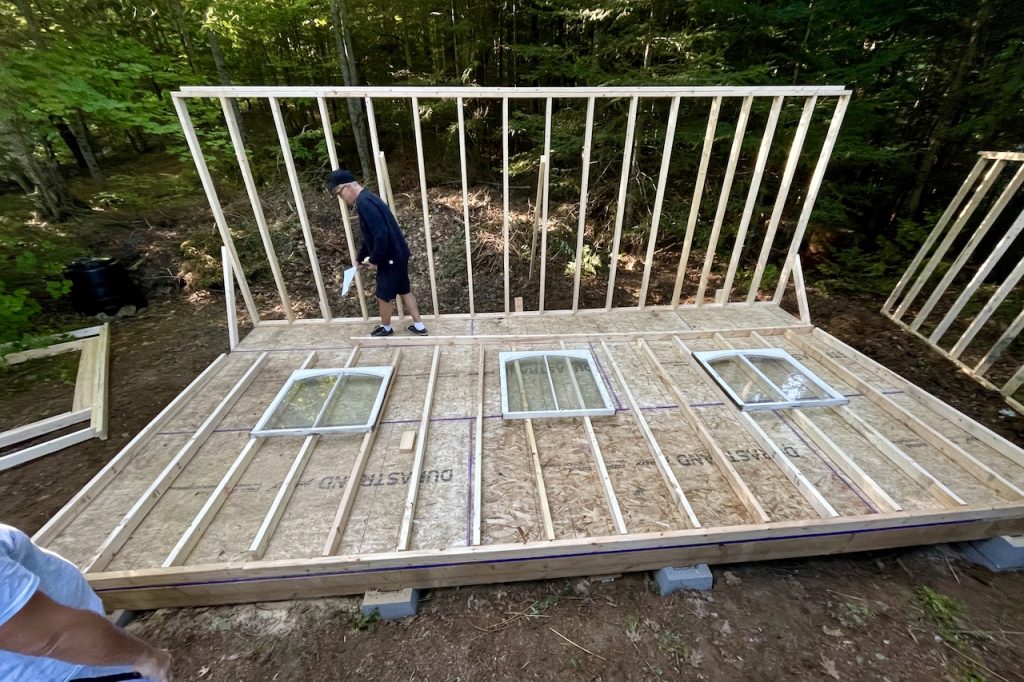
One thing to note about this storage shed; we changed the plans. Antique windows add a bit of character and the single entry door was eliminated. Double doors now serve as the main entrance. Using the plans as the reference to make these changes makes for an easy adjustment.
The VIDEO showcasing HOW TO FRAME THE WALLS of the shed is HERE!
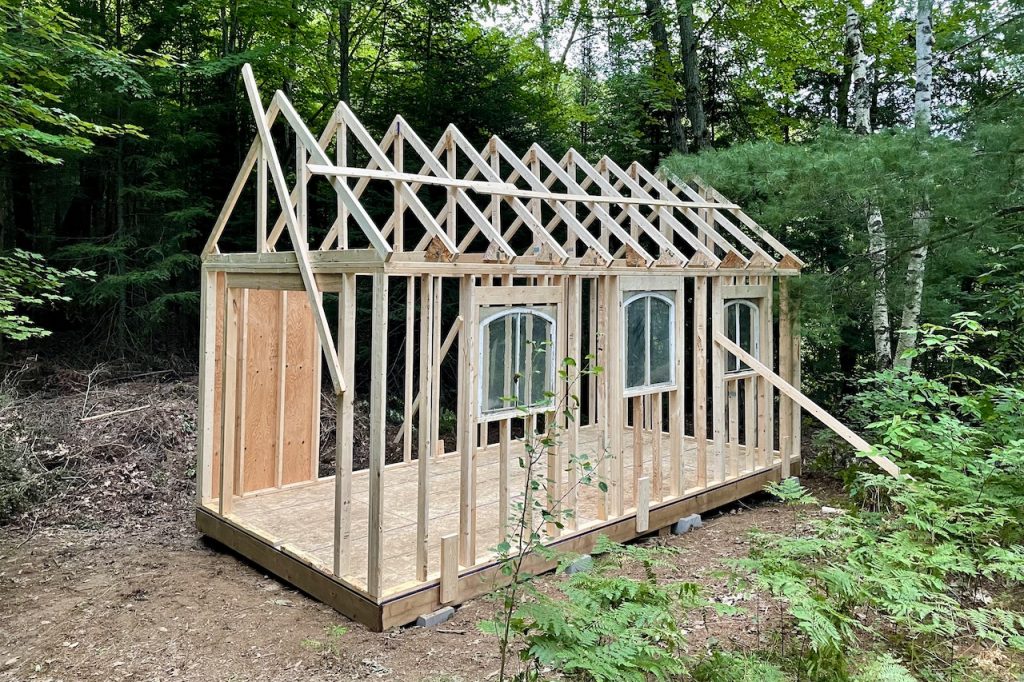
With the walls plumbed and securely in place, the next step is to frame the roof. Having already made the trusses to plan, the next step is to lift them up and in place. This is achieved by resting them on the top plates of the load-bearing walls.
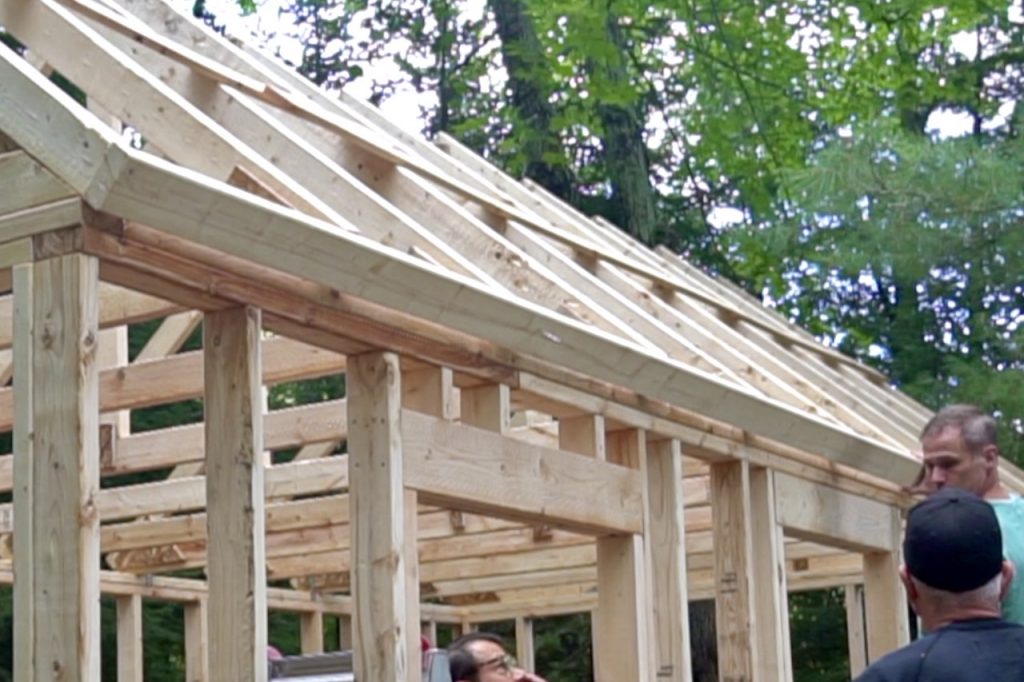
We started by raising the two trusses positioned on the front and back shed walls. These two trusses only have gussets on the inward-facing corners so that the exterior cladding can be added flush to the walls. With the two outside trusses in place, you can then add the rest, every two feet. We suggest attaching a long piece of trim to connect the rafters. This will assist in making sure the rafters are secured plumb.
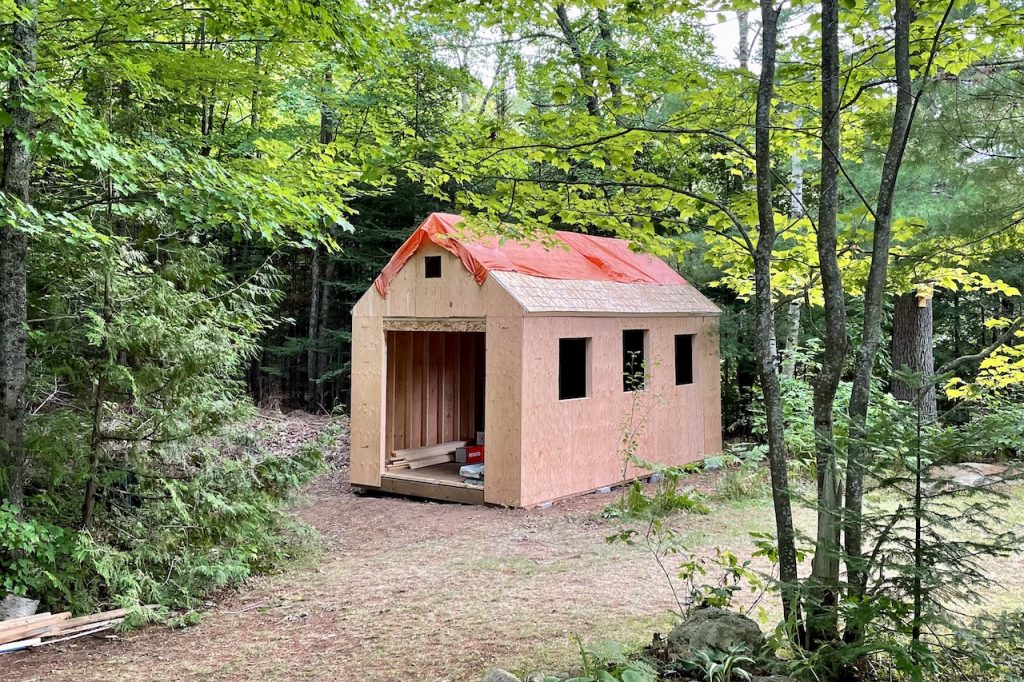
Once all of the trusses are securely in place, the final step is to add the plywood sheathing to the roof. Start at the lower corner of one side. Run the plywood across the rafters so it’s perpendicular to them. Then continue, repeating the process of cutting pieces to fit. You can stagger joints at each piece of plywood. Similar to floor sheathing, roof sheathing also comes complete with painted guidelines to help guide the placement of nails to secure it to the rafters.
The VIDEO showcasing HOW TO FRAME THE ROOF of the shed is HERE!
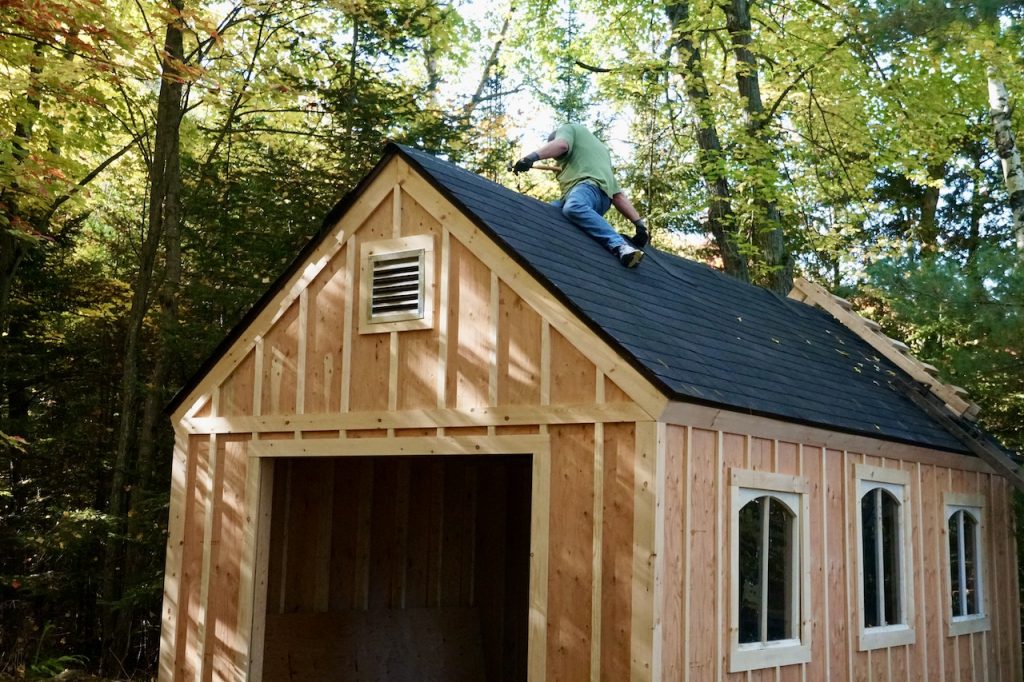
There are lots of different roofing options, from simple asphalt shingles to more labour-intensive cedar shakes. After reviewing the plans and discussing options with the pros at my building centre, I decided to go with asphalt shingles. The roofing component of HOW TO BUILD A STORAGE SHED ended up being the most physically challenging. Having a few people to help is a good idea, as is working slowly and safely.
To begin, cut and install the fascia trim that runs along the bottom of the roof sheathing. Next, add an aluminum drip edge that lines up flush with the edges of the roof. For added protection, include a layer of self-adhesive, all-weather roof leak barrier. This offers greater protection than roofing felt but also doesn’t need to be nailed in place. With the membrane securely in place, the last step is to add aluminum trim to the roofing edge on both the front and back gable.
Next: the shingles. Asking for a friend… who knew putting shingles on a roof could be so much fun? To begin, layout the design for the shingles. Measure a ½-inch from the edge of the roof to ensure the shingles overhang the drip edge. Then, mark 12-inches up the roof (size of a full shingle) and continue marking every 5-inches after that (measurement of a half shingle). Snap a straight chalk line on each 5-inch increment.
Suggestion! Since your tools are already in hand, might as well measure and mark both sides of the roof.
Here’s some brilliant advice my brother-in-law Steve learned from his dad. Try to remember; having someone with experience helping on a project is always a good idea. Here’s what Steve’s dad taught him: trim the three tabs off of a shingle. Then, use the top tar section as the first shingle, tacking it down in place. Repeat to create a continuous line of shingle thirds across the roof edge. Then, continue by adding full shingle sheets, offsetting them 6-inches from the previous row. Finally, get ready for the heavy lifting and repeat this process all the way up to the peak ridge of the roof.
Once both sides are shingled up to the ridge, the final roofing detail is to make a ridge cap. This is the DIY moment in the roofing part of this project. It’s also a good time to use up any damaged or shortened shingles. Simply cut each shingle into individual tabs, then trim away the corners of the tabs on an angle. Don’t forget, you can watch this VIDEO as a point of reference. Install the tabs perpendicular to the shingles so they layer five inches over the top of each other over the ridge.
The VIDEO showcasing HOW TO SHINGLE THE ROOF is HERE!
The installation of the doors for our shed project had us making the doors from scratch. This was a less expensive option compared to purchasing the manufactured doors specified in the plan package. Now, just so you know, making doors by hand isn’t without its challenges. Thankfully, my brother-in-law knew exactly what he was doing. Again, his experience was invaluable to HOW TO BUILD A STORAGE SHED!
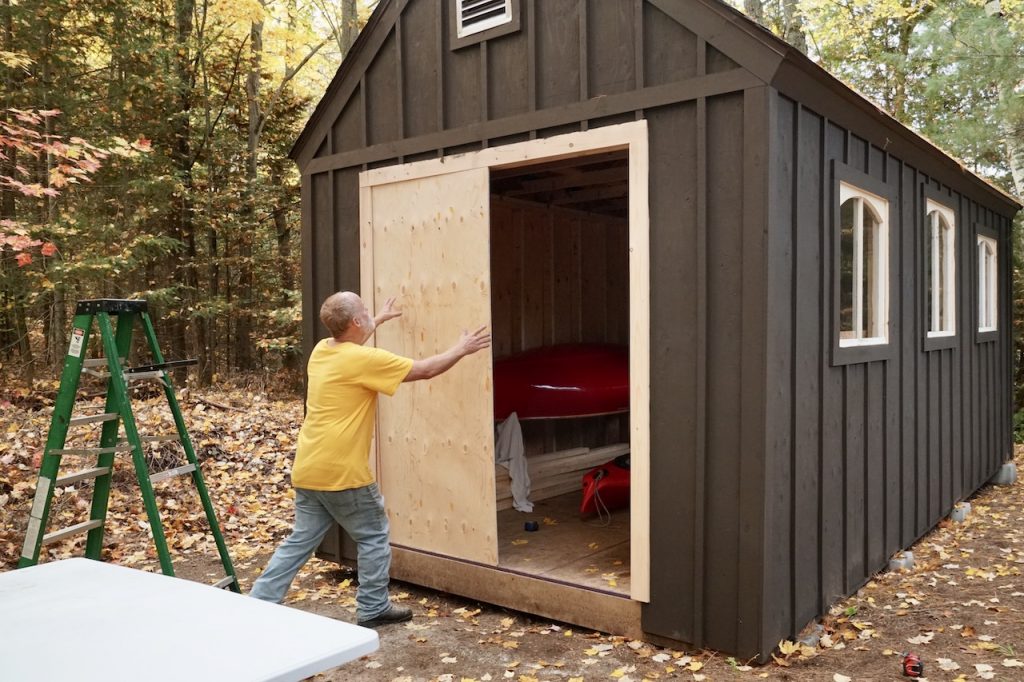
The first step with the doors is to cut the two pieces of plywood to size. Next, add the frame constructed out of 2 x 4s to the plywood. Give the doors a flip (turn them over, lol!), cut, and add the trim. Then just put them up and hang them in place. I’m making it sound easy, which it was only because Steve finessed those details in advance. We gave one of the doors a 1/4-inch of reveal so that they closed snugly. Then, we added an upper brace to prevent the doors from pushing inwards. The last detail is to pick attractive hardware for the job. Again, watch the VIDEO to see what we did.
The VIDEO showcasing HOW TO INSTALL THE DOORS of the shed is HERE!
The last major component of HOW TO BUILD A STORAGE SHED is to stain and paint the structure. Before I detail what we did, how about a quick statistic:
In a recent survey of more than 1,600 respondents, almost half said they’d rather spend time in the shed than do almost anything in the house, with 28% saying they also preferred it to the pub.
My goodness! No wonder we hear people speak so fondly about their she- or man-sheds! Even though I plan to be in my shed a lot – think of small DIY projects, cottage repairs, etc. – I decided not to paint the interior. Instead, I directed all my efforts at painting and staining the outside.
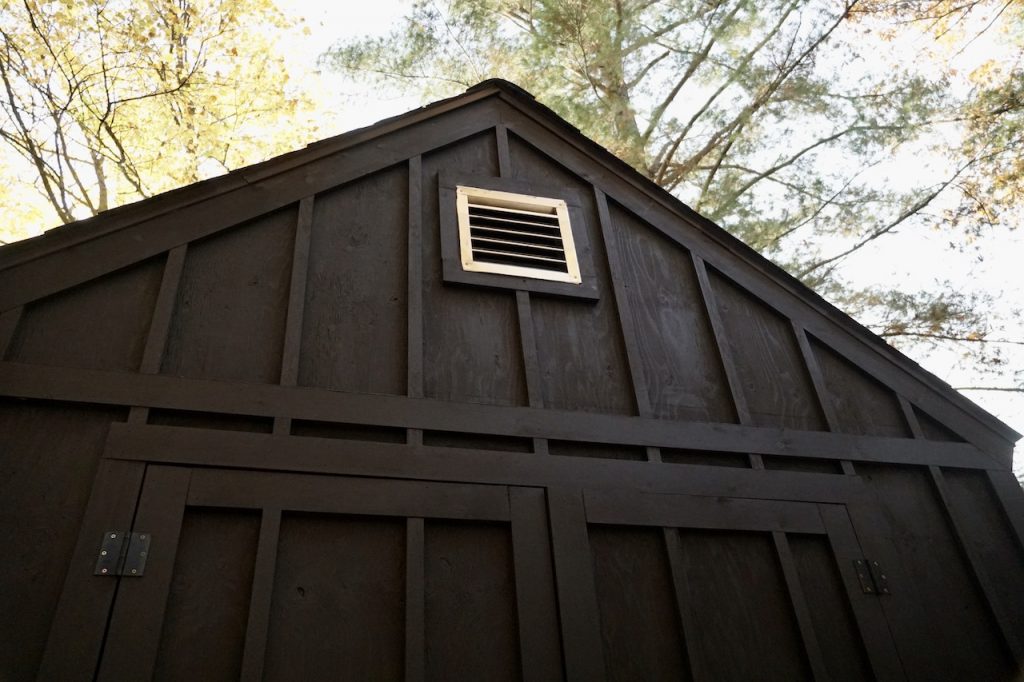
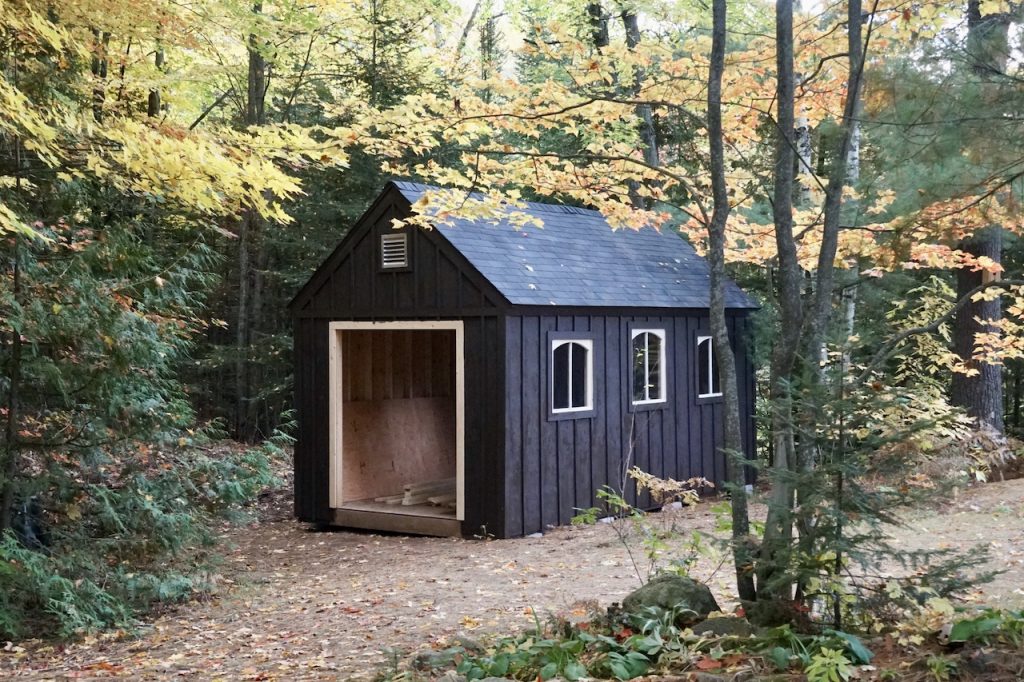
The experts at my local building supply recommended I apply a durable, solid stain to the wooden exterior of the shed. I went with a rich, dark chocolate colour to match the exterior of the other buildings on the property, including the shed proper. The colour is OXFORD BROWN and it delivered a gorgeous depth of colour that highlights all of the trim details.

A few years back I repainted the front door to the cottage in a trio of what I think of as classic lodge or cabin colours. We decided to paint the surround of all three of the antique windows in CLOVER PATCH, then the reveal of the windows on the left and right in APRIL LOVE (orange) and the centre detail on the central window in CHILD OF THE MOON (yellow). I’m so happy with these details.
The VIDEO showcasing HOW TO STAIN AND PAINT the shed is HERE!
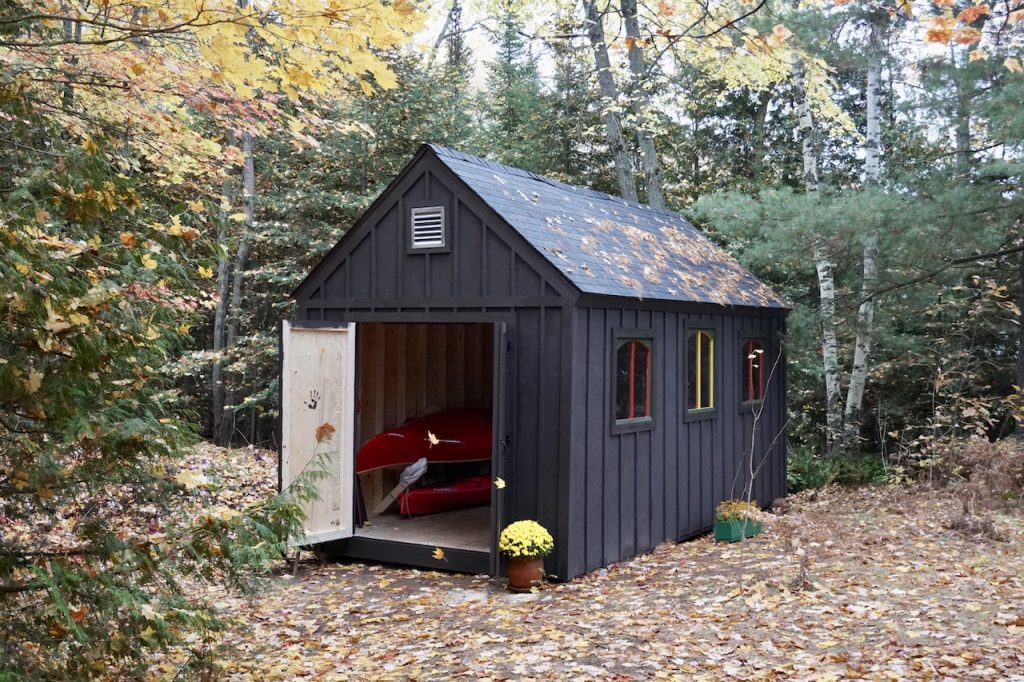
And just like that, we were sitting there looking back at the finished project – pretty amazing! This being the first thing I’ve ever built, on a scale of 1 to 10, how would I rate the entire experience? It’s a 12 outta 10 for sure. HOW TO BUILD A STORAGE SHED is a complete success!
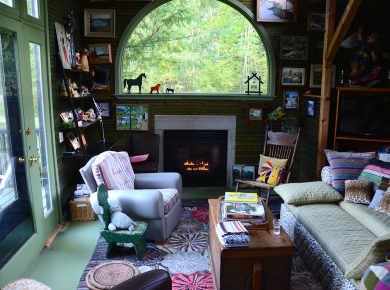
If you have questions about this project or have a project you’d like to have help with, send your story requests to info@weekendatthecottage.com. If this story inspired you, don’t forget to check out two other DIY ideas; this PINECONE WREATH and our THREE-SEASONS ROOM DECOR!

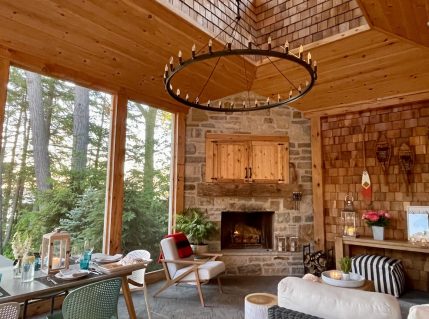
Essential furnishings partnered with inspired accessories and decor enhancements create a cozy and welcoming three-season room in cottage country…

Three different sizes of pine cones gathered together and fastened to a wire create a stunning seasonal decor enhancement…
An eclectic mix of vintage, antique and found objects to create whimsical cottage decor…


