
THE SPICE IS RIGHT!
SHOP NOW!
53
Days1
Hours47
Minutes1
Seconds Until Labour Day
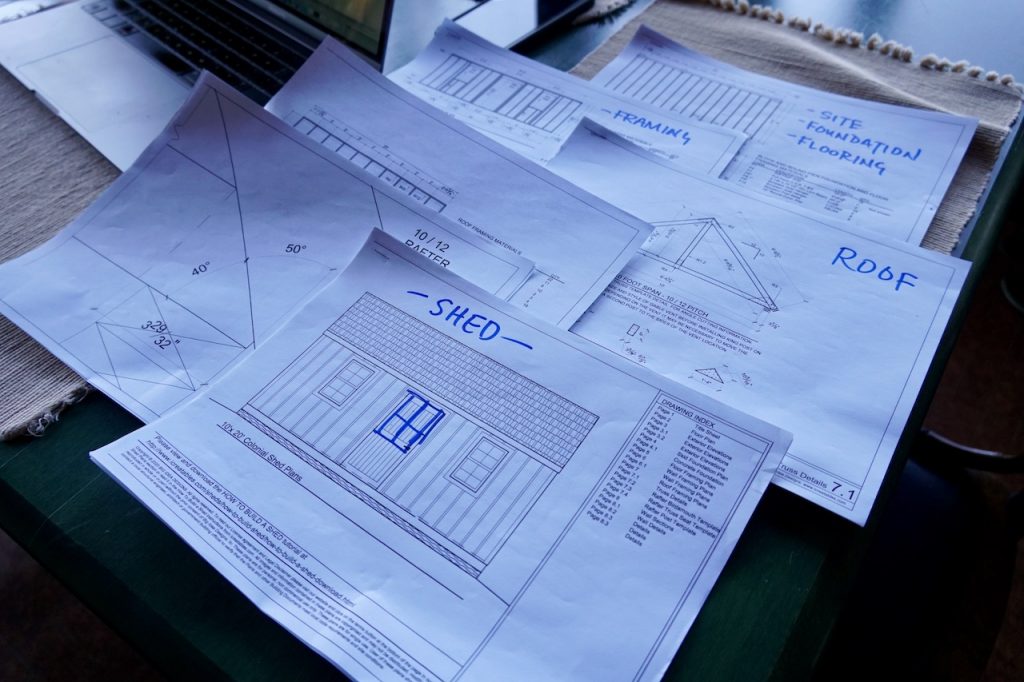
This is part one of our five-part series where we share the process of building a 10 x 20-foot storage shed. If you’ve just happened upon LET’S BUILD A STORAGE SHED, please make sure to begin by first reading this INTRODUCTION for the key things we learned before starting the project.
Building this storage shed is the first of many do-it-yourself projects we’ll be sharing. Please make sure to SUBSCRIBE to WATC so you never miss a post, and also subscribe to our YouTube CHANNEL. You’ll find all of our weekend projects in the DIY PLAYLIST.
If design and decor is your thing, don’t forget to check out some of our other lifestyle stories like this THREE-SEASON ROOM MAKEOVER, our FALL HOLIDAY TABLE as well as this stunning HANDMADE PINE CONE WREATH. We have lots of decor ideas sure to inspire!
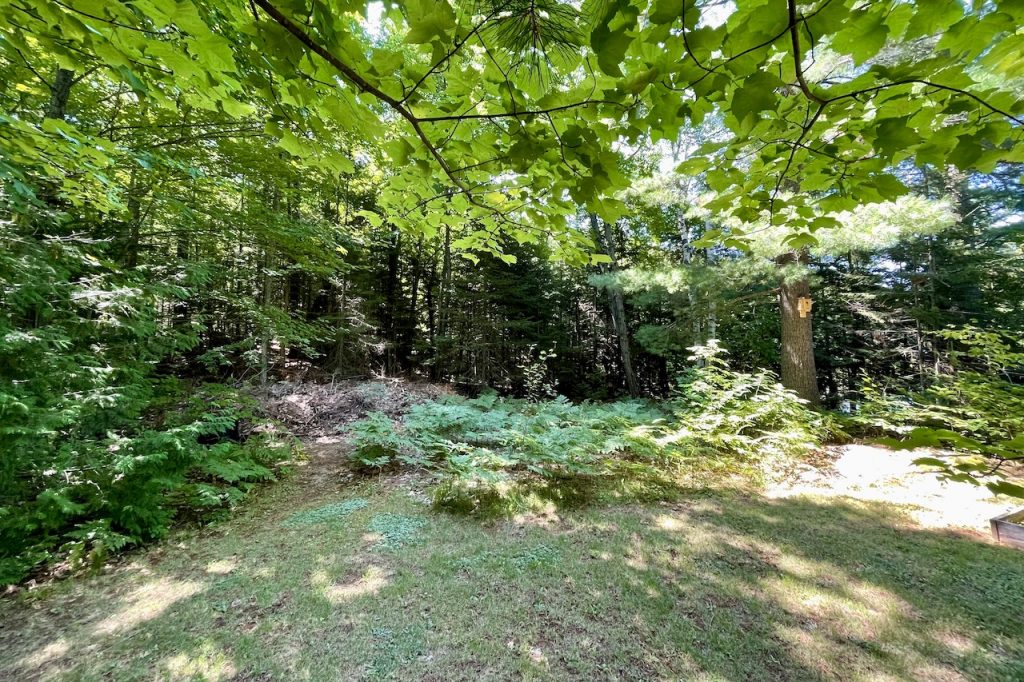
One of the most important first steps in any build project is to select and then prepare the site where the structure will go. In my case, I wanted the shed to be in a location away from the cottage proper but centrally located in the back half of the property. This will allow me to easily access lawn equipment and tools. Picking a spot on relatively level ground also made sense.
After selecting the space, the first task was to clear it of brush and foliage. Luckily this was easy. A pair of garden shears helped trim away a few poplar saplings while a rake helped clear away ferns, weeds and leftover leaves from the previous year.
Once the site was clear, we did a quick measurement just to get a rough idea of where the four corners of the 10 x 20-foot shed would sit. With relatively level ground, I got a better sense of the sight lines, framed by a big white pine and a few maples… I knew this shed site was perfect!
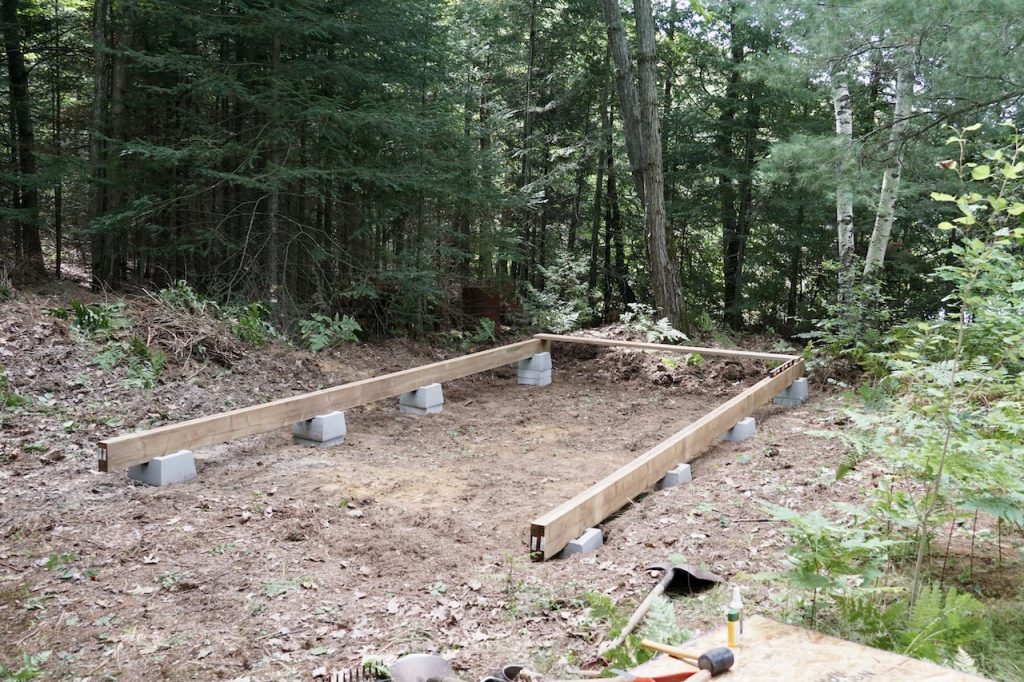
Before beginning the project, I had an excellent chat with a knowledgable professional at my local building supply. The plans I’d purchased included three options for laying the foundation. I could place down gravel and treated rails, pour cement piers or use post bases. He suggested the post bases levelled on cement slabs and explained how the weight of the structure would keep the shed on these solid footings.

The project started with a massive stroke of luck; I had a second expert ready to help. My friends Mark and Cheryl and their two sons Jackson and Griffin were up for the weekend, and Mark, who has a ton of building experience, offered to lead the charge. He helped us locate the high and low points of the site and then guided us on digging down into the ground for one corner while doubling up on cement pads for a corner needing height.
Getting the eight blocks level took quite a bit of time – almost six hours. We were okay with this, as getting the foundation right and level is key to any successful build. It does take time, but it’s time well spent.
Once the bases were level and in place, we prepared the two longest floor joists. This had us doubling up 2-inch x 8-inch x 20-foot planks that were“sistered” and drilled together. This created an extremely long and sturdy base for the two load bearing walls. We then laid these long floor joists into the bases and nailed in a 2-inch x 8-inch x 10 foot plank at the end of each.
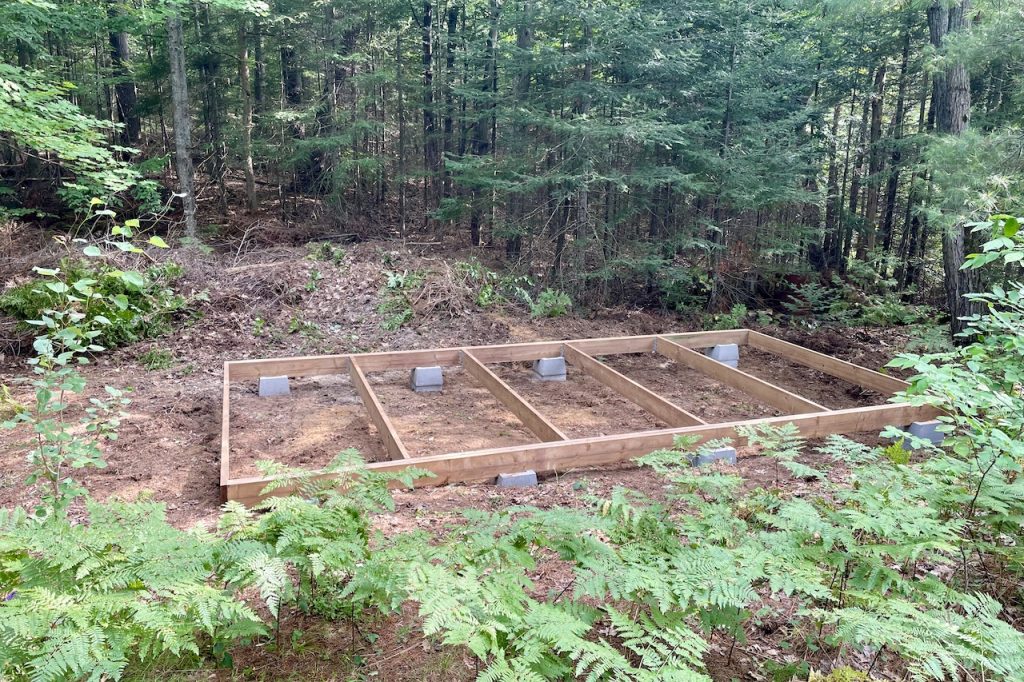
With the basic rectangular shape in place, Mark did a corner to corner measurement to make sure the footprint for the shed was square, then marked out the location of the remaining floor joists based on the details of the plan.
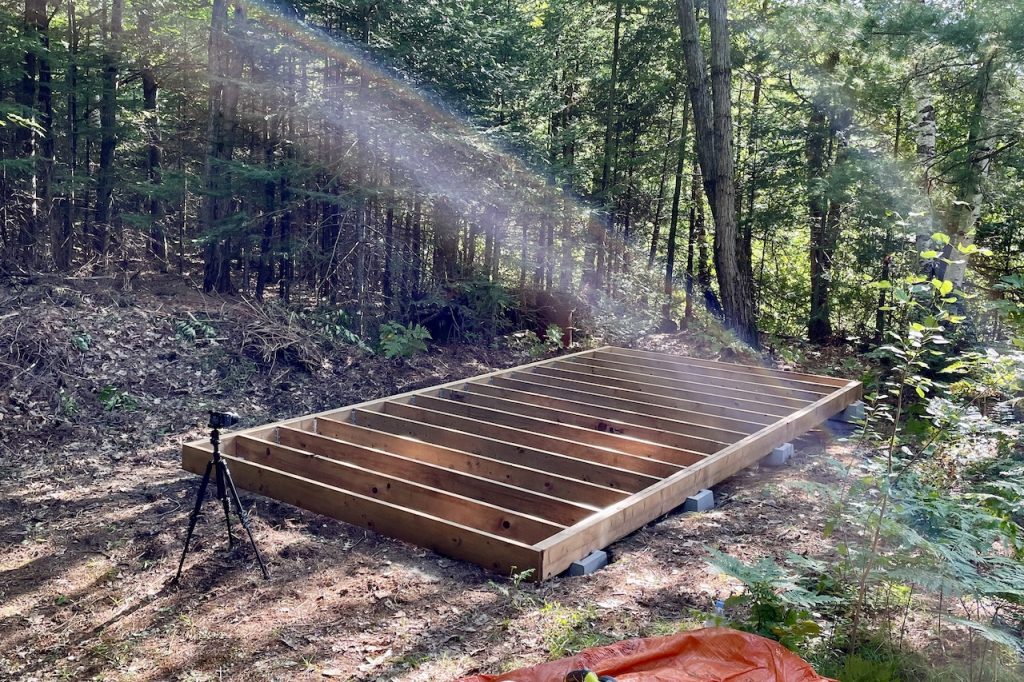
We cut the joists to size and placed them in using galvanized joist hangers. Even after my weekend guests left, I was still able to continue the project and install the remaining floor joists to plan.
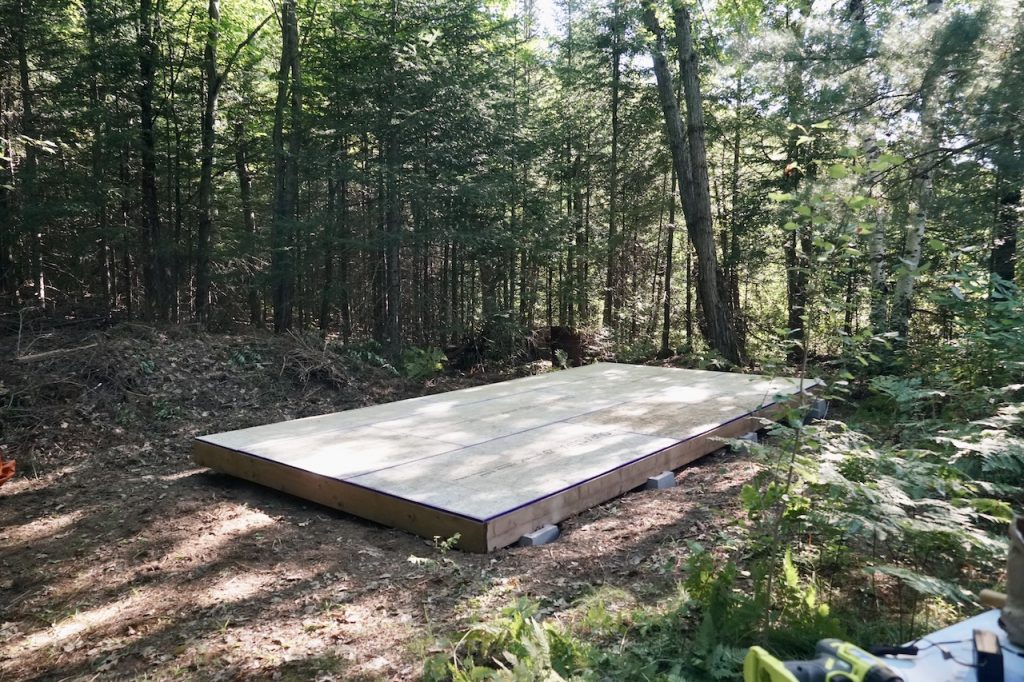
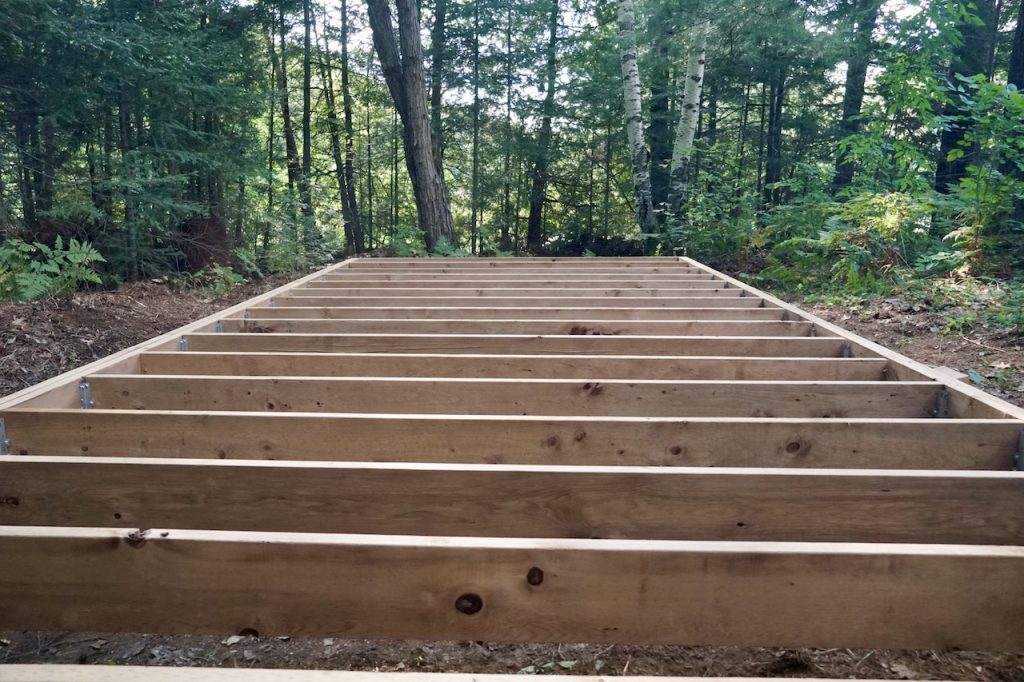
Final thing on this first part to the shed project was to lay the actual flooring material down. It’s interesting how the material comes with lines running along one side – those lines brilliantly line up with the floor joists below. So, I simply drilled the flooring into the corner and then worked my way out and along, adding screws every few inches or so along the guidelines.
Last thing about the floor was the way the sheets of flooring connected. My expert recommended a durable, sealed and coated tongue-and-groove product. Everything went into place without incident and before I knew it, my shed was starting to take shape.
Make sure to check back for LET’S BUILD A STORAGE SHED – PART TWO where I use the surface of our floor to help build the roof trusses.

Three different sizes of pine cones gathered together and fastened to a wire create a stunning seasonal decor enhancement…
A gathering of ideas to inspire an inviting tablescape, perfect for entertaining during the fall season…
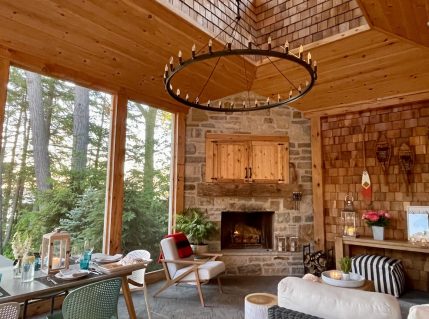
Essential furnishings partnered with inspired accessories and decor enhancements create a cozy and welcoming three-season room in cottage country…


