
THE SPICE IS RIGHT!
SHOP NOW!
53
Days1
Hours47
Minutes0
Seconds Until Labour Day
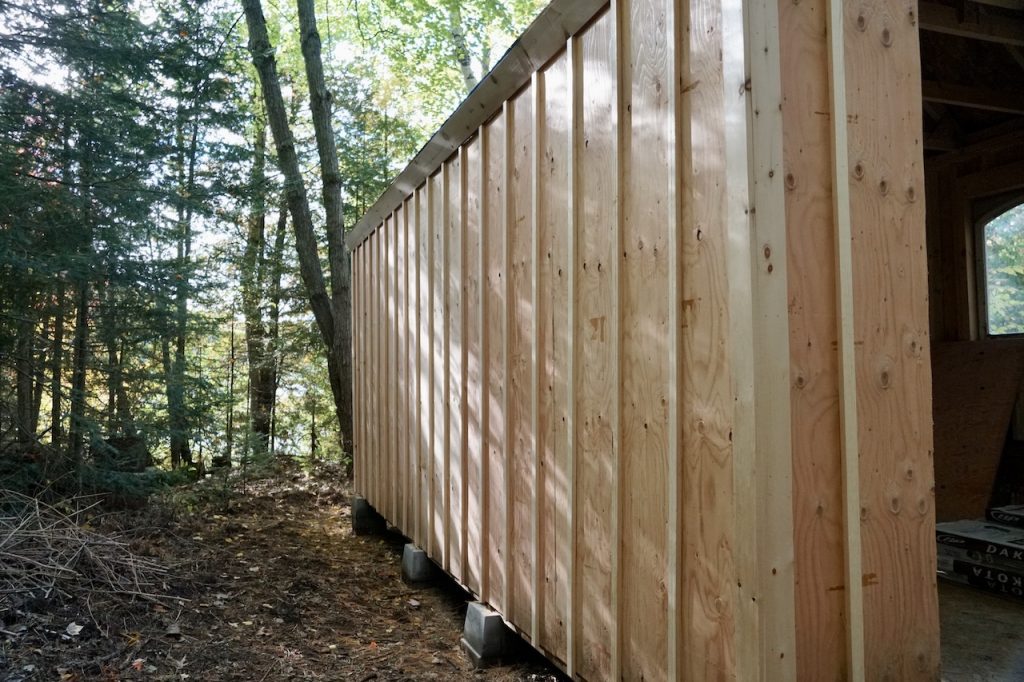
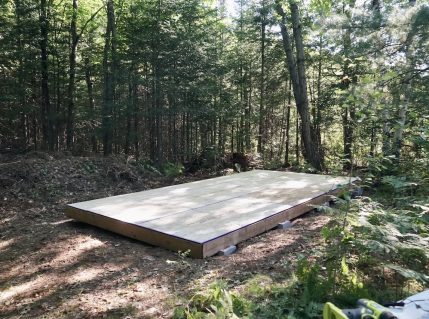
This is the final instalment of our five-part series where we share the process of building a 10 x 20-foot storage shed. If you’ve just happened upon LET’S BUILD A STORAGE SHED, we suggest you watch the first four parts first: PART ONE – FOUNDATION AND FLOOR, PART TWO – TRUSSES AND GUSSETS, PART THREE – FRAMING and PART FOUR – WALL & ROOF SHEATHING.
It’s a good idea to SUBSCRIBE to WATC so you never miss a post, and also subscribe to our YouTube CHANNEL to watch our weekend project videos in the DIY PLAYLIST. We have more great design and decor and DIY project stories in the works, so stay tuned!
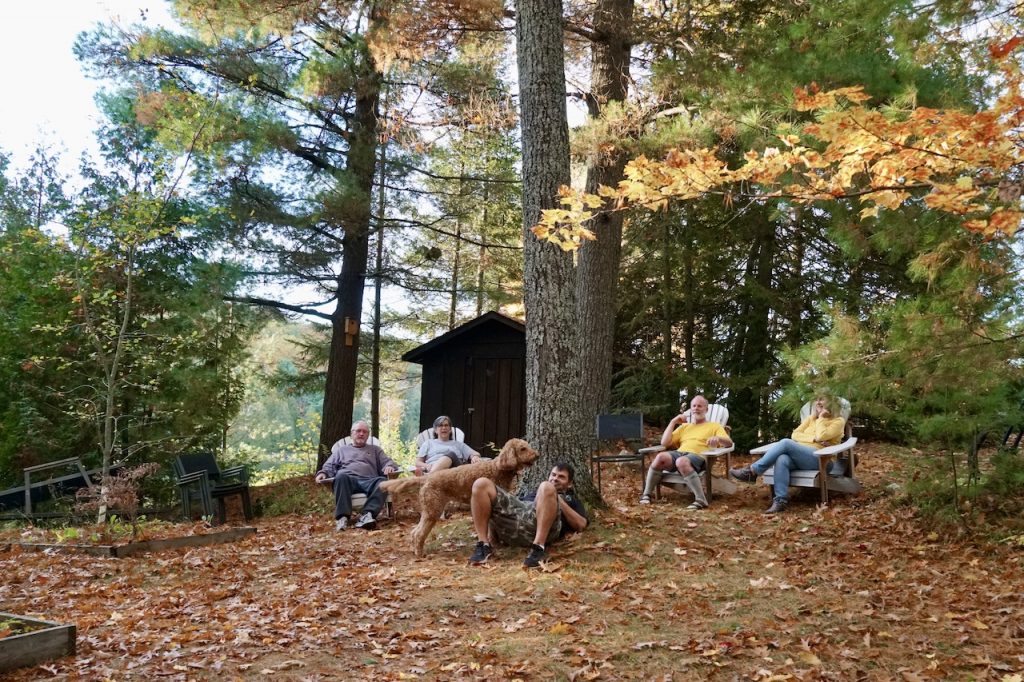
Before I work through the details in this post, let me just say yet again how lucky and thankful I am to have family and friends help with my DIY shed project. My brother-in law Steve arrived from the U.S. (what took you so long?) to help with the final details, and my sisters Maria and Dana – plus Dana’s husband Ranko – also pitched in to help. Many hands made for light work. It was tough but great fun working together!
Now, grab some roofing nails, your toolbox, a tape measure and some paint, because we’ve got a bunch of finishing touches to get done before the big reveal!
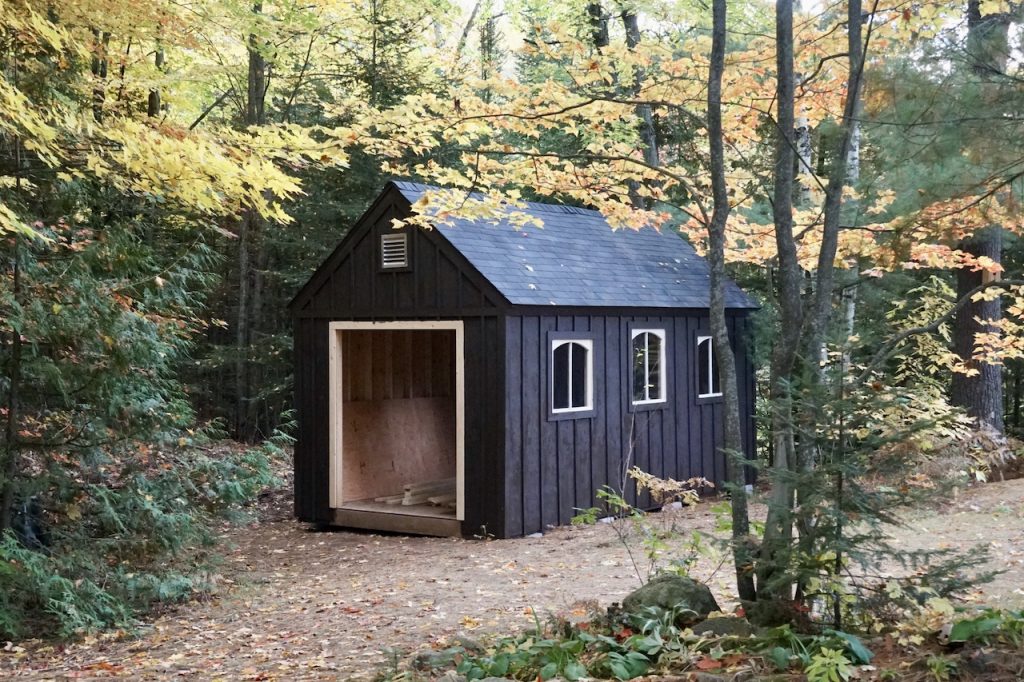
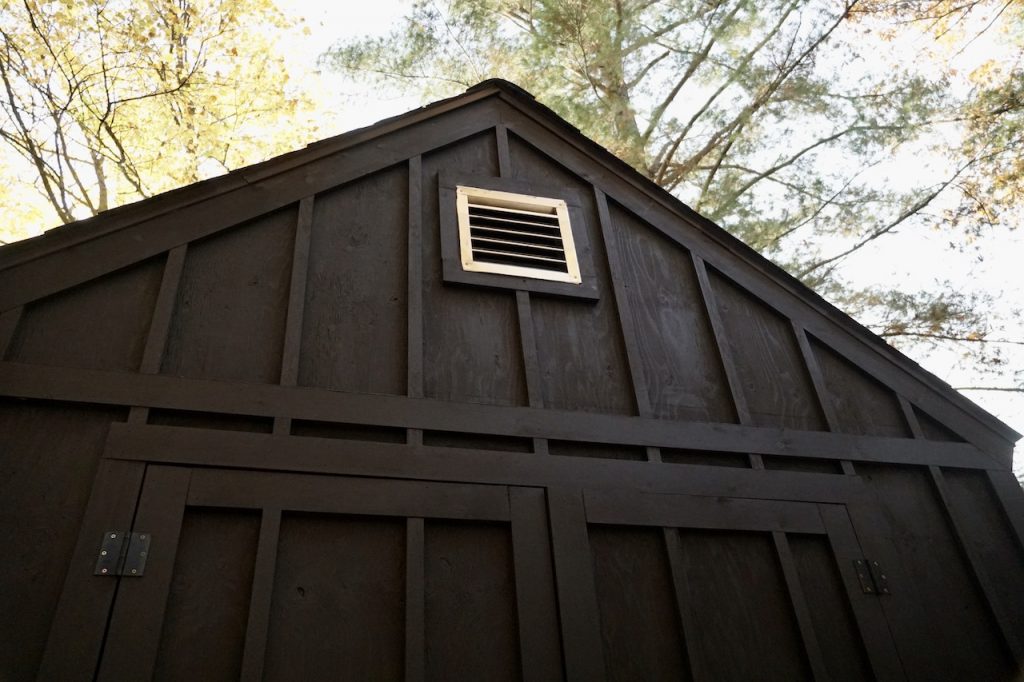
The plans for this storage shed called for three different sizes of trim. The first, a 1 x 6-inch fascia trim, was specified to finish the roof both at its edge and underneath. I also added an additional horizontal trim to hide where the wall sheathing butted up to the roof sheeting above the door. The second trim, 1 x 4-inch, was nailed in place as a detail on the corners of the wall but also used to trim the windows and doors. I popped the antique windows into place right before adding the trim surround – love the look of them. Having the Ryobi cordless nail finisher helped it go up quickly and efficiently.
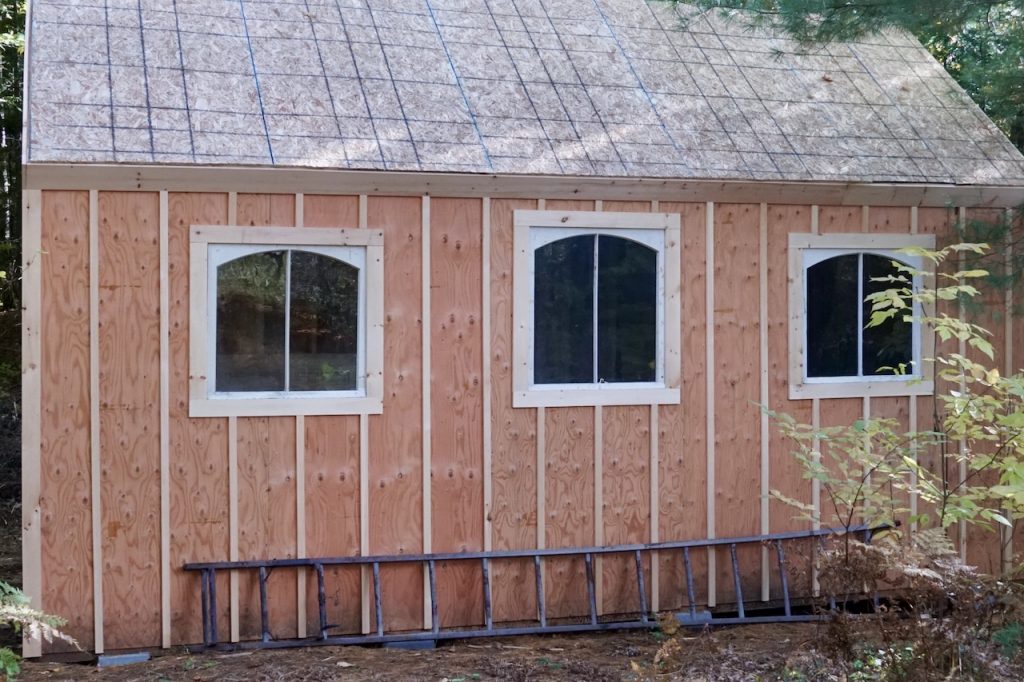
The final trim detail was the addition of 1 x 2-inch furring strips added at measured intervals directly onto the exterior wall sheathing. These strips of thin wood are a nice detail on the storage shed and an inexpensive way of breaking up the flat surface of the walls. The look really popped when the shed got a coat of solid stain.
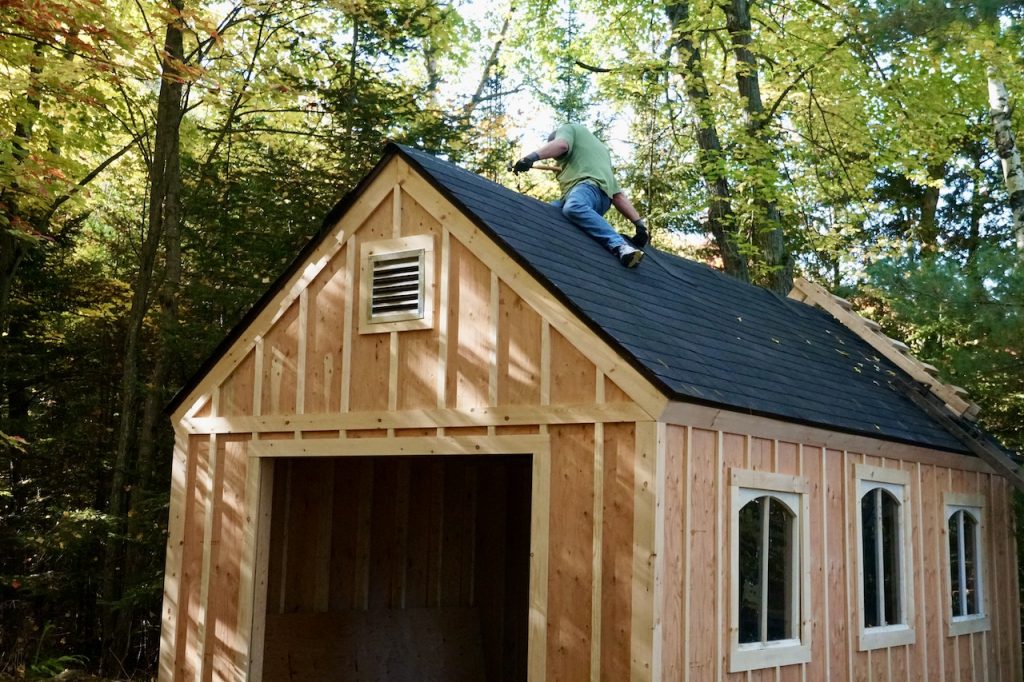
Ah, the shingles. Who knew putting shingles on a roof could be so much fun… said absolutely no one ever. Maybe I’m just late to the party; shingling a roof is tough work. Adding the shingles involves four steps. First, a drip edge is nailed to the edge of the roof resting over the 1 x 6-inch fascia trim. Next, roofing felt or a protective barrier is added over the drip edge and entire surface to protect the roof sheathing. Step three is to nail in additional drip edge along the sides of the roof peaks, and the last step is to nail on the shingles. Make sure to watch the VIDEO attached to this part of our storage shed build – it will help clarify the details.
Once the trim and shingles were all successfully attached and installed, we did a quick clean up of all the trim and shingle offcuts, and then I handed out paint brushes. Gotta say, watching my sister Dana apply the first few sweeps of stain onto the exterior of the shed did get my heart racing. I instantly knew, the storage shed was going to look mighty handsome.
The experts at my local building supply recommended I apply a durable, solid stain to the wooden exterior of the shed. I went with a rich, dark chocolate colour to match the exterior of the other buildings on the property including the shed proper. The colour is OXFORD BROWN and it delivered a gorgeous depth of colour that highlights all of the trim details. There’s another little detail with paint coming up further down in this story.
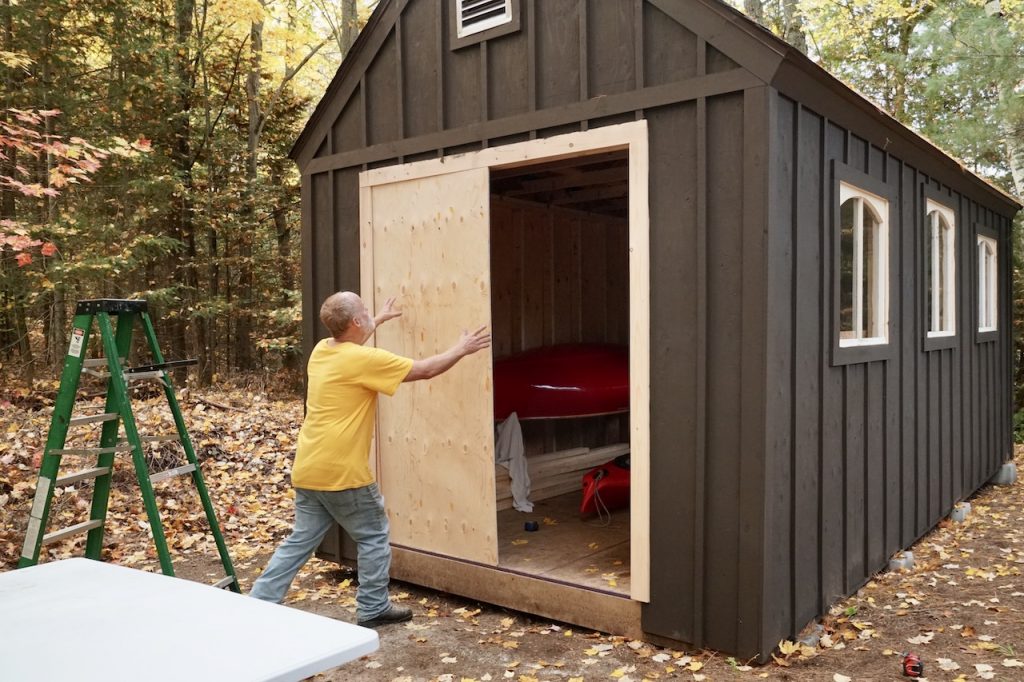
If I had a nickel for every time someone said “good luck putting up the doors!”, I’d have enough cash to build a second shed. They weren’t joking because the doors became a hot topic of conversation. In a few pics from the build you’ll see an opening surrounded by unpainted trim; think of it as Steve and I thinking. In the end, he talked me through a plan that made perfect sense.
First, cut the two pieces of plywood for the doors to size. Then, add the frame constructed out of 2 x 4s to the plywood. Next, the doors got the flip and we added trim and hung them in place. I’m making it sound easy, which it was only because of Steve. He worked through the finesse of the details in advance – giving one of the doors a 1/4-inch of reveal so they closed snug, adding an upper brace to prevent the doors from pushing inwards and picking the best hardware for the job. Again, watch the VIDEO to see what we did.
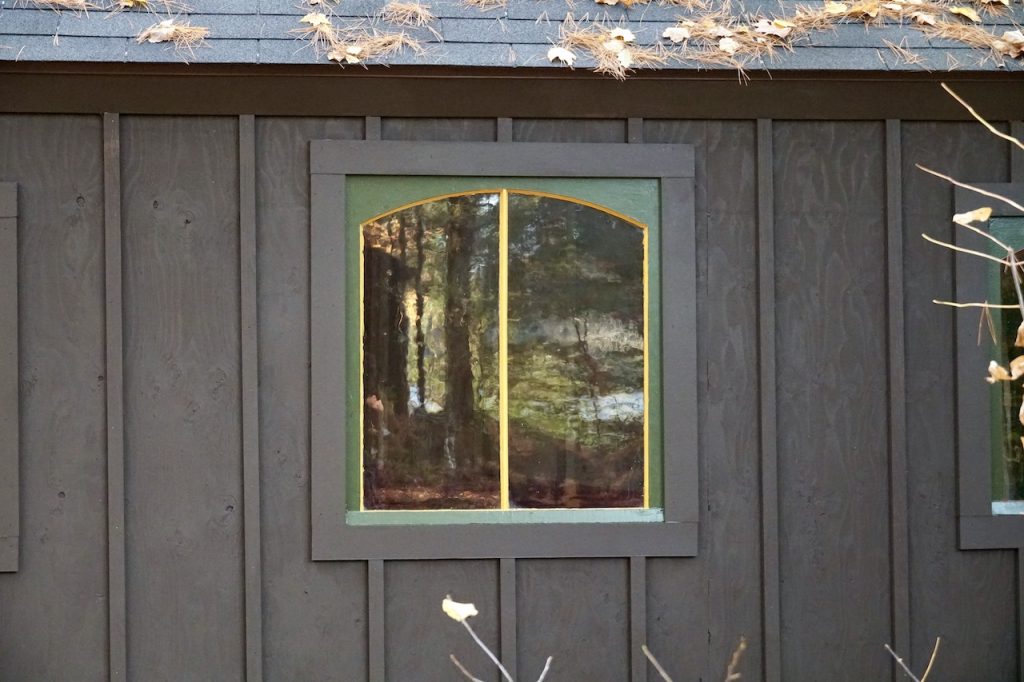
It wasn’t until the doors went up, complete with a trim that mirrored the rest of the shed, that I finally figured out the final, finishing touch. This ended up being a bit fiddly, but my sister Dana always excels at these types of challenges. It was something that would make the antique windows pop, subtle but enough to catch the eye and make you go, “beauty!”

A few years back I repainted the front door to the cottage in a trio of what I think of as classic lodge or cabin colours; a deep moss green, a burnished cinnamon orange and a patina mustard yellow. We decided to paint the surround of all three windows in CLOVER PATCH and then the reveal of the windows on the left and right in APRIL LOVE (orange) and the centre detail on the central window in CHILD OF THE MOON (yellow). I’m so happy with these details.
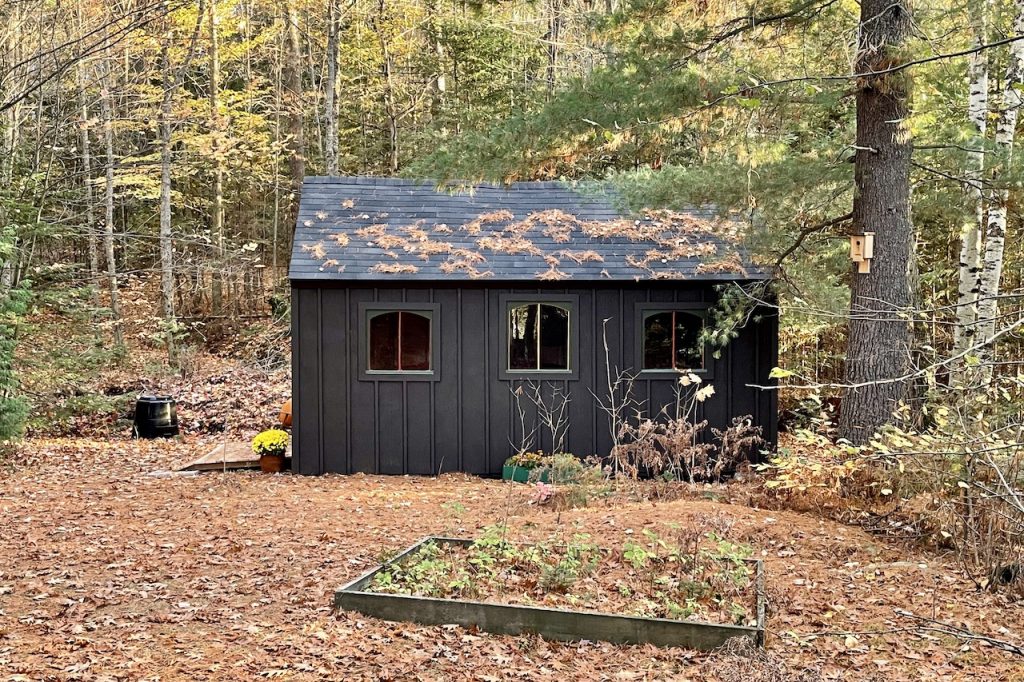
Last little yay was Steve adding a ramp to the entrance so I can bring stuff in and out of the shed effortlessly. And just like that, we were sitting there looking back at the finished project. It’s pretty amazing seeing as this is the first thing I’ve ever built. On a scale of 10, how would I rate the entire experience? A 12, for sure.
Here are the key takeaways:
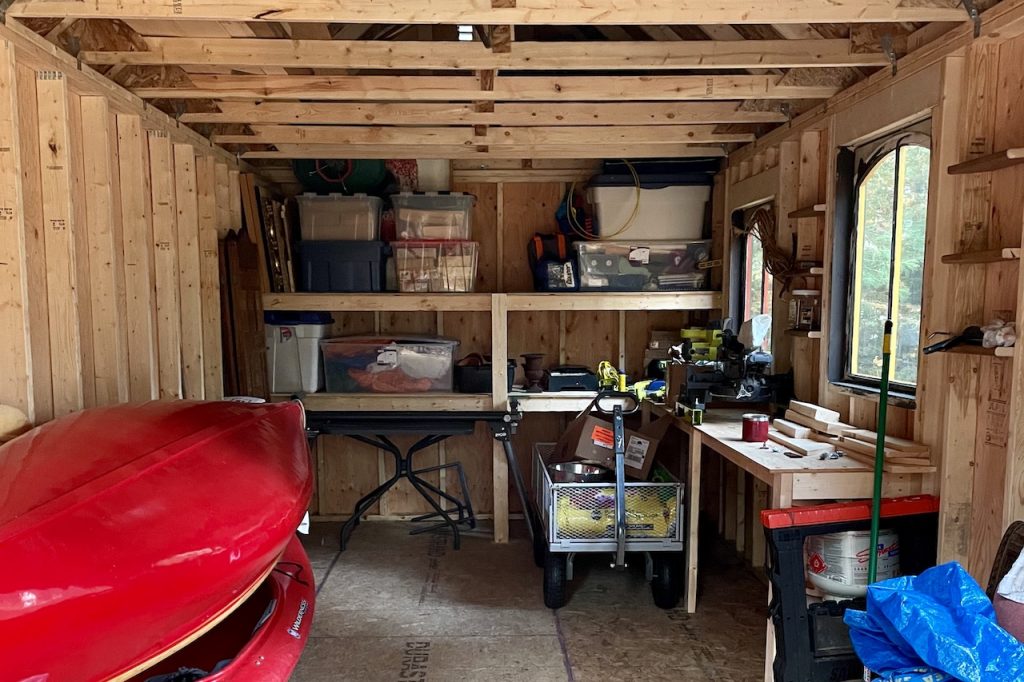
I need to come clean about a little detail I neglected to mention way back at the beginning of LET’S BUILD A STORAGE SHED: why I built the shed in the first place. You see, I’d completely run out of space. The cottage closets were all bursting with stuff, the sauna off the sunroom was being used for prop storage and the tiny existing shed on the property was filled chock-a-block to the rafters.
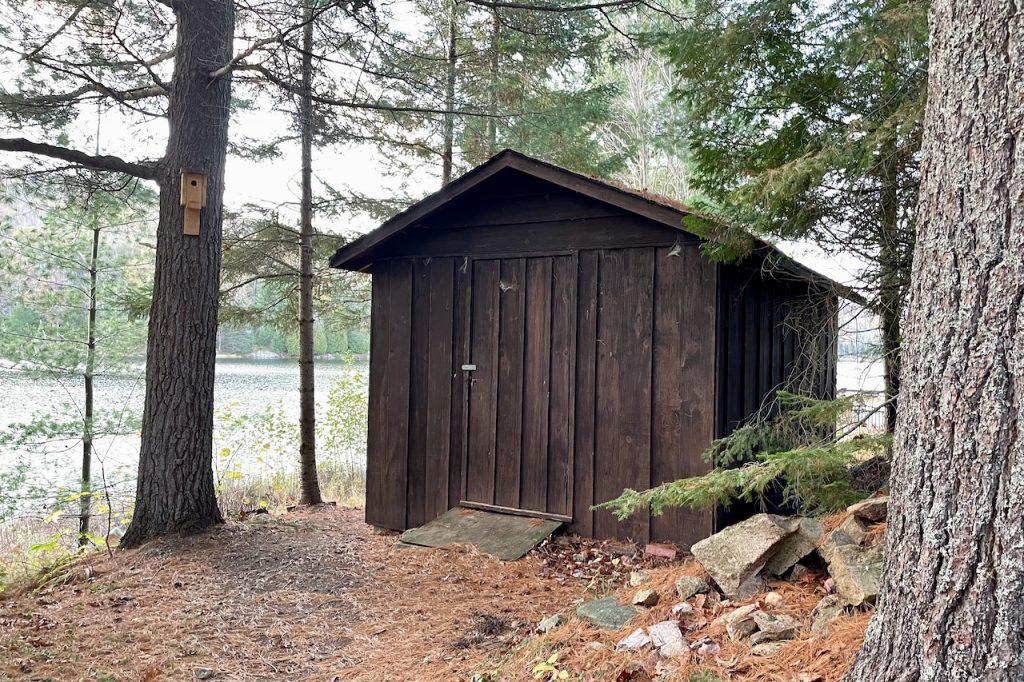
So now I’ve purged all my stuff, reorganized everything into the new shed and can breathe a big sigh of relief. My family kept laughing at me, strolling out of the cottage periodically to simply look at my new storage shed. Wait, what? I now have an old, newly emptied storage shed? Can I tackle another build hot off the heels of this one?
YOU BET! You heard it here first, friends. Stay tuned for spring/summer 2022 when I’m gonna take down the old shed and replace it with a guest cabin. BUNKIE BUSINESS, coming soon!

Three different sizes of pine cones gathered together and fastened to a wire create a stunning seasonal decor enhancement…
LET’S BUILD A STORAGE SHED – PART ONE! We’ll start by clearing the site, setting up the foundation and building the floor.
Essential furnishings partnered with inspired accessories and decor enhancements create a cozy and welcoming three-season room in cottage country…


