THE SPICE IS RIGHT!
SHOP NOW!
56
Days15
Hours53
Minutes40
Seconds Until Labour Day
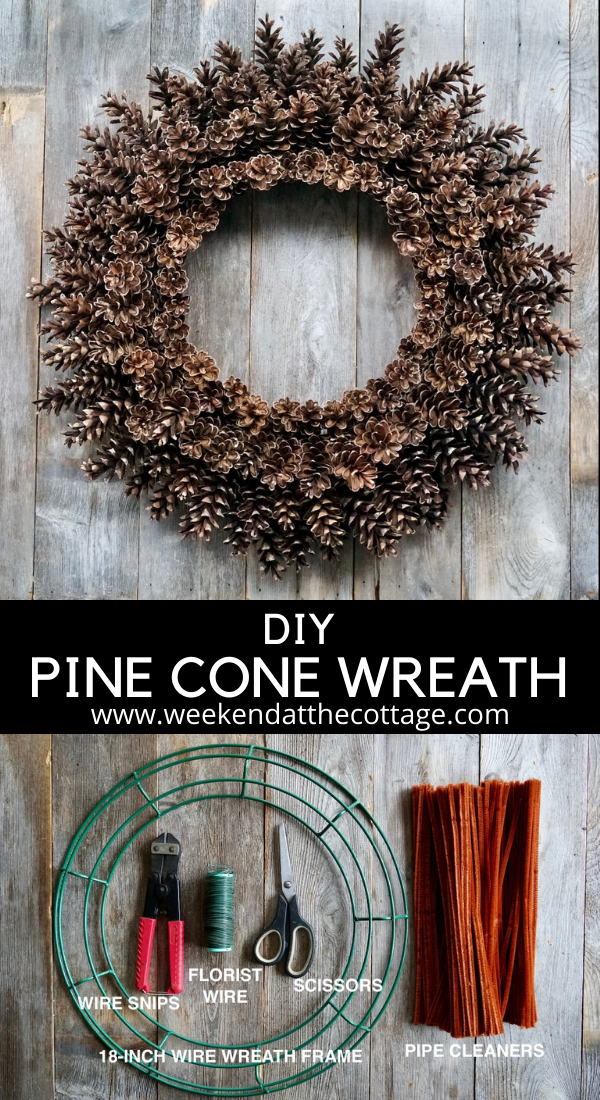
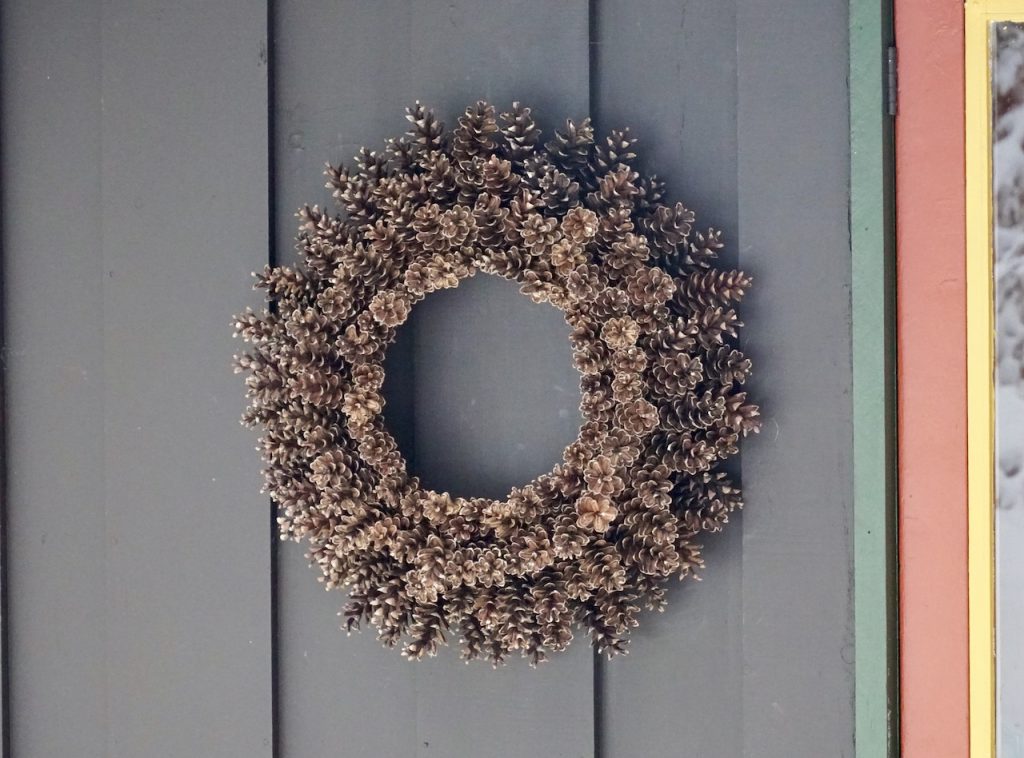
With a few simple tools, some tested ingenuity and a little bit of patience, you’ll be able to create your very own DIY PINE CONE WREATH. It’ll be as beautiful as ours, guaranteed!
Before we detail what we discovered making this DIY PINE CONE WREATH, we suggest that you watch THIS VIDEO. It will help you understand the process and where this project is going. From start to finish, making this wreath will take between 60 and 90 minutes. Not a lot of time considering you get to enjoy your wreath for years to come!
We know your family and friends will notice and compliment you on this wreath. Don’t forget to take a photo of your completed wreath and post it on social media with the tag #weekendatthecottage. You can also PIN it to a favourite decor or craft board. Everyone should make one!
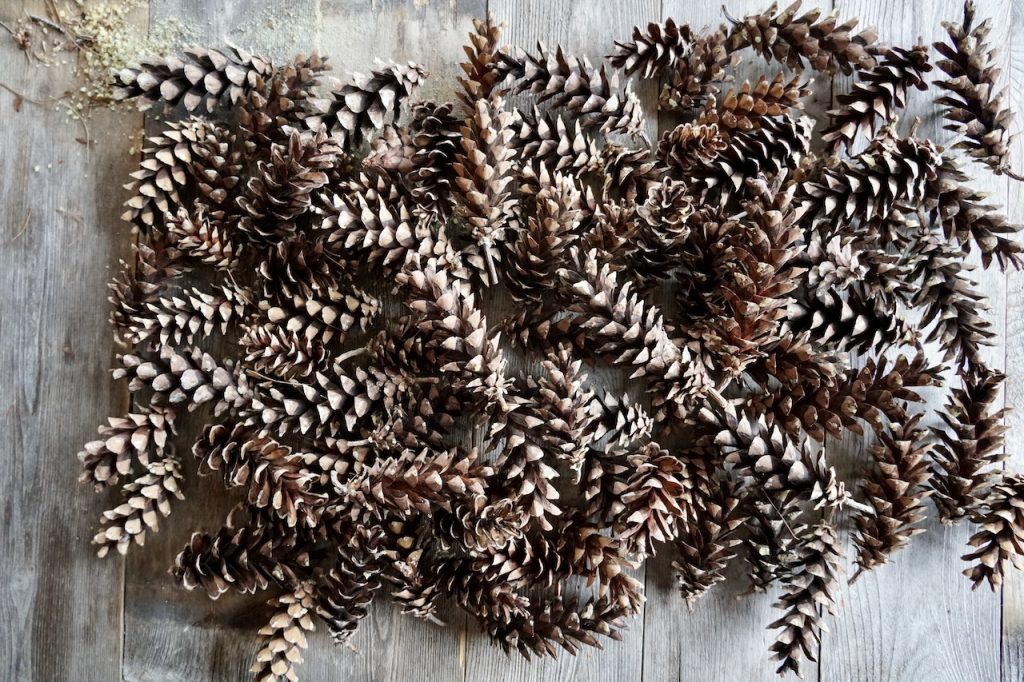
The idea for this project took shape years ago when I first got the cottage. As I walked around the property, I couldn’t help but notice the pine cones all over the place. Although I first used them as fire starters, I eventually thought about a more lasting use for them. Pine cones together in a wreath form create an impressive look.
Gather the pine cones for the project on your walks. If you don’t have pines in your midst, you can purchase pine cones at craft stores and garden centres. I suggest placing them in a warm location for a few days not only to dry any sap remaining on the stem but to let the warmth open the cones and let them bloom a little bit.

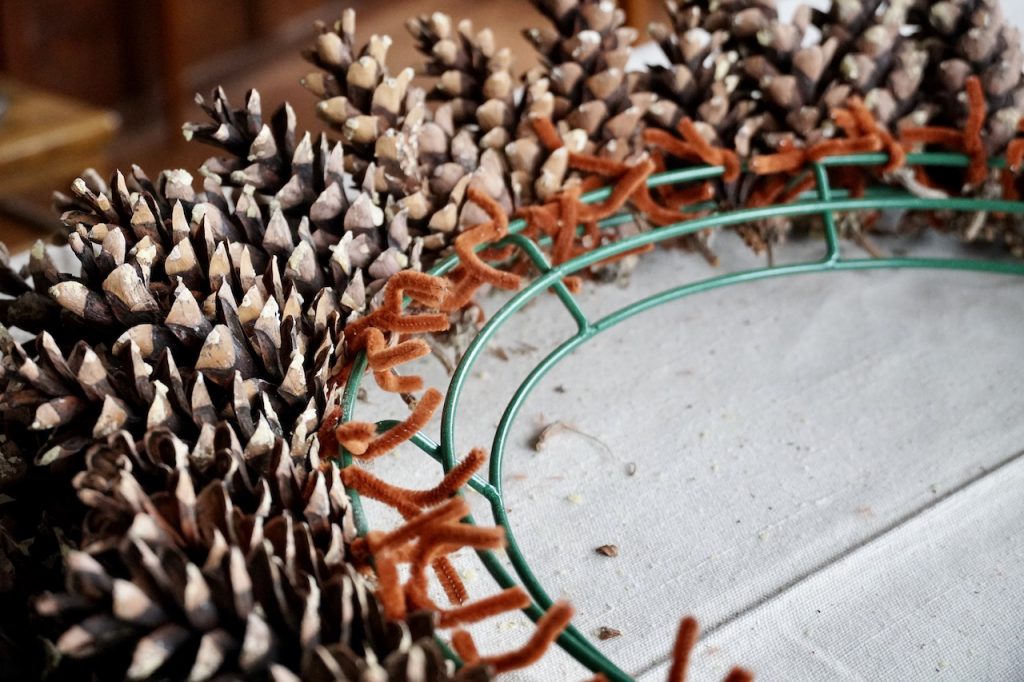
One look at the tools you’ll need to make this wreath and you’ll agree – well, that’s easy. We bet you might already have the scissors, florist wire and wire snips in your craft room or tool box. The wire wreath form and chenille pipe cleaners may require a bit of a hunt.
We used an 18-inch wire wreath form for this project but the smaller 12- or 14-inch forms work well too. We tried a more rustic grapevine wreath but found attaching the pinecones a bit more challenging. Look for your wreath form at a craft or hardware store or purchase one online.
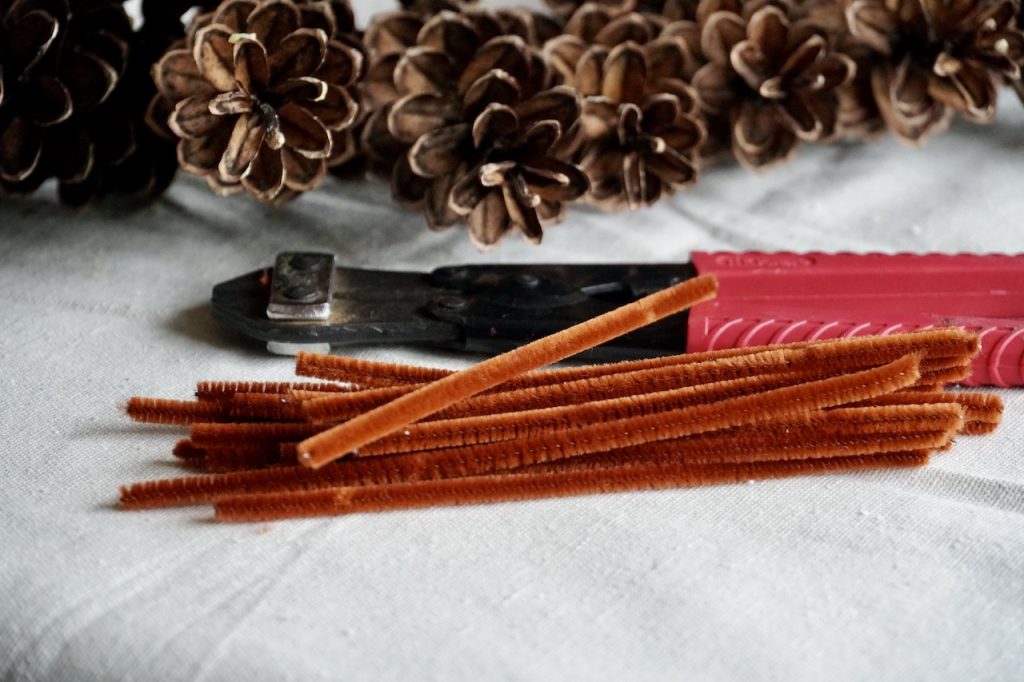
The final things needed for the project are chenille pipe cleaners. We went with brown so that they’d blend with the colour of the pine cones. We also discovered they have a soft, forgiving texture that hides the ends of the wire, so no scratching against doors, windows or mirrors. We purchased ours at a local craft store and then cut the 12-inch length down to 6 inches. This smaller length is perfect for attaching the pine cones to the wire form.
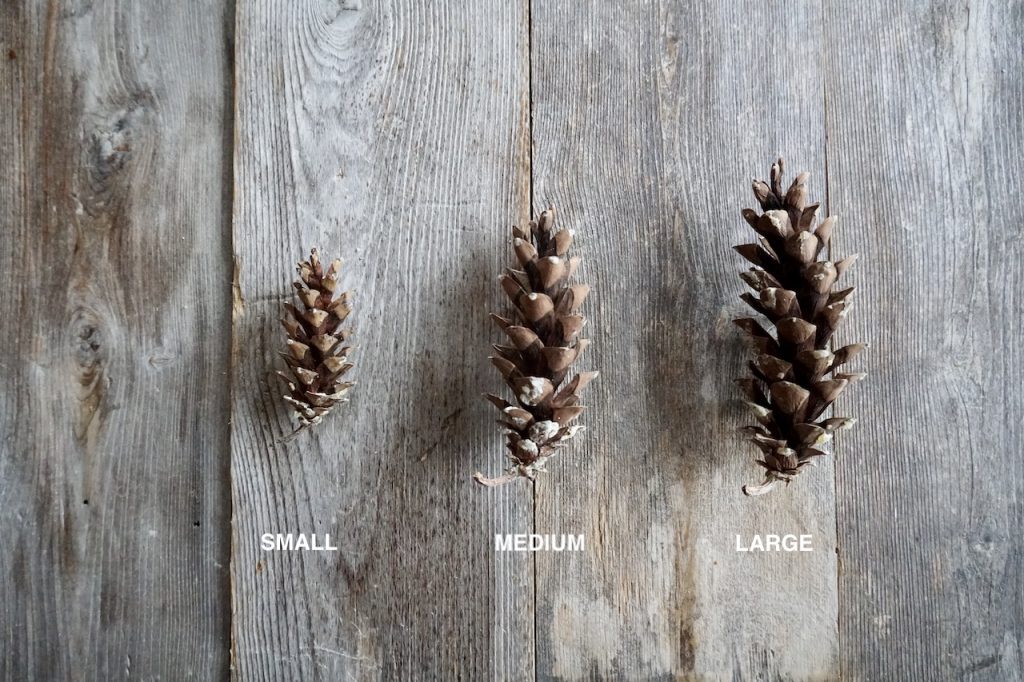
When I envisioned my very first homemade wreath, I figured I’d just attach the pine cones to the wire and that was it. I didn’t put much thought into making it aesthetically pleasing. I’ve learned a lot since then, like how organizing the pine cones by size (small, medium and large) makes for a more visually pleasing wreath. This helps create a more uniform look that draws the eye both in towards the centre and back out towards the edge.

Attaching the pine cones makes for quick work thanks to the rungs on the wreath form and the easy twisting of pipe cleaners. We suggest assembling the outer ring using the large cones, then the medium-sized cones to fill in the next two rungs quite easily. Attach the smallest cones on the interior rung.
One important tip when attaching the pine cones is to pull them together snugly as you twist each one into place. This causes them to hold their position when the wreath is hung.
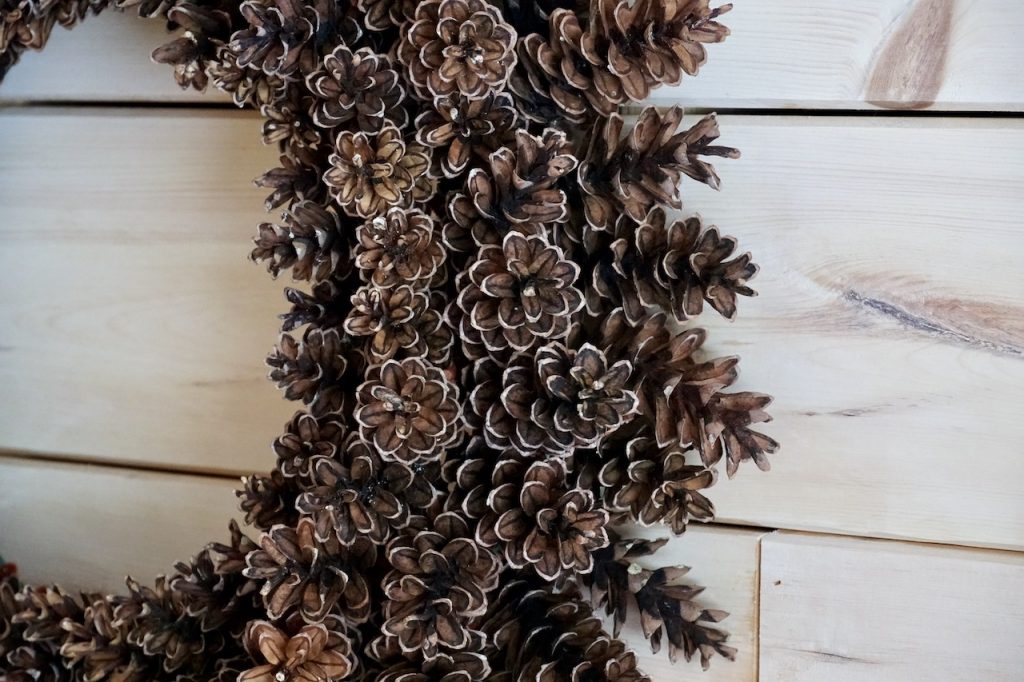
Please remember to gently turn the completed wreath over onto your work surface for a final inspection of the underside. This is the perfect opportunity to review the pipe cleaner twists, making sure each one is nice and tight, then go back and tuck the wire ends of the pipe cleaners down. Also a great time to grab your scissors or snips and clip away any long stems from the pine cones themselves. It’s another easy way of ensuring the wreath won’t scratch a wall, door, window or mirror when hung.

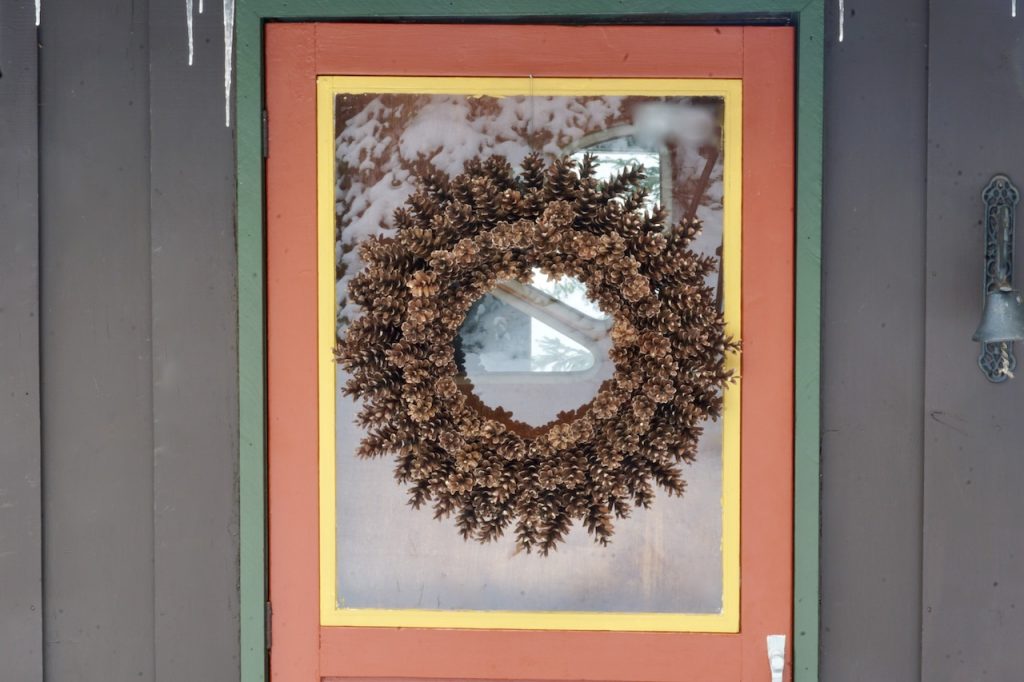
Finally, create a few loops of the florists wire, attach it to the wire wreath frame and voilà, your DIY PINE CONE WREATH is ready to be displayed and enjoyed!
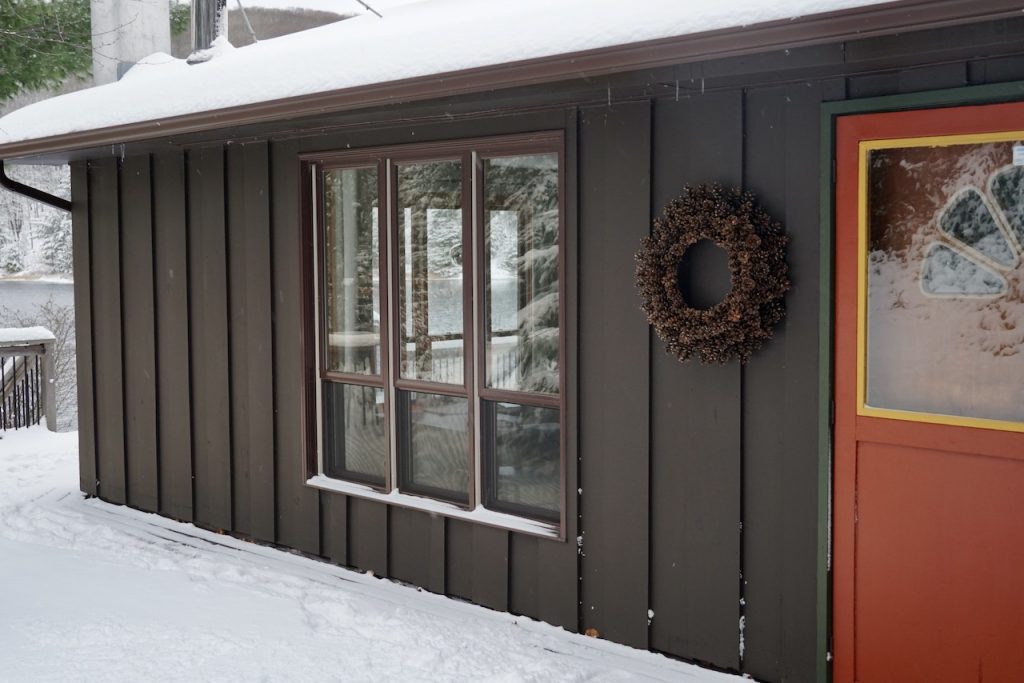
As I mention in the VIDEO, the wreath will add a festive decor touch to a wall, above a fireplace or over a mirror, but don’t let it solely reside inside. For years I’ve hung one next to the front door of the cottage as a sort of rustic, cottage country-inspired welcome to all who come by for a visit. Inside or out, your completed creation will be worthy of a place of honour in your holiday home!
Not a bad idea to whip up something tasty to celebrate, right? We think the friends and family visiting your holiday home might enjoy our FESTIVE CHEESEBALL or our MINI SAVOURY TARTS!

Join us as we show you How To Decorate a Real Christmas Tree…

Looking for décor inspiration for your festive brunch, luncheon or dinner? Let our HOLIDAY TABLESCAPE be your guide. I’m sure most of you share my belief that this truly is the most wonderful time of the year. For many of us, the main event involves gathering with our family and friends to enjoy a perfectly […]

Looking for a creative last-minute gift idea? Why not follow my lead and make this HOLIDAY AMARYLLIS gift. Creating this attractively presented Holiday Amaryllis is a wonderful way of giving fresh flowers as seasonal gifts. These showy flowers are especially interesting because of the way the bulbs sprout, grow and then flower. Amaryllis also come […]