
THE SPICE IS RIGHT!
SHOP NOW!
38
Days1
Hours30
Minutes55
Seconds Until Labour Day
This is another instalment of our five-part series where we share the process of building a 10 x 20-foot storage shed. If you’ve just happened upon LET’S BUILD A STORAGE SHED, we suggest you start at the very beginning of our build. Click here to read the INTRODUCTION, then continue with PART ONE – FOUNDATION AND FLOOR. Then follow along with PART TWO – TRUSSES AND GUSSETS and PART THREE – FRAMING. Not a bad idea to also SUBSCRIBE to WATC so you never miss a post. Finally, subscribe to our YouTube CHANNEL. You’ll find all of our weekend projects in the DIY PLAYLIST.
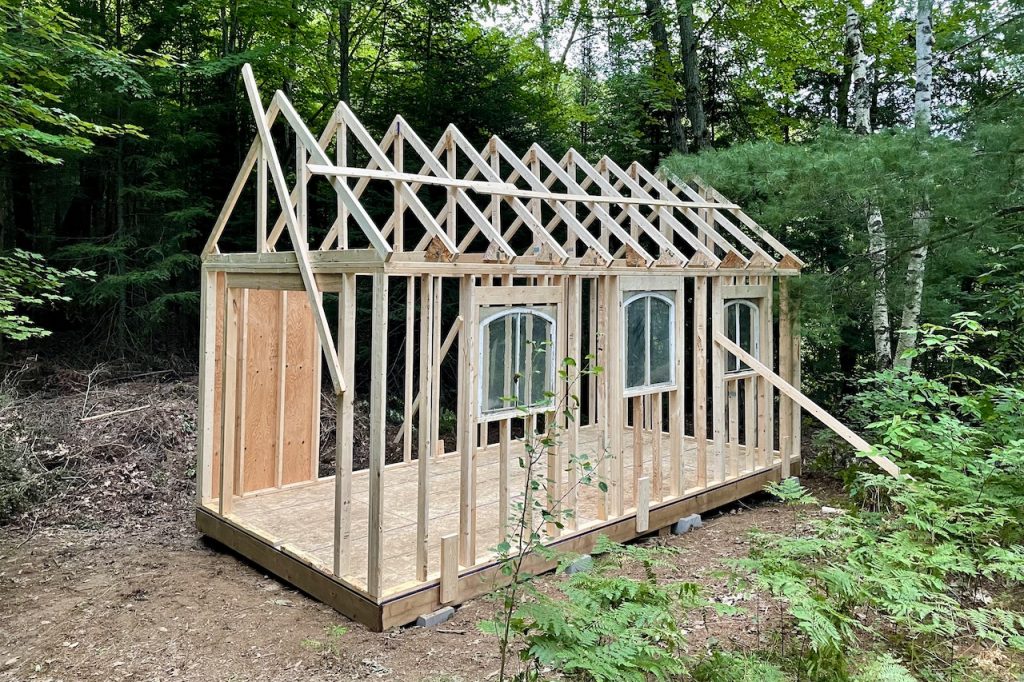
As you can see from the above photo, all of the framework for the storage shed was already in place at this point. The walls were lifted, plumbed and securely fastened both to the floor and at each corner. The roof trusses were also carefully lifted and secured in place. The framework still had a tiny bit of give, which was expected, but the structure became more stable with the addition of each piece of cover.
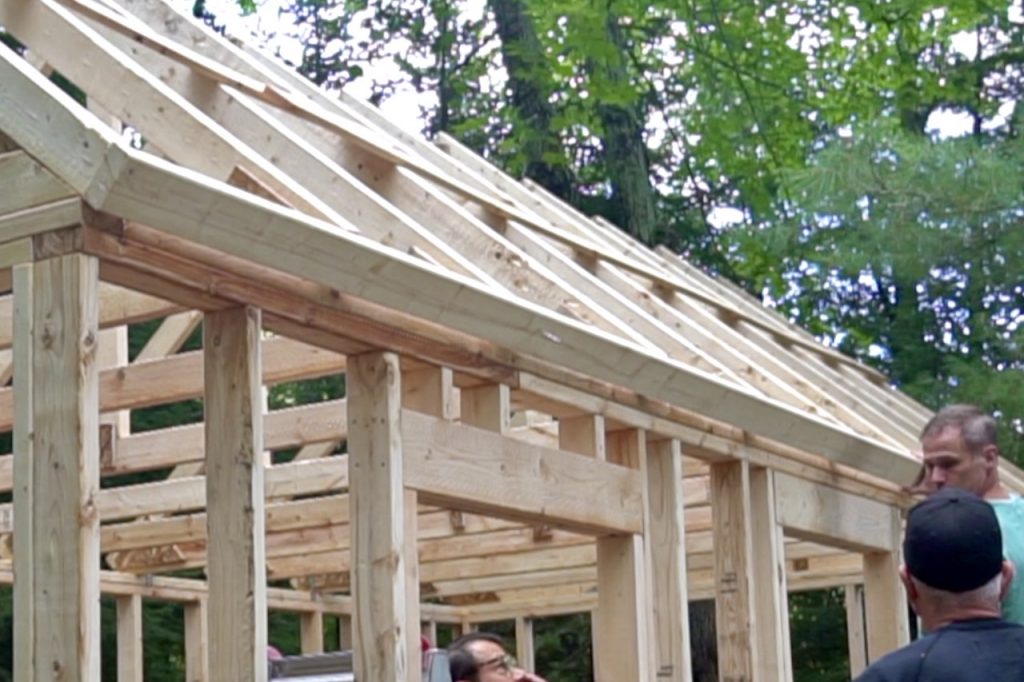
Prior to adding the spruce plywood to the exterior of the shed, we needed to add lengths of 2 x 4s to the ends of the roof trusses. This trim further stabilized the trusses and also served another purpose. It demarcates the edge of the roof. Although fascia trim, drip edge, roof sheathing, protective cover and shingles are still to come, this one piece of thick trim will act as the joiner for all. It’s important.
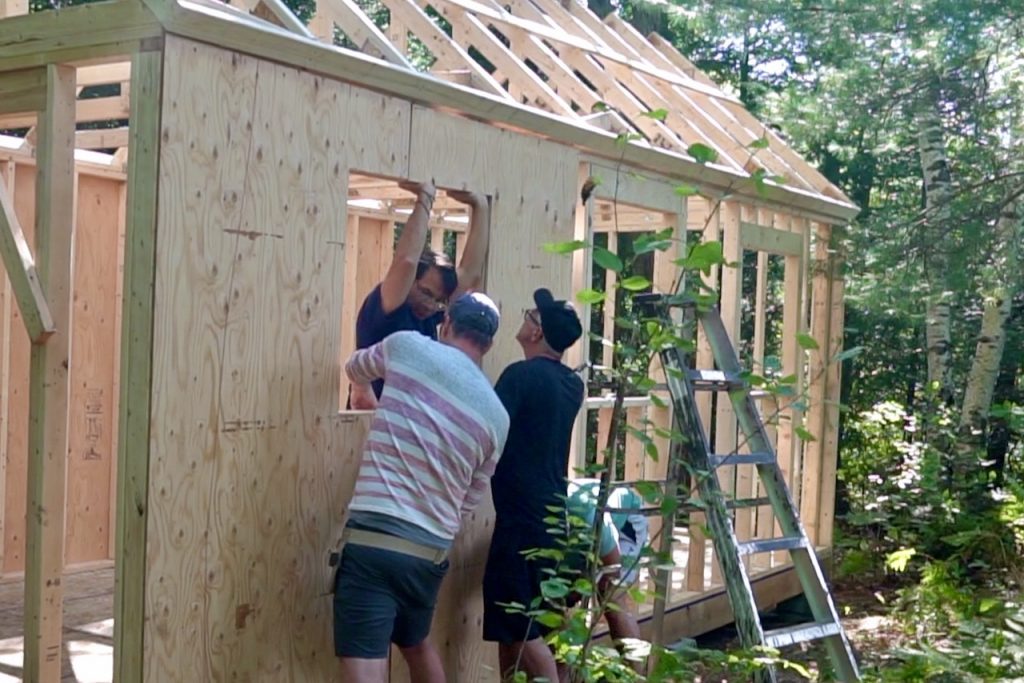
With the roof truss trim in place, we could then add the plywood cover or wall sheathing to the exterior walls. The pieces of plywood are rather heavy, so it is a two- or three-person job. Each sheet was lifted and tucked under the truss trim, then plumbed before being secured at the top along the run of vertical wall studs. With the sheet tacked up across the top of the framing, we could then proceed down the sheathing. It was easy to nail it to the studs underneath. Unlike the floor or roof material, there are no nail markings. Yet, little taps on the wood helped guide where a nail would meet a stud.
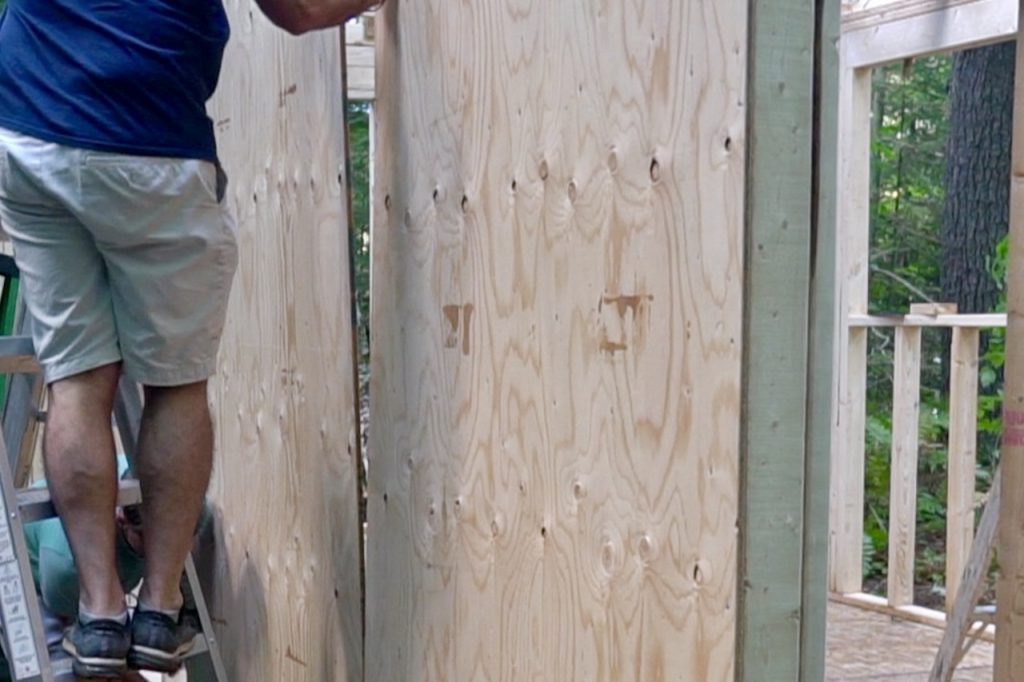
Butting the pieces of plywood up against each other is easy work, although we do suggest checking that each sheet is plumb before nailing it in place. This ensures the sheets butt up perfectly when they meet in a corner. We did need to trim off a tiny bit of the sheathing in one corner so that the plywood would meet perfectly. What does that mean? My storage shed isn’t 100% perfect, yet that tiny imperfection reminds me that my shed is handmade and, most importantly, my next build will be even better.
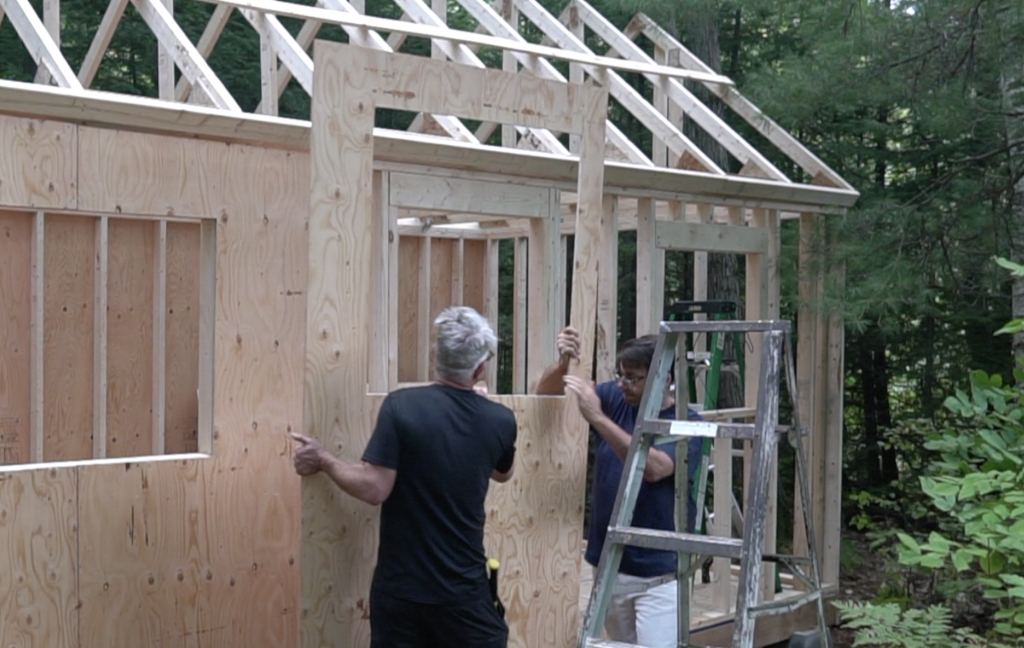
There are two ways of dealing with door and window openings, as they apply to exterior sheathing; we tried both. The first is to nail the sheathing over the opening, then take a circular, jig or reciprocating saw to cut away the cover from the opening. The second was is to hold up the sheathing, trace the cutaway, then position the plywood on a work surface to cut the opening using a circular saw. We found the trace method worked best.
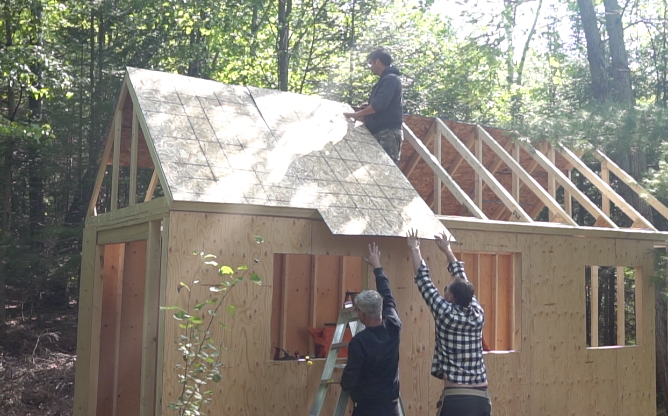
Securing the roof sheathing in place involved heavy lifting. Two people lifted the cover in place while a third stood in the shed on a ladder to hammer the sheathing to the truss. We decided to place the sheets vertically even though this necessitated having to trim away a few inches of overhang. Each sheet was nailed in place with centre butted up against the previous. It was easy then to trim away all of the overhang at the same time to reveal a straight edge to the roof.
With the wall and roof sheathing in place, this next instalment of LET’S BUILD A STORAGE SHED comes to an end.
Make sure to check back for LET’S BUILD A STORAGE SHED – PART FIVE where we do the finishing touches. My family is expected up for a get together and I intend to put them to work helping shingle the roof, adding the trim to the exterior and positioning the antique windows. I’ll also get my brothers-in-law to help with painting, building the door and installing the ramp. All that and much more to come.

LET’S BUILD A STORAGE SHED – PART ONE! We’ll start by clearing the site, setting up the foundation and building the floor.
The large platform of our shed foundation is getting used to build something we’ll need later in the project…

Looking for a DIY series on how to build a 10 x 20-foot storage shed from the ground up?


