
THE SPICE IS RIGHT!
SHOP NOW!
38
Days0
Hours15
Minutes11
Seconds Until Labour Day
This is another instalment of our five-part series where we share the process of building a 10 x 20-foot storage shed. If you’ve just happened upon LET’S BUILD A STORAGE SHED, we suggest you start at the very beginning of our build. Click here to read the INTRODUCTION, then continue with PART ONE – Foundation and Floor and PART TWO – Trusses and Gussets. Not a bad idea to also SUBSCRIBE to WATC so you never miss a post, and also subscribe to our YouTube CHANNEL. You’ll find all of our weekend projects in the DIY PLAYLIST.
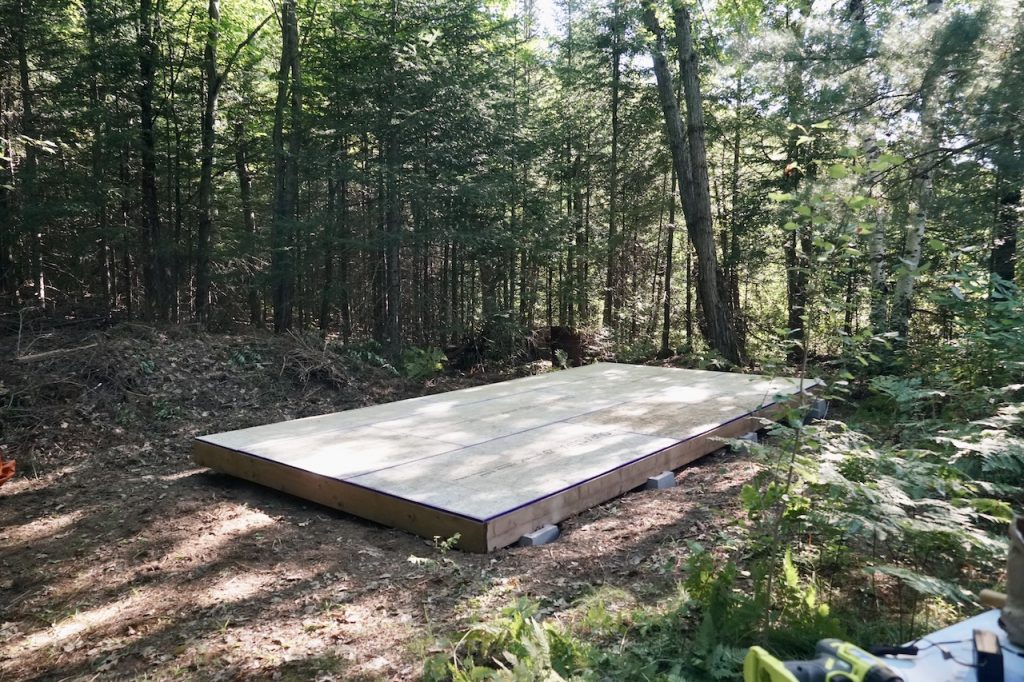
As mentioned in PART TWO, having the shed floor available as a surface on which to build the various components of the shed helped immensely. We took full advantage of the space it provided in this part of the build, especially since we needed it to construct four walls. Two of the walls measure 20 feet wide while the other two measure 10 feet.
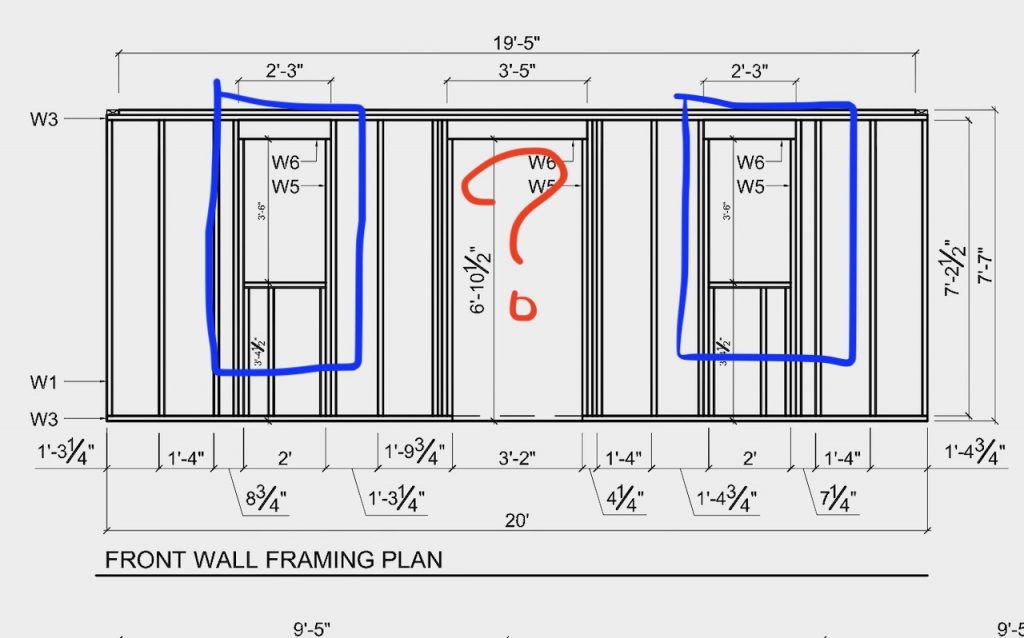
Based on previous comments made in the first two parts of LET’S BUILD A SHED, you might expect everything would be going to plan, right? Well, normally it would have, except I decided to change the plans to accommodate a little design feature. In the end, we figured it out, but it did cause a few delays as we repositioned things and had to adjust and remeasure. TIP: Bake some kind of treat like our BROWN-BUTTER BLONDIES to appease frustrated friends who are helping.
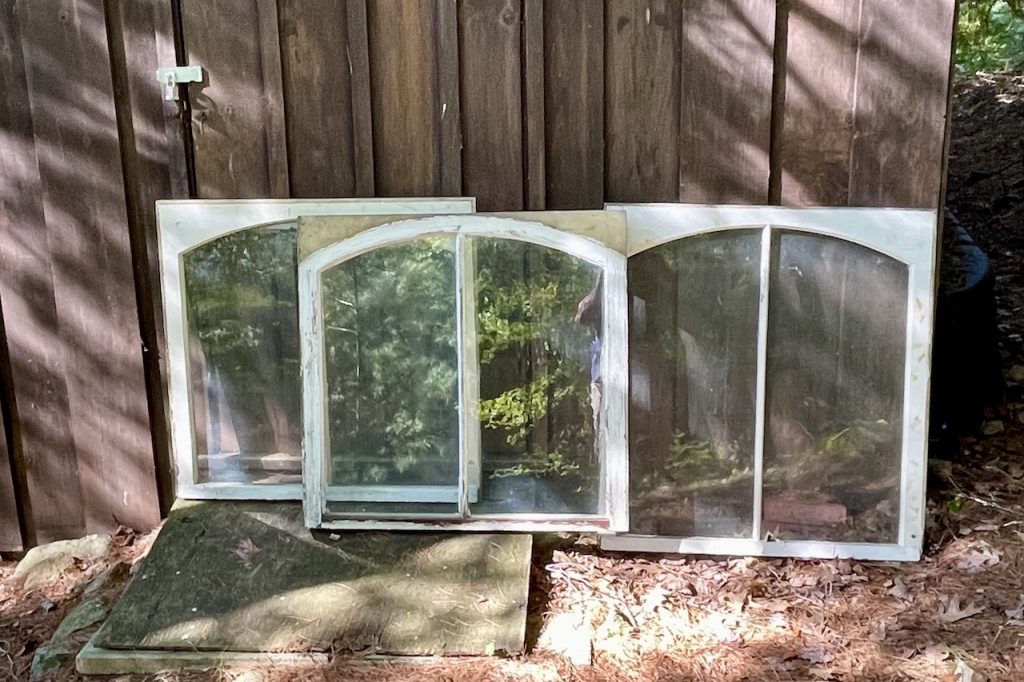
There’s some famous adage about how when one door closes a window opens? This is kinda what happened with the plans. About three weeks before the build I found three gorgeous period windows at an estate sale that had come from an old farmhouse. After purchasing them ($20 each – seriously, how could I resist?) I decided to remove one of the doors from the shed and replace it and the specified windows with my new purchases. This meant having to change the positioning and length of the 2 x 6 headers that sit above each window, plus move studs and sills – it was a lot of work! Yet, I hope this somewhat complicated change makes the shed more attractive, fingers crossed.
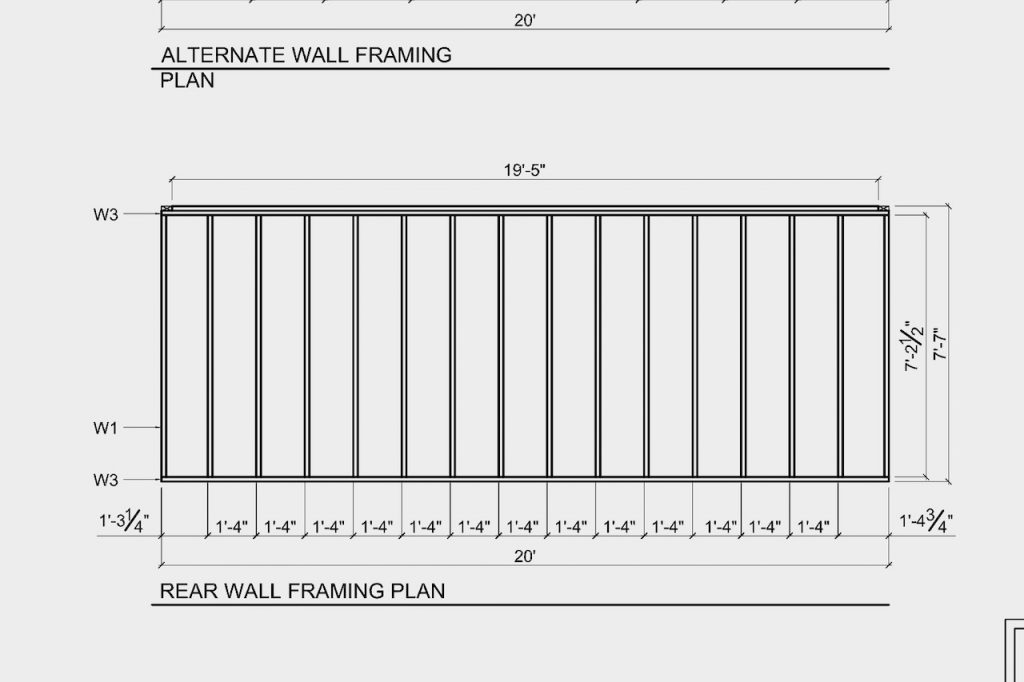
Laying out and putting together the first 20-foot wall for the shed took a bit of time. First we needed to mark where the 2 x 4 studs would be attached to the longer 2 x 4 top and bottom plates. We then cut the studs to the correct length and started hammering the framing of the wall together. This really was my first foray into hammering long nails into 2 x 4s, so yay! And whew! And ouch! Thankfully my hammering skills have improved.
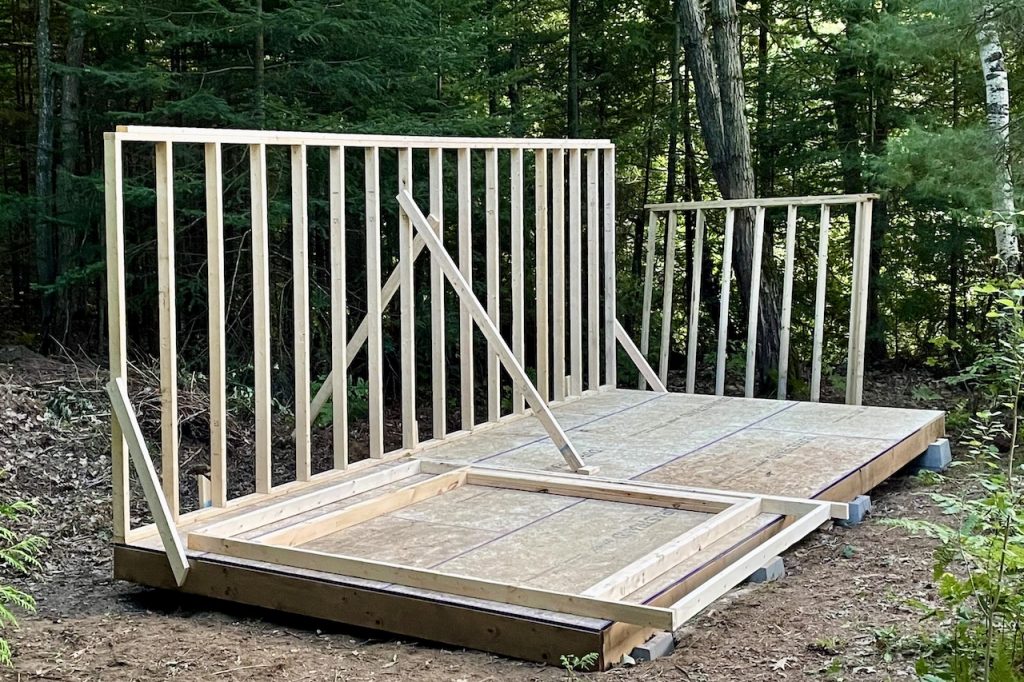
My friend Jamie was a great guide on this part of the project and he suggested we lift and attach the first wall frame in place, making sure to add braces and secure it from falling – safety first. This was also a perfect time to check that the studs, especially those on the ends, were plumb. We then put together the two side walls but lifted them off the platform so that we would have enough space to build the final 20-foot wall. Brilliant.
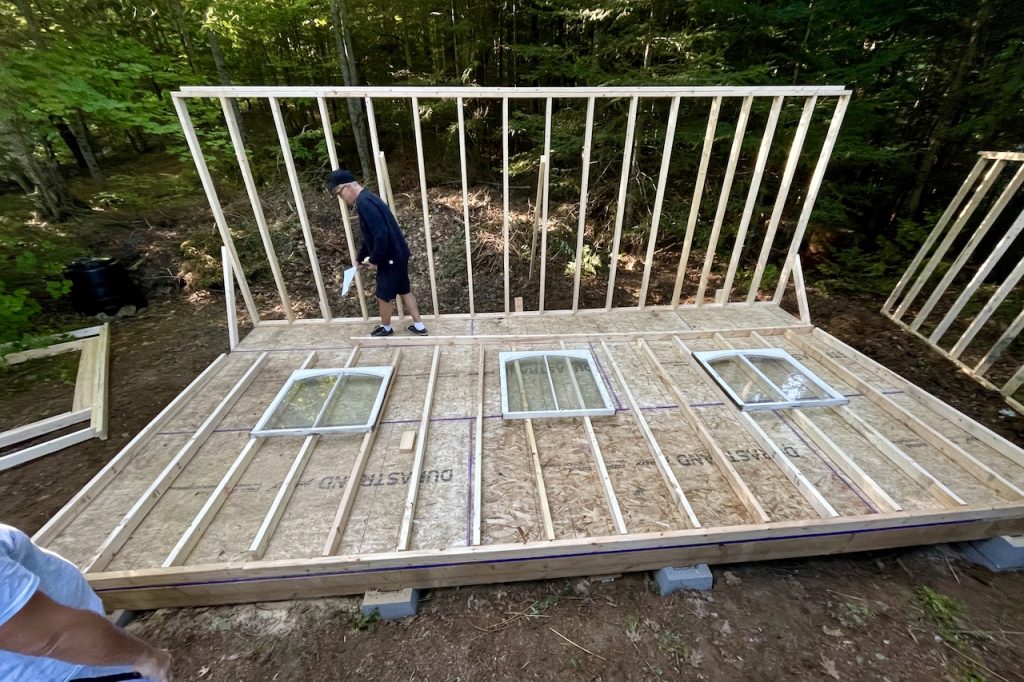
The final wall is the one that ended up taking the most time as it involved positioning and centring the antique windows, as mentioned above. In a way, I’m glad we saved it to the end because with our momentum it wasn’t too daunting. Planning the structure of this wall on the floor of the shed helped get the visual right. Must say, laying the windows in place got me really excited as I could see where the project was heading, and it’s all good!
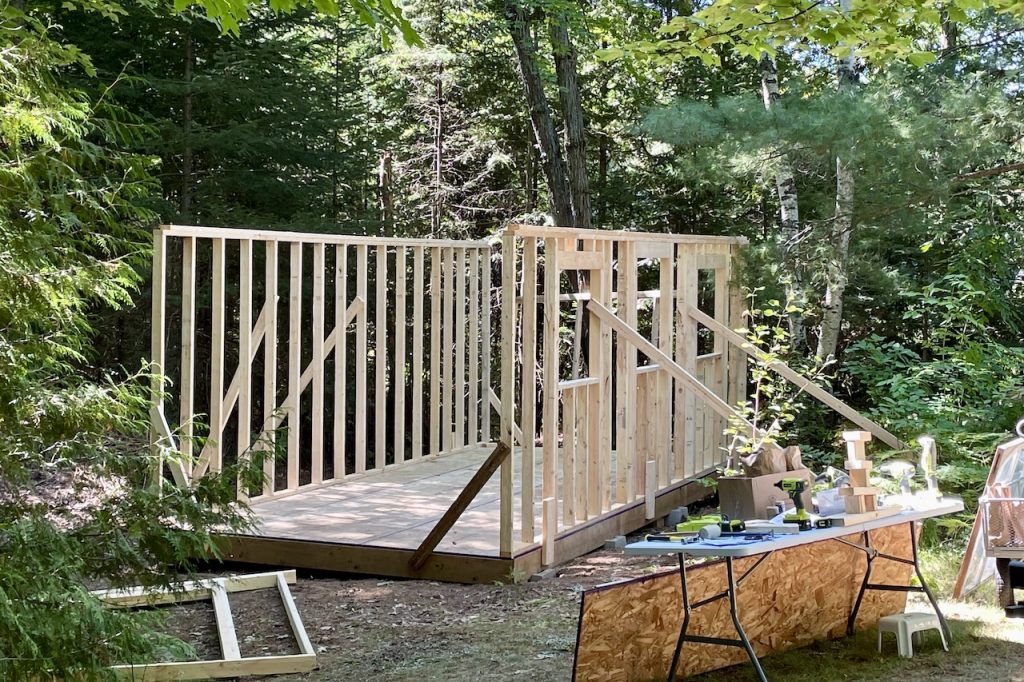
Once the four walls were put together, we lifted them all in place and connected them in the corners where the 2 x 4 plates connect. We then made tiny adjustments to make sure the corners were level and plumb and secured everything in place with the second top plate. Can’t stress enough how important it is to use braces to support and secure the walls when they first go up.
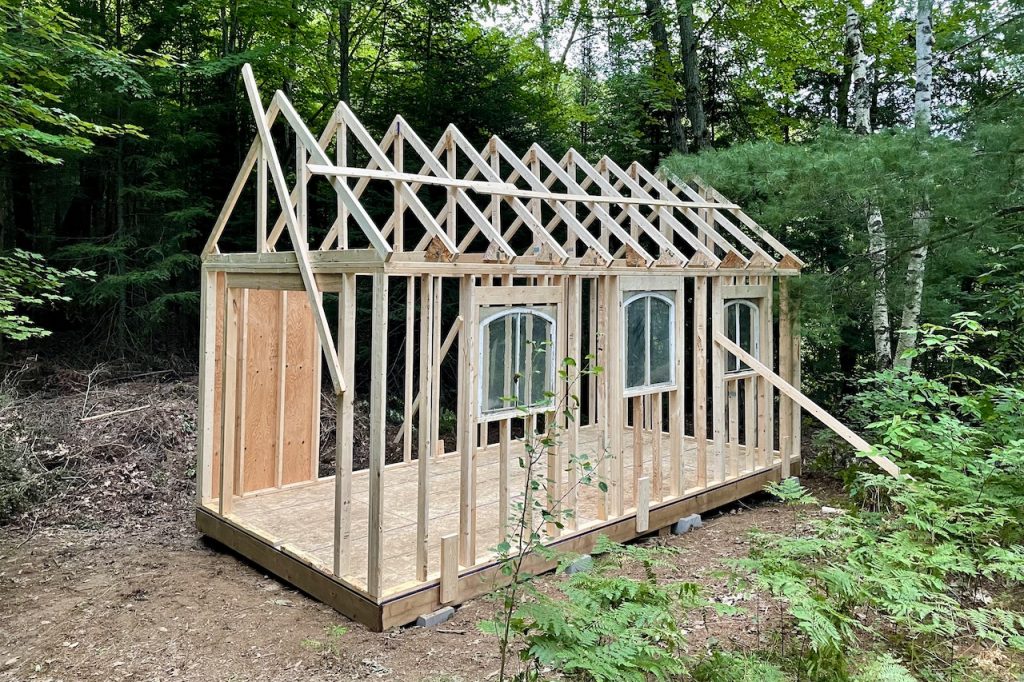
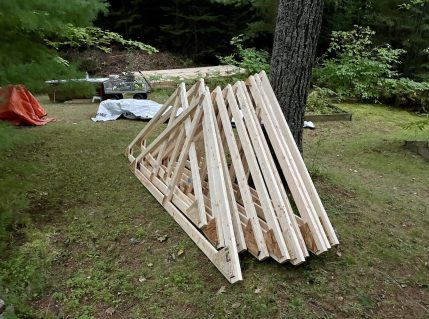
With the four walls up and stable, it was time to start lifting and securing the roof trusses in place. Jamie suggested we start with the two outside rafters and attach them to the top plates with 2 x 4 braces. This worked like a charm, and we continued to lift the remaining nine trusses up and in place. This was heavy and hard work – it was amazing to have my friends helping. The last element of the truss and rafter installation was to attach them using hurricane ties. The likelihood of a hurricane passing through this neck of the woods is slim, and thanks these metal plates, the likelihood of the roof going anywhere is slimmer.
Hammering the walls together, getting them lifted and in place and securing the rafters and trusses involved some serious strength. I certainly could not have done it without the help of my friends – they’re the best.
Make sure to check back for LET’S BUILD A STORAGE SHED – PART FOUR where we clad the outside of the shed with plywood and put the roof sheathing on. All that leading us to our final episode where we add shingles, trim, a coat of paint, and a few little details that give a simple storage shed some serious curb appeal!

Looking for a DIY series on how to build a 10 x 20-foot storage shed from the ground up?

LET’S BUILD A STORAGE SHED – PART ONE! We’ll start by clearing the site, setting up the foundation and building the floor.
The large platform of our shed foundation is getting used to build something we’ll need later in the project…


