
THE SPICE IS RIGHT!
SHOP NOW!
53
Days1
Hours47
Minutes0
Seconds Until Labour Day
This is another instalment of our five-part series where we share the process of building a 10 x 20-foot storage shed. If you’ve just happened upon LET’S BUILD A STORAGE SHED, please make sure to begin by reading this INTRODUCTION for the key things we learned before starting the project. Then continue to PART ONE where we cleared the build site, set up a level foundation on cement pads and blocks, then laid out floor joists and the actual flooring. Not a bad idea to also watch this VIDEO for part one. The entire build is pretty exciting!
This storage shed is the first of many do-it-yourself projects we’ll be sharing. Please make sure to SUBSCRIBE to WATC so you never miss a post, and also subscribe to our YouTube CHANNEL. You’ll find all of our weekend projects in the DIY PLAYLIST.
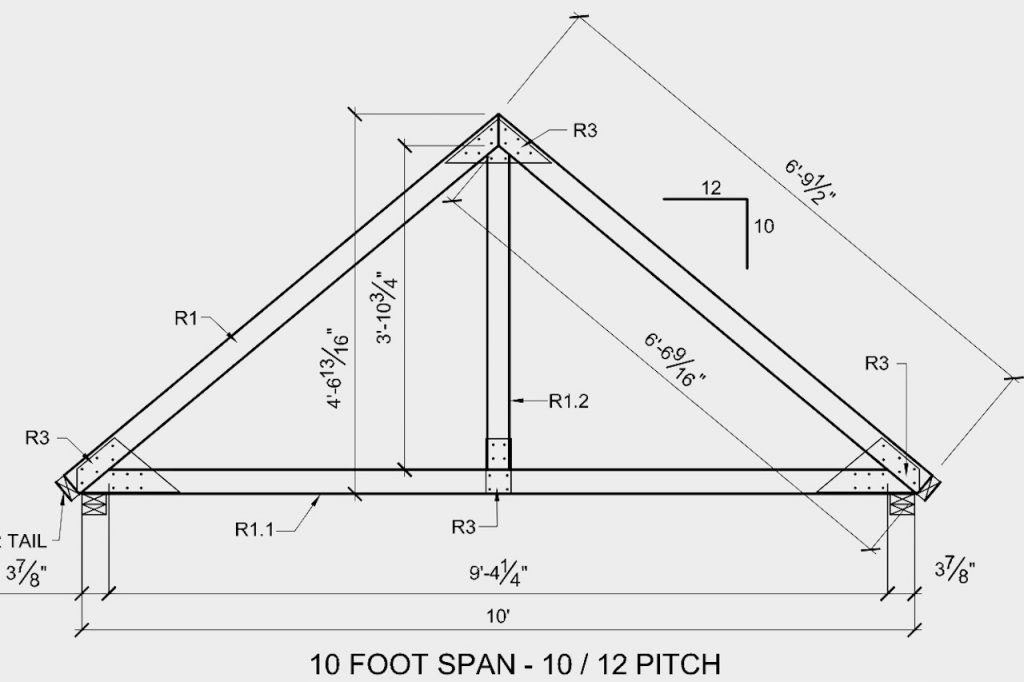
The plans for the storage shed came complete with a list of the building materials needed and the detailed drawings. As mentioned in the intro and part one, I divided the plans up into the various components with part two of the series dedicated to ROOF TRUSSES.
There are two things I’d like to mention. First, the plans I’m using also include three additional pages that detail the different angle cuts needed to form trusses that support a roof built at a 10:12 pitch. What? That 10:12 measurement means that for every 12 horizontal inches of roof, there’s a 10 inch rise. This is a steep slope roof.
Second thing is that the plans also included to-scale templates for some of the trickier cuts. Having the actual template was really helpful to make perfect cuts and carve out additional pieces.

In the VIDEO attached to this post I mention both trusses and rafters. Though both are triangular in shape, trusses have more triangle webs inside the principle frame. This shed calls for nine trusses for the interior of the roof structure and two rafters positioned at each end. More on that in a bit.
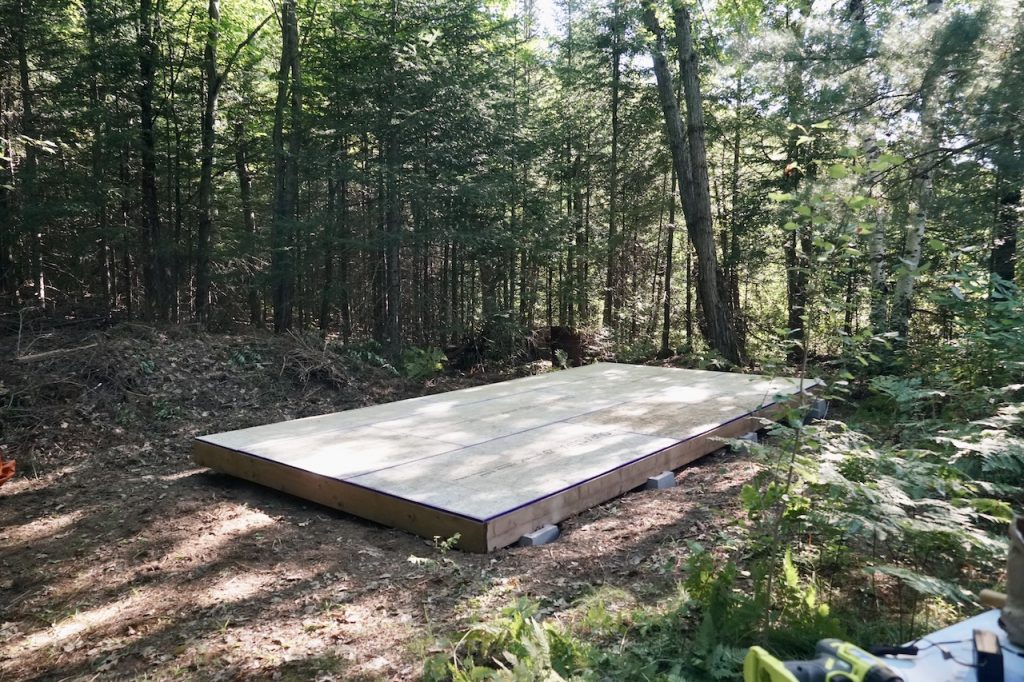
One of the reasons I decided to jump ahead and build the roof trusses for part two was to take advantage of the space provided by the shed floor. The roof trusses ended up being quite large, but having the floor to work on made positioning, drilling and assembling easy.
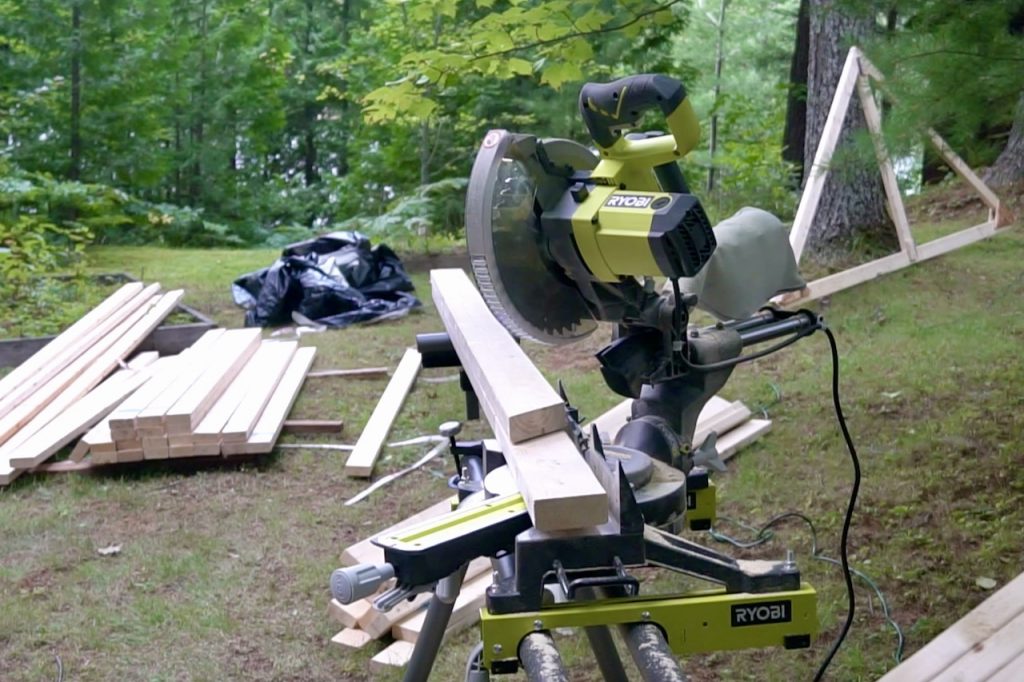
I’ve already mentioned how important having the correct tools are to a project like this. In speaking with experienced friends and my handy brother-in-law Steve, I gathered that a mitre saw would make cutting the various angles for the roof trusses way easier. All those in-the-know friends were right; safely using a mitre saw helped tremendously.
After cutting the various lengths of 2 x 4s with the mitre saw, I then laid down my first roof truss, checking it on the floor of the shed to make sure everything lined up properly. Once it was in place, I drilled off-cuts into the floor to create a positioning template. This helped me line up the remaining trusses. I got quicker after completing the first few trusses.
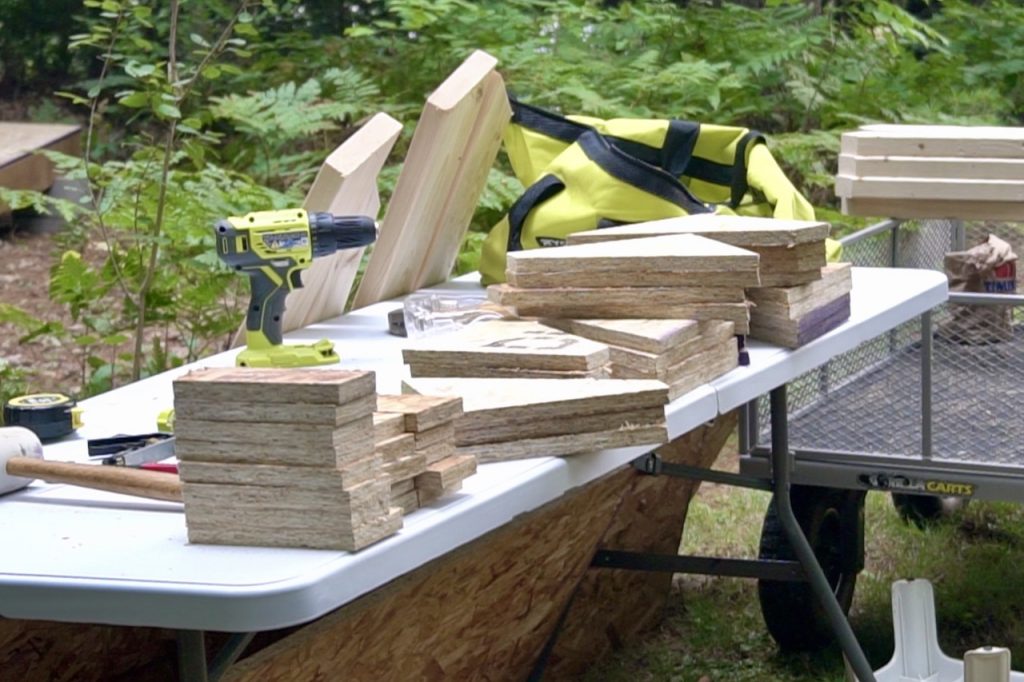
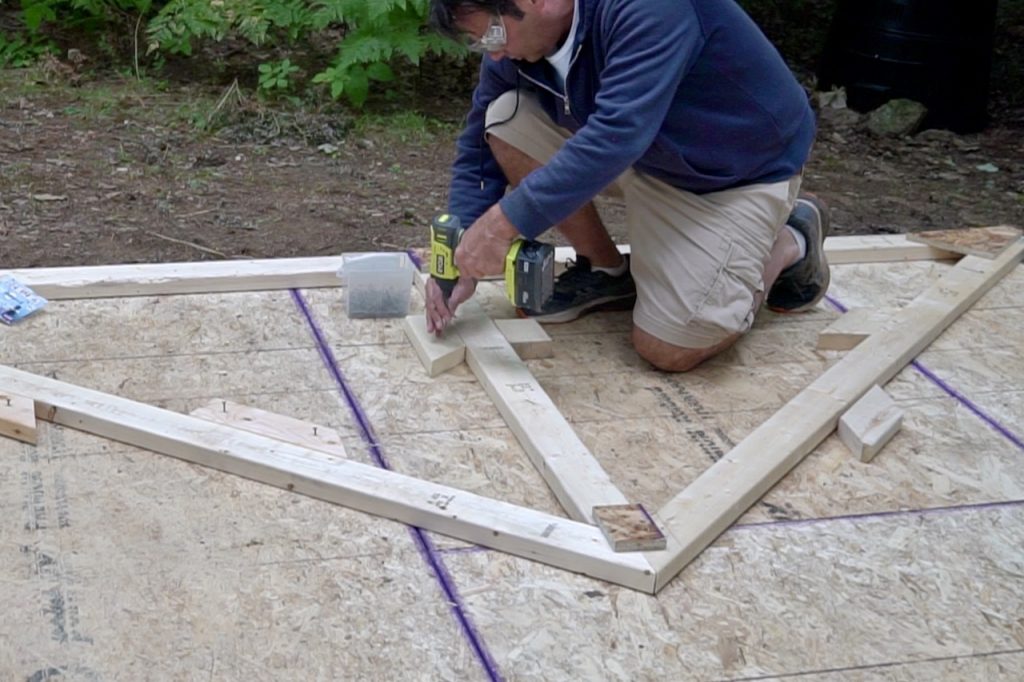
There were a few “ah ha” moments in this stage of the project, one of them being my introduction to gussets. I noticed when ordering the materials that the plans called for metal gussets to secure the tops of the trusses, the two corners and the base of the king post. This was when the building expert explained that manufactured metal gussets weren’t available and I’d have to make my own out of leftover roof sheathing. What? I’m in! …I guess?
Gussets are defined as plates or brackets for strengthening an angle in framework. Making them was relatively easy thanks to the diagrams provided in the plans. I cut out all of the gussets after cutting the 2 x 4 lengths, then laid the trusses down and attached the gussets as directed. The plans called for gussets to be applied to both sides of each truss. My adventure with trusses and gussets was quite a bit of work with the positioning, drilling and flipping but I learned a lot and certainly enjoyed the process.
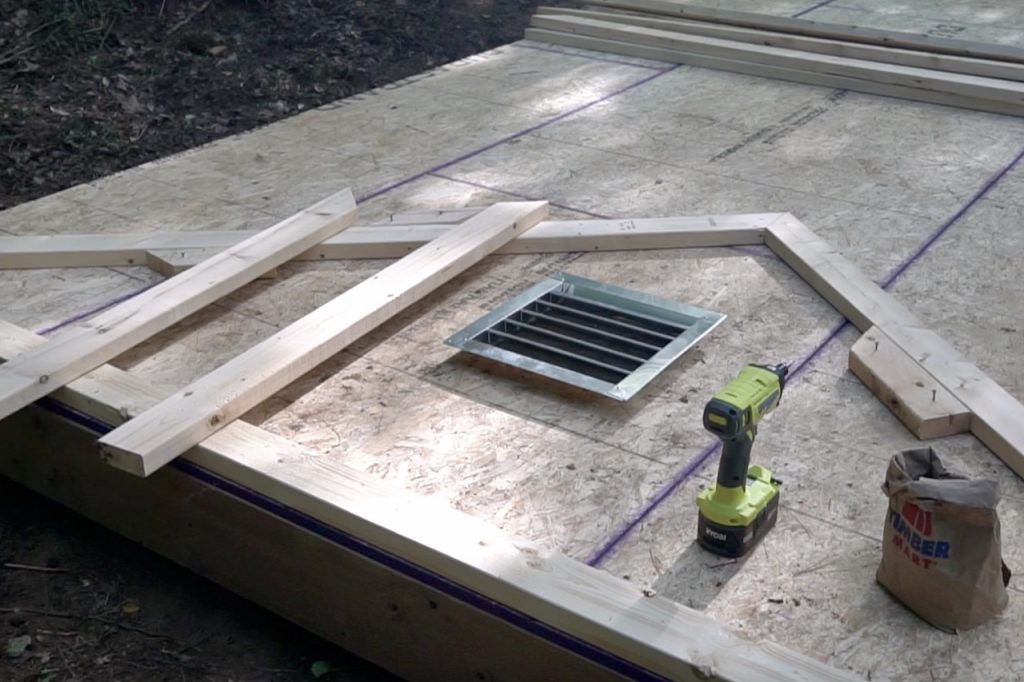
I even had two rafters make their way into this shed build project. While reading the fine print of the plan, that I noticed a special detail to install two roof vents on the front and back gable rafters. This involved removing the king posts and replacing them with two additional alternate supports, turning the truss into a rafter.
Last thing about the roof trusses: they’re heavy yet I was still able to carry them away from the main build area once completed. I covered them with protective tarp and carried on with the next step in the project, framing the walls. Thankfully, a new set of friends came up for a visit and to help. Yippee!
Make sure to check back for LET’S BUILD A STORAGE SHED – PART THREE where the framing for the walls goes up before we lift the trusses and secure them in place.
Essential furnishings partnered with inspired accessories and decor enhancements create a cozy and welcoming three-season room in cottage country…

Looking for a DIY series on how to build a 10 x 20-foot storage shed from the ground up?

LET’S BUILD A STORAGE SHED – PART ONE! We’ll start by clearing the site, setting up the foundation and building the floor.


