Preheat the oven to 450°F with the rack in the middle position. Have a parchment-lined baking sheet at the ready. Also have a sharp knife on hand, as well as some flour to dust your work surface.
Prepare the dry ingredients: Place all of the dry ingredients into a medium-sized bowl and whisk to combine. Spill dry mix into a sieve or sifter placed into a larger bowl. Tap to sift. Make a well into the centre of the dry mix.
Working quickly, add 1 ½ cups of buttermilk into the well. Stir by hand to combine, adding a bit more buttermilk if required. Dough should just come together and be soft and sticky. Do not overwork.
Turn dough onto floured work surface and pat into a somewhat flat 7-inch round, about 2-inches thick.
Invert dough, flour-side up onto the baking tray. Score an x into the centre of the dough.
Transfer to oven and bake for 15 minutes. Reduce to 400°F, baking for 25 minutes more or until bread is browned and sounds hollow when knocked on the bottom.
Cool on wire rack for 1 ½ - 2 hours before slicing.
Serve plain, with butter and jam, or with butter to accompany soups, stews and chowders.
Easy Soda Bread Recipe
Ingredients
3 ½ cups unbleached all-purpose flour
1 teaspoon baking soda
½ teaspoon kosher salt
1 ½ to 1 ¾ cups buttermilk
Directions
Preheat the oven to 450°F with the rack in the middle position. Have a parchment-lined baking sheet at the ready. Also have a sharp knife on hand, as well as some flour to dust your work surface.
Prepare the dry ingredients: Place all of the dry ingredients into a medium-sized bowl and whisk to combine. Spill dry mix into a sieve or sifter placed into a larger bowl. Tap to sift. Make a well into the centre of the dry mix.
Working quickly, add 1 ½ cups of buttermilk into the well. Stir by hand to combine, adding a bit more buttermilk if required. Dough should just come together and be soft and sticky. Do not overwork.
Turn dough onto floured work surface and pat into a somewhat flat 7-inch round, about 2-inches thick.
Invert dough, flour-side up onto the baking tray. Score an x into the centre of the dough.
Transfer to oven and bake for 15 minutes. Reduce to 400°F, baking for 25 minutes more or until bread is browned and sounds hollow when knocked on the bottom.
Cool on wire rack for 1 ½ - 2 hours before slicing.
Serve plain, with butter and jam, or with butter to accompany soups, stews and chowders.
Easy Soda Bread Recipe
5 / 5. 2
Only four ingredients to create a craggy-crusted soda bread with a nice dense chew…
This post proves our EASY SODA BREAD RECIPE is exactly that – easy!
We know you’re going to love this EASY SODA BREAD RECIPE because of three essential features. It’s easy to make; about 5 minutes to pull together and 45 minutes to bake. It also pairs perfectly as a very tasty side served with a hearty soup or stew, or topped with butter and jam for breakfast or afternoon tea. Final takeaway is that list of only four easy-to-find ingredients; who knew a soda bread recipe would be so easy to make and love?
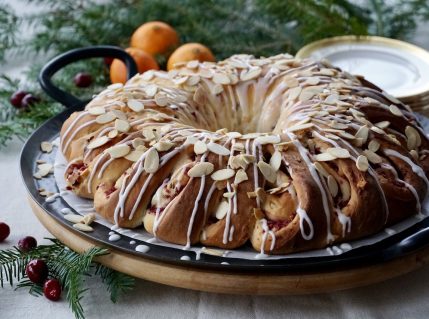
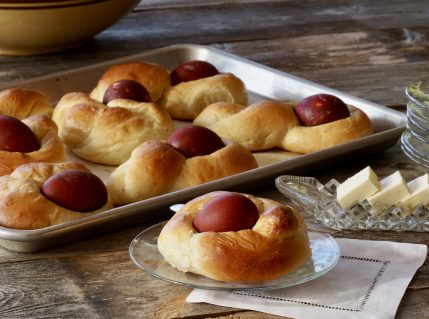
Although this may go down as the easiest bread recipe on our site, we have plenty of other homemade bread recipes that may be of interest for all you bread makers out there. If yeast dough is your jam, try our HOMEMADE EASTER BREAD, this CRANBERRY BUN WREATH, our GOOEY CINNAMON BUNS or our famous CHOCOLATE HAZELNUT BABKA. Another option is to try your hand at a sourdough recipe. From STARTER to SOURDOUGH BREAD, these two recipes are essential to mastering the perfect boule.
Ready to find out more about making soda bread? Time to flour that pastry board, preheat your oven and gather the ingredients listed down below.
Let’s make this EASY SODA BREAD RECIPE!
INGREDIENTS
So, just four ingredients; let that sink in. Only four ingredients between you and a freshly baked loaf of homemade soda bread. Hopefully, you already have the first three – flour, salt and baking soda – on hand. The fourth, buttermilk, is easy to pick up at your local grocer in the dairy section. If your favourite store is out of buttermilk, fear not, we’ll also share a quick fix on making your own a little later in this post. Also, note there are no eggs, raisins, cheese, herbs or currants in this recipe, although some bakers do add them. We wanted this recipe to be as simple as possible.
BAKING SODA
Here’s a very important tip. Before measuring the dry ingredients, make sure to check the expiration date on your baking soda. Baking soda behaves like yeast in this recipe, as a leavening agent. Trust me as I speak from experience, you only need to have one recipe to flop because your baking soda is past its prime. I’m hoping we just saved you the trouble. Additionally, let’s say you do have a box of expired baking soda. Shake it into your kitchen sink and give it a good scrub. Then, bonus round, if your home or cottage is on a septic system, experts agree that baking soda is good for that too. Hurray!
BEST FLOUR FOR SODA BREAD
We crafted and tested this recipe using our favourite unbleached, all-purpose flour. We use it for most baking and bread recipes unless a cake or pastry flour is better suited. Why use unbleached flour over bleached? Unbleached flours whiten after the milled grains oxidize naturally. Bleached white flour is whitened after being treated with chemicals. We’re not fans. Pro tip: if you enjoy a slightly chewier, darker soda bread, something more akin to a traditional Irish soda bread, you’re going to want to use IRISH STYLE FLOUR. Think of it as a coarse whole wheat flour that contains all of the bran, endosperm and germ of the wheat berry. You can use a speciality unbleached whole wheat flour for this recipe although you’ll also need to add a bit more buttermilk to craft a hydrated dough.
WHISK AND SIFT THE DRY MIXTURE TOGETHER
Although these two directions might not seem important in a four-ingredient bread recipe, they really are. Remember to first spoon the flour into the dry measuring cup before levelling off the quantity using a knife. Then, spill the measured flour, ½ teaspoon salt, and 1 teaspoon baking soda into a large mixing bowl, grab a wire whisk and blend them together.
Spill the dry mix into a fine wire sieve resting over a larger bowl and tap the sieve to sift the dry ingredients together. Having the flour, baking soda and salt thoroughly combined ensures the dry mix activates uniformly once the buttermilk is added.
Before adding the buttermilk to the dry mix, create a little well in the centre of the flour mixture. Make sure to watch this VIDEO where I show you how the dough for this EASY SODA BREAD RECIPE comes together. Now let me close the loop on a comment we detailed off the top: buttermilk. Can’t find buttermilk at the store? Here’s how to make it at home. Simply pour one cup of whole milk into a liquid measure or glass. Then add a tablespoon of either white vinegar or lemon juice – strain the lemon juice first so your buttermilk doesn’t end up with pulp globules. Then, stir and refrigerate for maybe 20-30 minutes. And voilà, homemade buttermilk. You’re welcome.
SODA BREAD DOUGH
So, the key takeaway about soda bread dough is all about the reaction that happens when the buttermilk hits the flour mixture. Some of you may wonder if you can use yoghurt or kefir as buttermilk substitutions. We haven’t tested them, but drop us a note if you know whether they work or not. The chemical reaction in soda bread is specifically between baking soda and buttermilk, which creates carbon dioxide bubbles that make the bread rise. For best results, you’re going to need to mix the wet and dry ingredients quickly. During testing we found combining the two by hand is the way to go. Once combined, it’s time to bake.
SHAPE AND SCORE THE TOP
Once the dough barely comes together (don’t overwork it), turn it out onto a lightly floured surface. Then, press it out gently to shape a round loaf before lifting and inverting it onto a parchment paper-lined sheet pan or baking sheet. You can also bake the bread in a cast iron skillet. Having excess flour clinging to the top is part of the appeal of the loaf, but more importantly, it allows us to shape the sticky dough into a circular or round shape.
Final step is to cut the traditional deep cross or “X” on top of the loaf. Doing so will allow the bread to expand evenly as it bakes. It also prevents cracks and further controls the release of steam allowing heat to penetrate into the loaf evenly. PS – My Irish editor says to prick a toothpick into each quadrant, wait for it, to release the fairies as the bread bakes. Awwww!!!!
HOW TO TELL WHEN SODA BREAD IS DONE?
Knock knock! If you just said “Who’s there!” out loud (or in your head), I LOVE you! But all joking aside, you can tell your soda bread is done by gently tilting it on its side and firmly knocking or tapping the bottom of the loaf with a closed fist. If you hear a hollow sound, it’s done. You’ll also be able the gauge doneness if the loaf has puffed up and taken on a gorgeous, richly golden-coloured surround. Failing that, you can test using a probe thermometer. When your instant-read thermometer registers 195°F or 90°C, your loaf is done.
NOW WE WAIT
True story! You have to wait for the bread to cool down. During testing, we let the bread sit for one and a half to two hours. This extended cooling time made slicing the bread way easier and also ensured the centre of the loaf was fully cooked. Because bread continues to cook as it cools, slicing bread too soon will not result in the loaf where the centre isn’t fully cooked. The slices will also fall apart if not cooled correctly.
Additionally, two options on how to cool soda bread. If you enjoy bread with a crisp crust, place the baked loaf on a wire rack, leaving it to cool uncovered. If you’d rather have bread with a softer crust, wrap the loaf up in a clean dishcloth before cooling it on a wire rack. This will yield softer slices.
HOW TO ENJOY SODA BREAD
Of course, you can enjoy slices of soda bread as is. Prepare to be amazed by the tight, almost compressed texture of the crumb. The bread is somewhat light with a slightly dense chew.
For those ready to add soda bread to their breakfast or brunch plans, might we suggest slices smeared with butter and a dollop of your favourite jam. We tried it with both our PEACH-GINGER JAM and fabulously famous GOOSEBERRY JAM. Peanut butter lovers, fear not. There’s a place for a swipe of peanut butter on a toasted slice of soda bread too.
Last suggestion on how to enjoy soda bread is to tuck slices beside a bowl of your favourite soup, stew or homemade chili. Soda bread is a bit of a chameleon, working with both with sweet and savoury dishes.
This delicious homemade bread recipe is so fantastic, we suggest you PIN the recipe to a favourite bread or baking board on PINTEREST or BOOKMARK this tab for easy access. SHARE it with friends so they can make them too. We’d also appreciate seeing pics of all the delicious treats you’re making these days. Use #weekendatthecottage when you post those pics on Facebook and Instagram. Thanks!
Cook Mode Use cook mode to keep your screen on while cooking.
Ingredients
3 ½ cups unbleached all-purpose flour
1 teaspoon baking soda
½ teaspoon kosher salt
1 ½ to 1 ¾ cups buttermilk
Directions
Preheat the oven to 450°F with the rack in the middle position. Have a parchment-lined baking sheet at the ready. Also have a sharp knife on hand, as well as some flour to dust your work surface.
Prepare the dry ingredients: Place all of the dry ingredients into a medium-sized bowl and whisk to combine. Spill dry mix into a sieve or sifter placed into a larger bowl. Tap to sift. Make a well into the centre of the dry mix.
Working quickly, add 1 ½ cups of buttermilk into the well. Stir by hand to combine, adding a bit more buttermilk if required. Dough should just come together and be soft and sticky. Do not overwork.
Turn dough onto floured work surface and pat into a somewhat flat 7-inch round, about 2-inches thick.
Invert dough, flour-side up onto the baking tray. Score an x into the centre of the dough.
Transfer to oven and bake for 15 minutes. Reduce to 400°F, baking for 25 minutes more or until bread is browned and sounds hollow when knocked on the bottom.
Cool on wire rack for 1 ½ - 2 hours before slicing.
Serve plain, with butter and jam, or with butter to accompany soups, stews and chowders.

 Until Labour Day