3 cups organic all-purpose flour (see notes above)
1 ½ teaspoons kosher salt
1 tablespoon honey
1 ¼ cups distilled water, lukewarm (see note above)
vegetable oil for greasing
flour for work surface
Takes ,
serves 12.
Instructions
Boost the starter: The evening before making the bread, place the quantity of starter into a medium-sized bowl. Sprinkle with 2 ounces of flour and 2 tablespoons of water. Stir together vigorously. Cover with porous wrap and place onto a plate. Transfer to a warm location, leaving it to sit undisturbed overnight.
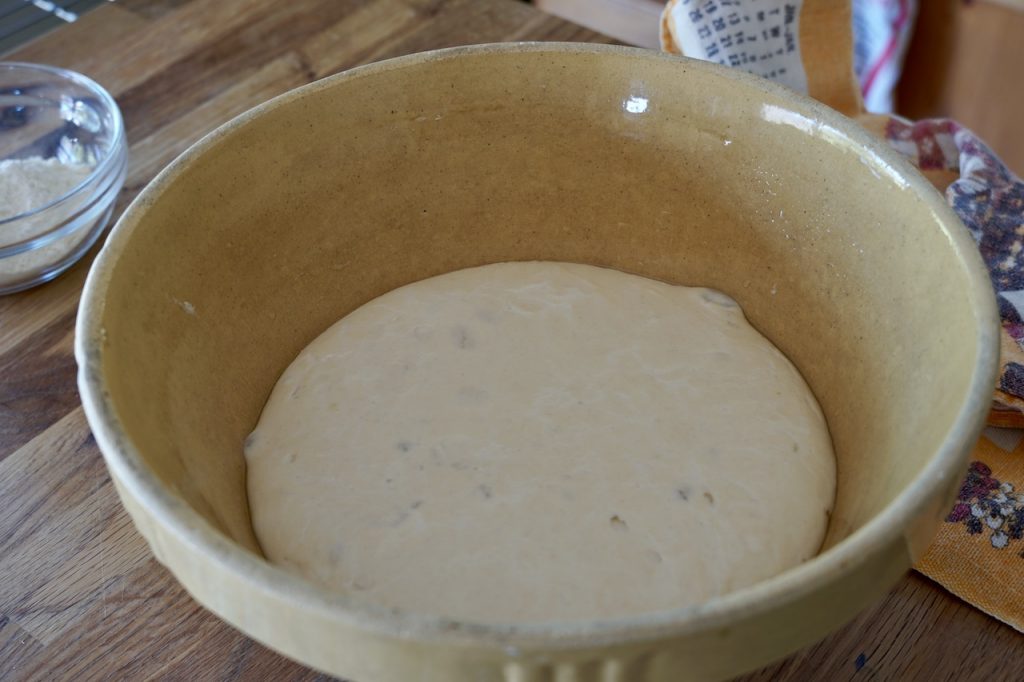
Prepare the dough: On the day-of, begin by heating the water in a small pan until lukewarm. Whisk or stir the flour and salt together in the bowl of a stand mixer. Add the honey, then the boosted starter, followed by the warmed water. Stir together until well combined. Cover with a clean dish towel, leaving it to sit undisturbed for 1 hour.
After 1 hour, transfer the bowl to the stand mixer fitted with the hook attachment. Process the dough on a moderate speed for 5 minutes. If preparing by hand, knead the dough in the bowl for 8 to 10 minutes or until the dough comes away from your hand and no longer sticks to the bowl. Transfer the dough into a clean medium-sized bowl.
Dip the tips of your fingers into a tiny bit of vegetable oil and oil the inside of the bowl. Cover with a clean dish towel and transfer to a warm location, leaving it to sit undisturbed for 3 hours.
Shape the dough: Turn the dough out onto a floured work surface and sprinkle the top with a bit more flour. Looking down on the circle of dough, grab it at the 12 o’clock position and gently pull it up and over itself, tucking it under the 6 o’clock position. Next, grab the dough at the 9 o’clock position and gently pull it up and over itself, tucking it under the 3 o’clock position. Then grab the dough at the 3 o’clock position and gently pull it up and over itself, tucking it under the 9 o’clock position. Lastly, grab the dough at the 6 o’clock position and gently pull it up and over itself, tucking it under the 12 o’clock position. Turn the entire ball of dough over. Repeat this whole process two more times.
Gently lift the dough and transfer it onto a parchment-lined baking sheet. Cover with a clean dish towel and transfer to a warm location, leaving it to sit undisturbed for 1 hour.
Preheat Dutch oven and oven: As soon as the dough is transferred to a warm location, place a Dutch oven, with lid on, into your conventional oven with the rack in the lowest position. Turn the oven on to 450°F and heat for one hour.
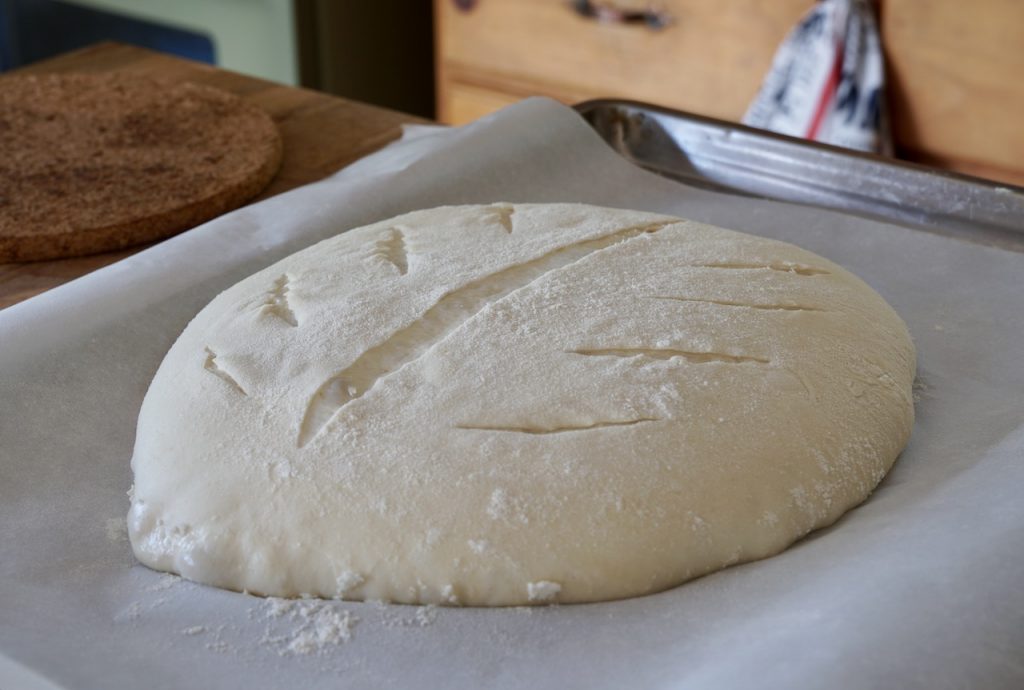
Score the loaf: Bring the shaped loaf to your work surface and uncover. Working quickly but carefully, score the top using a razor blade or sharp knife.
Bake the bread: Place trivets or a wire rack onto your work surface and carefully put the heated Dutch oven on top. Remove the lid. Lift loaf up by the four corners of the parchment paper and transfer into the Dutch oven. Remember to use oven mitts to return the lid on top and transfer into the oven. Bake for 15 minutes. Remove the lid at the 15 minute mark and bake for an additional 15 minutes.
After 30 minutes, remove the pot from the oven. Clutching the corners of the parchment paper, carefully lift the loaf up from the pan and out onto a wire rack.
Cool for at least 30 minutes, preferably an hour.
Homemade Sourdough Bread
Ingredients
¾ cup sourdough starter
2 ounces organic all-purpose flour
2 tablespoons distilled water
3 cups organic all-purpose flour (see notes above)
1 ½ teaspoons kosher salt
1 tablespoon honey
1 ¼ cups distilled water, lukewarm (see note above)
vegetable oil for greasing
flour for work surface
Directions
Boost the starter: The evening before making the bread, place the quantity of starter into a medium-sized bowl. Sprinkle with 2 ounces of flour and 2 tablespoons of water. Stir together vigorously. Cover with porous wrap and place onto a plate. Transfer to a warm location, leaving it to sit undisturbed overnight.
Prepare the dough: On the day-of, begin by heating the water in a small pan until lukewarm. Whisk or stir the flour and salt together in the bowl of a stand mixer. Add the honey, then the boosted starter, followed by the warmed water. Stir together until well combined. Cover with a clean dish towel, leaving it to sit undisturbed for 1 hour.
After 1 hour, transfer the bowl to the stand mixer fitted with the hook attachment. Process the dough on a moderate speed for 5 minutes. If preparing by hand, knead the dough in the bowl for 8 to 10 minutes or until the dough comes away from your hand and no longer sticks to the bowl. Transfer the dough into a clean medium-sized bowl.
Dip the tips of your fingers into a tiny bit of vegetable oil and oil the inside of the bowl. Cover with a clean dish towel and transfer to a warm location, leaving it to sit undisturbed for 3 hours.
Shape the dough: Turn the dough out onto a floured work surface and sprinkle the top with a bit more flour. Looking down on the circle of dough, grab it at the 12 o’clock position and gently pull it up and over itself, tucking it under the 6 o’clock position. Next, grab the dough at the 9 o’clock position and gently pull it up and over itself, tucking it under the 3 o’clock position. Then grab the dough at the 3 o’clock position and gently pull it up and over itself, tucking it under the 9 o’clock position. Lastly, grab the dough at the 6 o’clock position and gently pull it up and over itself, tucking it under the 12 o’clock position. Turn the entire ball of dough over. Repeat this whole process two more times.
Gently lift the dough and transfer it onto a parchment-lined baking sheet. Cover with a clean dish towel and transfer to a warm location, leaving it to sit undisturbed for 1 hour.
Preheat Dutch oven and oven: As soon as the dough is transferred to a warm location, place a Dutch oven, with lid on, into your conventional oven with the rack in the lowest position. Turn the oven on to 450°F and heat for one hour.
Score the loaf: Bring the shaped loaf to your work surface and uncover. Working quickly but carefully, score the top using a razor blade or sharp knife.
Bake the bread: Place trivets or a wire rack onto your work surface and carefully put the heated Dutch oven on top. Remove the lid. Lift loaf up by the four corners of the parchment paper and transfer into the Dutch oven. Remember to use oven mitts to return the lid on top and transfer into the oven. Bake for 15 minutes. Remove the lid at the 15 minute mark and bake for an additional 15 minutes.
After 30 minutes, remove the pot from the oven. Clutching the corners of the parchment paper, carefully lift the loaf up from the pan and out onto a wire rack.
Cool for at least 30 minutes, preferably an hour.
Homemade Sourdough Bread
Loading...
Organic flour blended with homemade sourdough starter, kosher salt and a tiny bit of honey…
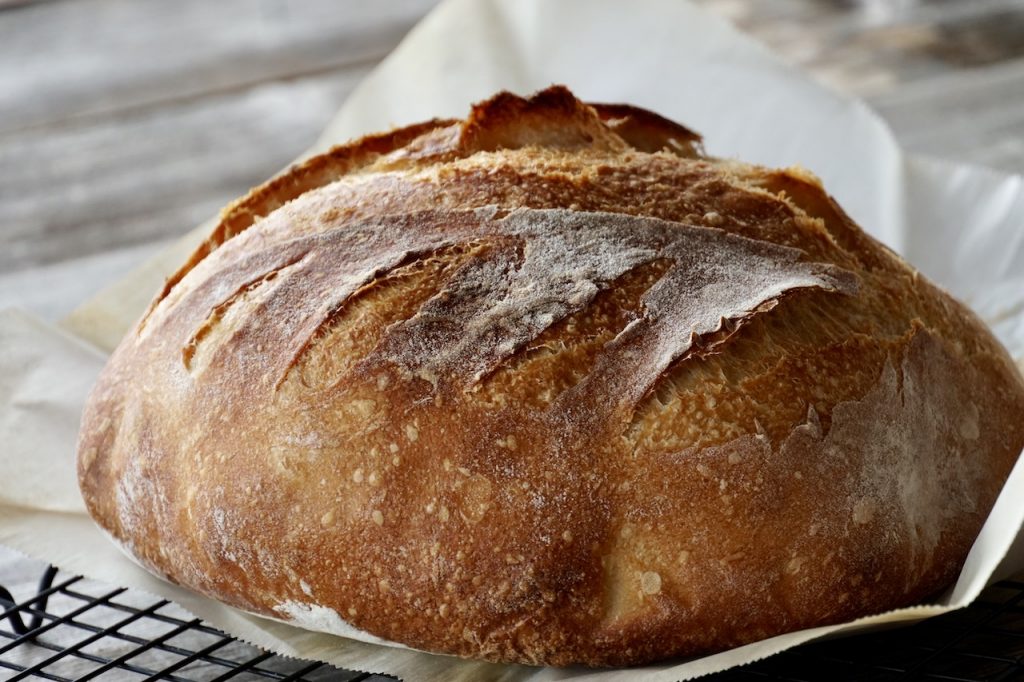
Our easy HOMEMADE SOURDOUGH BREAD recipe will turn you into a bread-making believer!
This post on how to make a HOMEMADE SOURDOUGH BREAD from scratch is the second instalment in our two-part series. We started by showing you the simple seven-day process of making an EASY SOURDOUGH STARTER. This recipe puts that essential ingredient to good use with delicious results.
Before I continue, let me just say at the outset that I am NOT a professional baker, nor do I aspire to be one. I’m probably just like you; a fearless at-home chef wannabe who loves good food. My goal was to learn how to make this bread, dial down the stress and anxiety that goes with it, and come away with a feasible process.
Trust me, I’ve made a lot of sourdough in the past few weeks and I think I’ve accomplished my objective – this bread is mighty fine, friends!
Before I go through my findings and tips, two important suggestions. Watch the VIDEO created for this recipe to give you a sense of where we’ll be going. Then, remember to have fun with this! It is SUCH an amazing adventure, I simply cannot recommend it enough. Just don’t take it (or yourself) too seriously.
Ready? Let me show you how to make HOMEMADE SOURDOUGH BREAD!
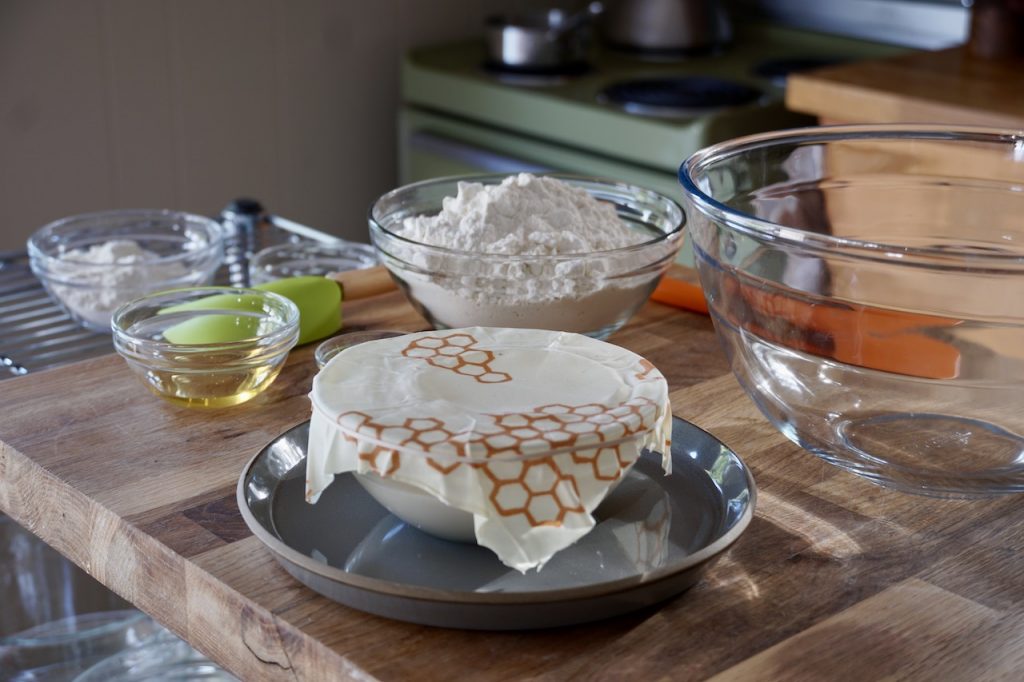
INGREDIENT LIST
Laying all of these ingredients out to take an overhead photo made me smile. I still can’t believe that this wonderful bread is made using just five ingredients. That said, I am going to suggest you follow my lead with some particulars.
In crafting both my SOURDOUGH STARTERS (see mention below) and the bread itself, I used organic flour. It happened by accident. I ran out of flour after my first recipe testing, and sure enough, the local grocery store only had the slightly more expensive organic flour on the shelves. I splurged – didn’t have a choice, really – and instantly noticed a difference in both my starters and the subsequent testing of this recipe. Organic flour is recommended yet, not essential – sometimes you just gotta work with what ya got!
Second thing is that I expect some of you may question why I used distilled water for the recipe. I did so out of necessity. The water at the cottage is unfiltered from the lake and I never use if for cooking. Instead, I have one of those standing water coolers that dispenses distilled. Although I’m not sure if it affected the recipe, I did want you to know it’s all I had to work with! Like the flour, work with what you have – good ‘ole tap water will work fine!
START ME UP
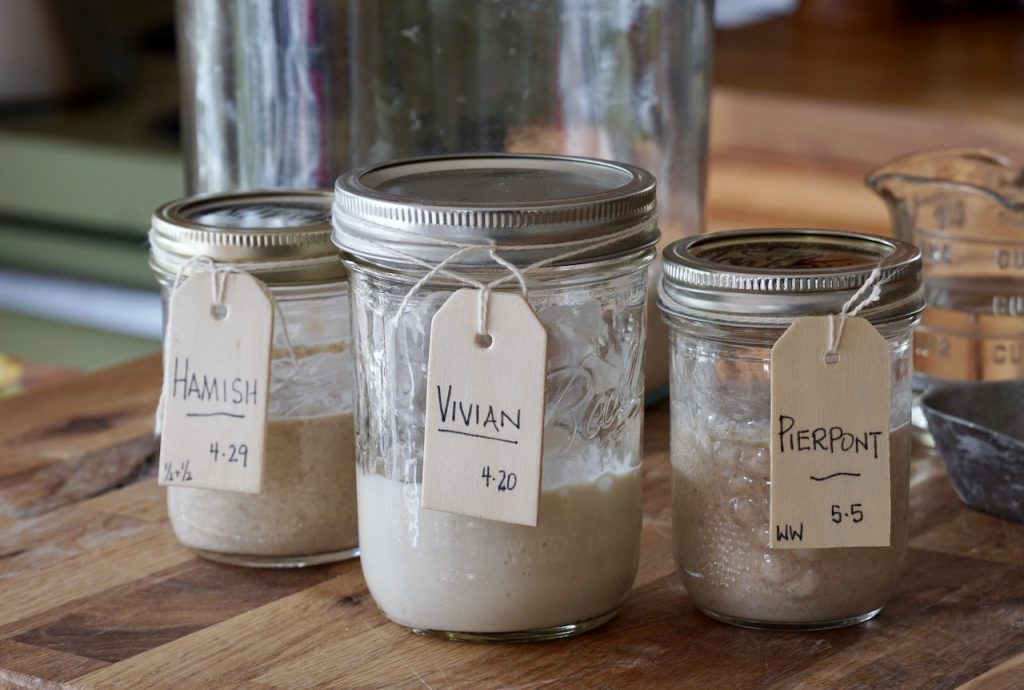
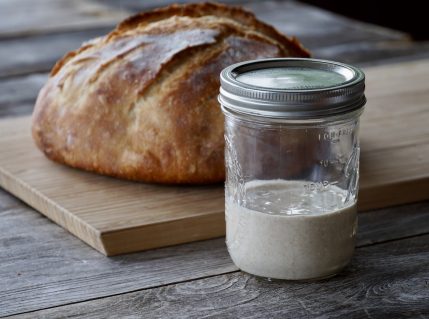
In case you missed it, the key ingredient in this and most other sourdough bread recipes is SOURDOUGH STARTER. If you don’t have a starter handy, try calling a friend to see if they can give you one. Failing that, head HERE to watch our simple step-by-step video, or go HERE to read about making your own EASY SOURDOUGH STARTER.
The one used in this recipe was made with 100% organic all-purpose flour. I’ve also made this recipe using a whole wheat starter partnered with organic whole wheat flour. Each flour and matching starter combo created a delicious bread. One thing is for sure, you’re going to have as good a time as I did experimenting with each and all!
The next few points are all centred around process. They hopefully will help your first attempt go from mix to dough to finished loaf without a hitch!
NIGHT MOVES
By the time I started working on my third test of the recipe, I wondered about boosting the starter right before using it; now I know this to be a smart move. Taking an amount of established starter, feeding it and leaving it in a warm spot the night before you plan to bake will prime it and get it ready to rise.
One more thing about that starter – although I kept thinking it needed to be super spongey when I mixed it into the dough, I now think the opposite. A starter that’s been recently fed will expand and relax to a creamy, almost yoghurt-type texture. I find that a starter with this type of consistency creates more air bubbles in the dough.
TAKE A STAND
Yes, you can add an extra old-school dimension to this recipe and work the dough by hand, but I chose not to on purpose. Letting a stand mixer do the trick is way easier and the finished loaf still has those telltale air bubbles.
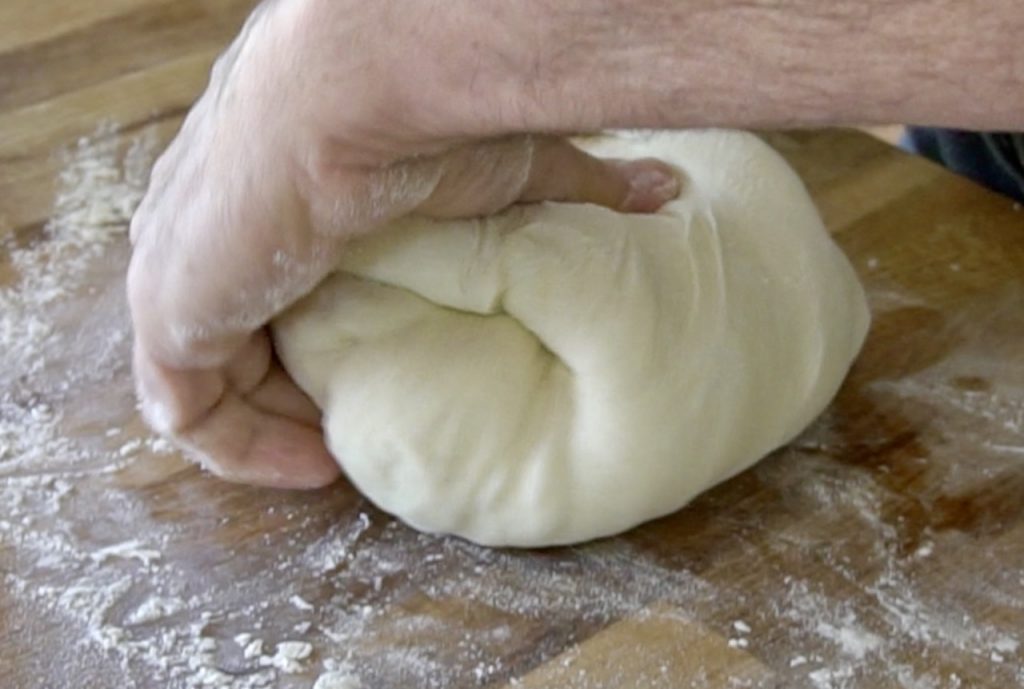
THREE FOLD
Don’t ask me why I started doing this; I have this weird thing with odd numbers. It just felt right to fold and flip the dough three times before the final rise. Hopefully the instructions below explain my perhaps crazy and convoluted process. The thing to keep in mind is that we’re creating tension. Getting your ball of dough as tight as possible is important. Trust me that it will relax as it rests during that final hour, so don’t freak out. Just keep going.
THE SCORE
Right before we send the loaf off to bake, score the top so that the bread almost pops open as it expands and cooks. It took some hunting but I finally found those old-fashioned double-edged razor blades at the pharmacy. Although you can use a very sharp and thin knife, I find razor blades work best. Also, play around with the way you score the top; it’s so amazing to see how it turns out when it comes out of the oven.
GONE TO POT
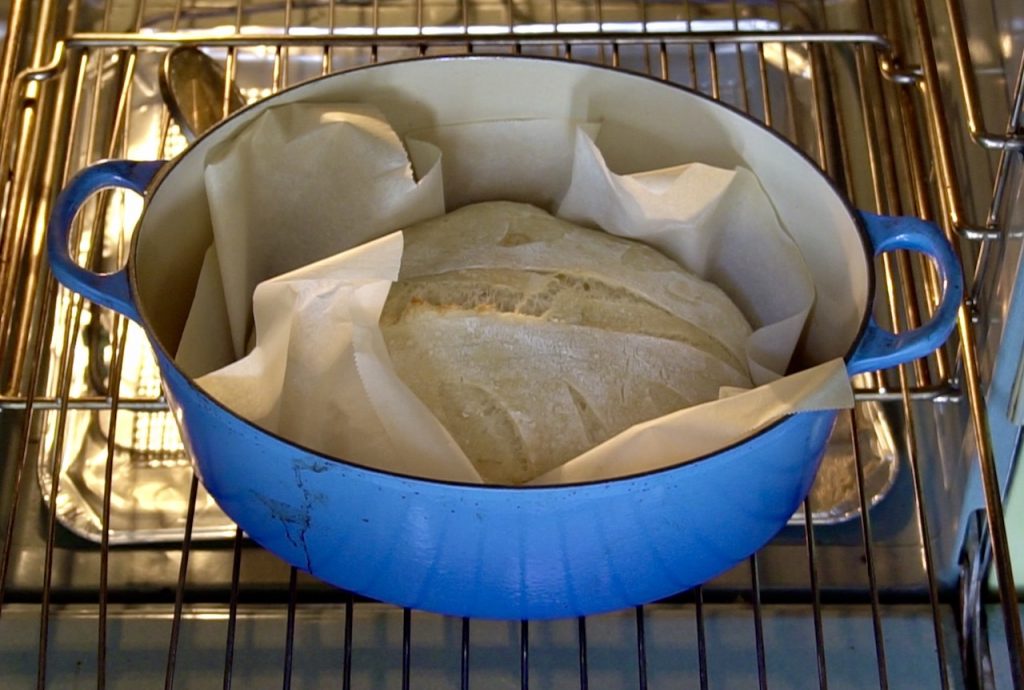
The only way to make sourdough bread is in a Dutch oven. If you don’t have one the first time you attempt this recipe, borrow one from a family member or friend. Once you see how amazing it performs when making sourdough, you may wish to purchase one for yourself. I’ve listed three different options towards the bottom of this post.
OH JOY
You’ll have back-to-back moments of joy during the baking process. The first will be at the 15 minute mark when you carefully lift the hot lid up and away from the Dutch oven and see the expanded loaf for the first time.
The second will be after the next 15 minutes of baking when you lift the loaf up out of the Dutch oven and onto a wire rack to cool. It will smell fabulous and you’ll even hear it crackle a bit as it cools! From start to finish, it truly is a dream come true for the senses!
You’ll find lots of ways to enjoy this bread, whether toasting it or using it to make killer sandwiches. I love it warm from the oven with nothing more than a bit of butter and a dollop of our STRAWBERRY RHUBARB JELLY, NANCY’S APRICOT JAM or our savoury ANTIPASTO. Let us know how you enjoy yours after making it.
It’s time to check HOMEMADE SOURDOUGH BREAD off of your must-make list!
Cook Mode Use cook mode to keep your screen on while cooking.
Ingredients
¾ cup sourdough starter
2 ounces organic all-purpose flour
2 tablespoons distilled water
3 cups organic all-purpose flour (see notes above)
1 ½ teaspoons kosher salt
1 tablespoon honey
1 ¼ cups distilled water, lukewarm (see note above)
vegetable oil for greasing
flour for work surface
Directions
Boost the starter: The evening before making the bread, place the quantity of starter into a medium-sized bowl. Sprinkle with 2 ounces of flour and 2 tablespoons of water. Stir together vigorously. Cover with porous wrap and place onto a plate. Transfer to a warm location, leaving it to sit undisturbed overnight.
Prepare the dough: On the day-of, begin by heating the water in a small pan until lukewarm. Whisk or stir the flour and salt together in the bowl of a stand mixer. Add the honey, then the boosted starter, followed by the warmed water. Stir together until well combined. Cover with a clean dish towel, leaving it to sit undisturbed for 1 hour.
After 1 hour, transfer the bowl to the stand mixer fitted with the hook attachment. Process the dough on a moderate speed for 5 minutes. If preparing by hand, knead the dough in the bowl for 8 to 10 minutes or until the dough comes away from your hand and no longer sticks to the bowl. Transfer the dough into a clean medium-sized bowl.
Dip the tips of your fingers into a tiny bit of vegetable oil and oil the inside of the bowl. Cover with a clean dish towel and transfer to a warm location, leaving it to sit undisturbed for 3 hours.
Shape the dough: Turn the dough out onto a floured work surface and sprinkle the top with a bit more flour. Looking down on the circle of dough, grab it at the 12 o’clock position and gently pull it up and over itself, tucking it under the 6 o’clock position. Next, grab the dough at the 9 o’clock position and gently pull it up and over itself, tucking it under the 3 o’clock position. Then grab the dough at the 3 o’clock position and gently pull it up and over itself, tucking it under the 9 o’clock position. Lastly, grab the dough at the 6 o’clock position and gently pull it up and over itself, tucking it under the 12 o’clock position. Turn the entire ball of dough over. Repeat this whole process two more times.
Gently lift the dough and transfer it onto a parchment-lined baking sheet. Cover with a clean dish towel and transfer to a warm location, leaving it to sit undisturbed for 1 hour.
Preheat Dutch oven and oven: As soon as the dough is transferred to a warm location, place a Dutch oven, with lid on, into your conventional oven with the rack in the lowest position. Turn the oven on to 450°F and heat for one hour.
Score the loaf: Bring the shaped loaf to your work surface and uncover. Working quickly but carefully, score the top using a razor blade or sharp knife.
Bake the bread: Place trivets or a wire rack onto your work surface and carefully put the heated Dutch oven on top. Remove the lid. Lift loaf up by the four corners of the parchment paper and transfer into the Dutch oven. Remember to use oven mitts to return the lid on top and transfer into the oven. Bake for 15 minutes. Remove the lid at the 15 minute mark and bake for an additional 15 minutes.
After 30 minutes, remove the pot from the oven. Clutching the corners of the parchment paper, carefully lift the loaf up from the pan and out onto a wire rack.

 Until Labour Day