4 large egg whites plus 1 whole large egg, at room temperature
1 cup (227g) full-fat plain yogurt, at room temperature
2 teaspoons vanilla extract
1 teaspoon almond extract
For the filling:
1 8oz. package cream cheese, at room temperature
1 cup granulated sugar
1 teaspoon vanilla extract
2 cups 35% whipping cream
2 cups mini-marshmallows
3 cups assorted fresh fruit such as strawberries, blueberries, apricots, peaches
fresh mint to garnish
Takes ,
serves 12.
Instructions
Prep steps: Preheat the oven to 350°F. Grease two 8 x 2-inch round cake pans. Add a round of parchment to the bottom of each. Grease the parchment, then flour the pans. Set to the side.
Prepare fruit: Rinse fruit under cool water. Pat dry and slice, if required.
Prepare cakes: Place flour, sugar, baking powder and salt into the bowl of a stand mixer stirring ingredients together to combine. Add the butter to the bowl then run the mixer on low with paddle attachment to create a mixture that resembles coarse sand. Add the egg whites one at a time, then the whole egg, beating well after each addition to begin building the structure of the cake. Scrape down the sides and bottom of the bowl after each addition.
In a small bowl, whisk the yogurt with the vanilla and almond extracts. Add this mixture to the batter in thirds. Beat 1 to 2 minutes after each addition, until fluffy. Be sure to scrape down the sides and bottom of the bowl.
Pour the batter into the prepared pans. Bake for 25 to 30 minutes until top is golden or a toothpick or cake tester inserted into the centre comes out clean.
Remove from the oven and let cakes cool in pans on a wire rack for 5 minutes. Remove cakes from the pans and peel off parchment. Cool cakes completely on a wire rack.
Prepare filling: Using a hand mixer, whip 35% whipping cream until it forms stiff peaks. In a second bowl, blend cream cheese together with sugar and vanilla until light and fluffy. Reserve two tablespoons of the cream cheese mixture to the side. Gently fold the whipped cream into the cream cheese mixture. Once incorporated, fold in the marshmallows.
To assemble: Cut the rounded domes off the cakes, then slice each one horizontally, creating 4 cake layers. Smear the reserved cream cheese whip on a level cake plate or footed cake stand. Place the first layer of cake into the centre of the plate, cut side facing up. Smear some jam across the surface, spreading it out evenly using an icing spatula. Add 3 or 4 dollops of the cream filling, smoothing it out across the surface but leaving some room at the edge. Dot the filling with berries and sliced fruit. Repeat until all the layers are decorated. For the top layer, place fruit in attractive groupings. Add a few sprigs of fresh mint.
Loosely cover with wrap and refrigerate for at least two hours before serving.
Summer Chantilly Cake
Ingredients
For the white cake:
2¾ cups (330g) cake and pastry flour
1 ⅔ cups (333g) superfine sugar
1 tablespoon baking powder
¾ teaspoon kosher salt
12 tablespoons (170g) unsalted butter, softened
4 large egg whites plus 1 whole large egg, at room temperature
1 cup (227g) full-fat plain yogurt, at room temperature
2 teaspoons vanilla extract
1 teaspoon almond extract
For the filling:
1 8oz. package cream cheese, at room temperature
1 cup granulated sugar
1 teaspoon vanilla extract
2 cups 35% whipping cream
2 cups mini-marshmallows
3 cups assorted fresh fruit such as strawberries, blueberries, apricots, peaches
fresh mint to garnish
Directions
Prep steps: Preheat the oven to 350°F. Grease two 8 x 2-inch round cake pans. Add a round of parchment to the bottom of each. Grease the parchment, then flour the pans. Set to the side.
Prepare fruit: Rinse fruit under cool water. Pat dry and slice, if required.
Prepare cakes: Place flour, sugar, baking powder and salt into the bowl of a stand mixer stirring ingredients together to combine. Add the butter to the bowl then run the mixer on low with paddle attachment to create a mixture that resembles coarse sand. Add the egg whites one at a time, then the whole egg, beating well after each addition to begin building the structure of the cake. Scrape down the sides and bottom of the bowl after each addition.
In a small bowl, whisk the yogurt with the vanilla and almond extracts. Add this mixture to the batter in thirds. Beat 1 to 2 minutes after each addition, until fluffy. Be sure to scrape down the sides and bottom of the bowl.
Pour the batter into the prepared pans. Bake for 25 to 30 minutes until top is golden or a toothpick or cake tester inserted into the centre comes out clean.
Remove from the oven and let cakes cool in pans on a wire rack for 5 minutes. Remove cakes from the pans and peel off parchment. Cool cakes completely on a wire rack.
Prepare filling: Using a hand mixer, whip 35% whipping cream until it forms stiff peaks. In a second bowl, blend cream cheese together with sugar and vanilla until light and fluffy. Reserve two tablespoons of the cream cheese mixture to the side. Gently fold the whipped cream into the cream cheese mixture. Once incorporated, fold in the marshmallows.
To assemble: Cut the rounded domes off the cakes, then slice each one horizontally, creating 4 cake layers. Smear the reserved cream cheese whip on a level cake plate or footed cake stand. Place the first layer of cake into the centre of the plate, cut side facing up. Smear some jam across the surface, spreading it out evenly using an icing spatula. Add 3 or 4 dollops of the cream filling, smoothing it out across the surface but leaving some room at the edge. Dot the filling with berries and sliced fruit. Repeat until all the layers are decorated. For the top layer, place fruit in attractive groupings. Add a few sprigs of fresh mint.
Loosely cover with wrap and refrigerate for at least two hours before serving.
Summer Chantilly Cake
5 / 5. 2
A tender white cake layered with a luscious whipped marshmallow cream and boosted with the flavours of fresh summer fruit and berries…
This summer dessert recipe exceeds all expectations. Not only is it jaw-droppingly gorgeous, it’s also fantastically flavourful. We also think this upgrade from the standard berry Chantilly cake recipe is way more exciting, guaranteed to wow and impress anyone lucky enough to enjoy a piece. I mean, seriously, what’s not to love about a tender white cake paired with a billowy filling of whipped cream and cream cheese, plus the freshest of summer fruits – assorted berries, peaches and apricots. This SUMMER CHANTILLY CAKE is a seasonal dessert dream come true.
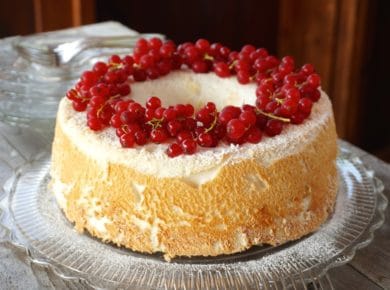
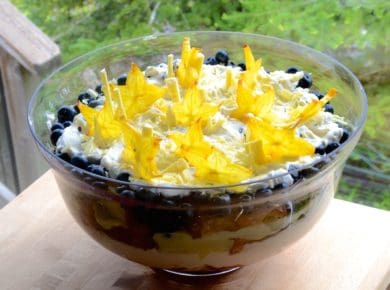
Before we go through tips and suggestions on this relatively easy dessert recipe, here are a few leads on other recipes that share a similar vibe. First, this EASY BERRY TRIFLE layered with cream, custard, cake and fruit. Not to be outdone, and just as beautiful, is this chocolatey BLACK FOREST TRIFLE. Finally, another dessert made with the same creamy filling used in this recipe, our CHERRY-BERRIES ON A CLOUD. All of these desserts will make your summer taste amazing.
Back to this beauty. Here are some tips on making our SUMMER CHANTILLY CAKE:
THE SET UP
We normally begin every post with an image of the ingredients needed to make the recipe. For this recipe, though, there are three components: the simple white cake, the cream filling and the fresh fruit and fruit jam. Think of the above photo as a sneak peek at where this recipe will take you. The set-up pic was taken right before I started assembling the cake, and I remember getting super excited at this point in the recipe. You will be too because, you know what? You’ve got this!
PREP STEPS
The instructions on how to make this dessert are listed down below. The first step details some simple prep steps. We preheat the oven to 350°F and grease, line and flour a pair of 8-inch round cake pans. Make sure those cake pans are at least two inches high, as the cakes puff way up as they bake.
One additional prep step worth mentioning is to bring the cream cheese, unsalted butter and farm-fresh eggs to room temperature before you begin. Doing so ensures the cakes have a tender crumb because the butter will blend perfectly with the sugar and flour. The cakes will also bake perfectly because room-temperature eggs expand more as they react to the heat. Lastly, the cream filling is made creamier because the cream cheese aerates more easily. As my friend Elizabeth Baird often says, baking is a science. This little pro tip proves it.
TOOLS TO MAKE IT
Fingers crossed you have these tools in your arsenal; they make this particular recipe a breeze. If you don’t have any of the following, look to purchase them online or head to a favourite department store or baking supply store. As mentioned in the prep steps, you’ll need a set of 2-inch high, 8-inch round cake pans plus parchment paper. To keep things simple, we also suggest making the cake batter in a stand mixer using the paddle—not the whisk—attachment. Later in the recipe, you’ll need a hand mixer for the cream filling. These tools will help greatly in the process.
SIMPLE WHITE CAKE
In the VIDEO attached to this recipe, we did a big shout-out to the team in the KING ARTHUR test kitchen. They did all the heavy lifting by crafting this perfect yet simple white cake recipe. They have lots of other recipes that may be of interest to all the bakers out there. Feel free to visit their site and subscribe when visiting. It’s a fabulous site filled with great recipes and helpful information. LOVE! However, true to form, I did make a few adjustments to their recipe based on personal taste.
First, I swapped vanilla yogurt with a full-fat plain yogurt. Although we could have used sour cream, mascarpone cheese, or even ricotta cheese, the yogurt has a more pleasing silkiness. Additionally, using plain yogurt dials down the vanilla flavouring while also reducing the quantity of sugar. Everyone who tries this cake loves it prepared this way.
The second tweak is one I made regarding the almond extract. We invite you to make this cake your own, so feel free to try other flavours. I’ve tried the cake with both coconut extract and lemon extract and loved both. Other flavour extracts that work include orange, walnut, cinnamon, cherry and even apricot extract. Experiment with the possibilities.
HOW TO MAKE A WHITE CAKE
Making the cake for our SUMMER CHANTILLY CAKE recipe is easy. Blend the cake and pastry flour, superfine sugar, baking powder, kosher salt and room temperature butter until the mix looks like coarse sand. The above photo captures the goal perfectly. Simply add the ingredients to the bowl of a stand mixer and run on low speed, letting the paddle attachment do all the work. That sandy dry mix helps build the structure of the cake.
WHY USE SUPERFINE SUGAR?
The other thing about that sandy texture is about using superfine sugar. The above photo shows, from left to right: granulated sugar, superfine sugar and icing sugar. Icing sugar, AKA powdered sugar, is most often used to craft frostings for cakes, while granulated sugar is our standard all-purpose sugar variety. Superfine sugar sits right in between, not too coarse, not too fine. It’s especially perfect when making a cake such as this because it blends evenly with the butter and very fine cake and pastry flour. Look for it at a bulk food store or baking speciality shop. While you’re there, buy double what this recipe calls for. Superfine sugar is also used to make this tangy LEMON MERINGUE PIE (hint!).
FRESH EGGS
My lightbulb moment during this recipe was reducing the number of whole eggs (1) and increasing the quantity of egg whites (4) to create a pale white cake. You’d think I may have just figured it out on my own, but no, it took this recipe to prove the concept. For best results, we suggest using farm-fresh, organic eggs. Yes, you will taste the difference.
WHITE CAKE BATTER
I also wanted to include this photo of the finished batter. Hopefully, you’re getting a sense of the consistency. It’s not runny in the least; in fact it’s rather dense. Adding the egg whites and whole egg to the dry ingredients made it creamy and gave it some volume. But the final addition of the full-fat yogurt simply blended everything together with a rich texture.
Very important! Don’t forget to smooth the batter out in the pans after you divide it between the two. Yes, the cakes will puff up and dome a little, so sending them to the oven smooth is important for evenness and the overall finished look.
BAKED CAKES
Standard instructions for baking the cakes; we‘re looking for golden-brown tops. The sides of the cake will shrink in just a little from the edges of the pans, and a cake tester or toothpick, inserted in the middle of the cake, comes away clean.
Cool the pans on a wire rack for five minutes before inverting the cakes on the wire rack to remove the pans and parchment. Leave the cakes to cool completely before assembling.
CREAM FILLING
The above photo shows the ingredients needed to make the filling, all of which you’ll have no trouble finding at your local grocery store. You’ll need 35% whipping cream, AKA heavy cream, granulated sugar, vanilla extract, cream cheese and then, one ingredient that even had me scratching my head, mini marshmallows. For best results, have the cream cheese at room temperature before you begin. We also suggest you try a few mini marshmallows before you begin… just to make sure they’re fresh, LOL!
WHIPPED CREAM
The preparation of the filling begins with us whipping two cups of heavy whipping cream in a medium bowl. When making whipped cream, I often do a sprinkle of granulated sugar and sometimes a dash of vanilla extract. I decided against it in this case since enhancements are on the way. When whipping the cream, the goal is to whip until it holds stiff peaks. Of course, you can do this by hand using a whisk, but we think a hand mixer is the way to go. Less fussy.
CREAM CHEESE AND MARSHMALLOWS
Next step is to add the room temperature cream cheese, a teaspoon of vanilla extract and the sugar into a second large bowl. Think of it as an upgrade from sweetened whipped cream. No need to rinse the beaters from the whipped cream, just tap them on the first bowl to knock off the excess, then get whipping. Once the cheese mixture is light and fluffy, make sure to reserve about two tablespoons of that mixture in a small bowl. Set it to the side; we’ll use it in a bit to hold the cake on the cake plate during assembly.
Once your cream cheese mixture is complete, gently fold in the whipped cream. I did it in three parts, gently folding it in until incorporated. Last step is to add the two cups of mini marshmallows, folding them in much like the whipped cream.
FRESH SUMMER FRUIT
Although we considered making a berry Chantilly cake, we figured more fruit meant more flavour and interest. We used fresh strawberries, blueberries, apricots and peaches for our SUMMER CHANTILLY CAKE, and other fruit will work too. You can adjust the recipe based on what’s in season. Other fruits to consider include raspberries, blackberries, nectarines, plums, and more unusual berries such as gooseberries and red currants. The recipe also calls for a cup of berry jam. Again, use a favourite although a homemade jam always seems to taste better in a recipe such as this.
HOW TO ASSEMBLE A LAYER CAKE
Remember the pic we posted at the top? Let’s springboard from there. Berries and fruit are ready, we’ve portioned out some homemade raspberry jam ,and the creamy filling is perfect. Before layering, we do our best to level the cakes by trimming away the bulged dome on each using a serrated knife. Each cake is also cut in half horizontally. Yup, and just like that, two cakes are now four!
To start, smear the reserved cream cheese mixture on a level cake plate or footed cake stand. Then add the first cake layer, cut side facing up. Smear some jam across the surface evenly, then add some of the cream filling, smoothing it out as well, leaving some space from the cake’s edge. Final touch on the layer is to speckle the cream with berries and sliced fruit. No special technique here, but don’t be skimpy. The goal is to craft a dessert with a pronounced fresh fruit vibe.
With the first layer done, we now repeat three more times. One tip is to gently press down every time you add another cake layer. This presses the fruit and cream topping closer to the edge, distributing the filling evenly.
CAKE DECORATING PRO TIP
Please follow my lead and take the time to tuck berries and fruit into the filling along all of the edges, covering any gaps. Use a casual approach and make it look like it just happened to be there. It’s a nice finishing touch to your summer dessert masterpiece, as is a sprig or two of fresh mint on top. If you have some growing, use that.
One final important instruction on this recipe: you must lightly cover with plastic wrap and place this cake in the fridge for at least two hours before serving. That creamy cream cheese filling will chill just enough to assist in keeping the layers together when you serve. Like I said at the outset, you got this!
TO SERVE
Better break it to you, I seriously doubt you’ll be able to serve this glorious confection with a slice standing up. It’s just too mile-high and the risk of toppling is too great. Best to slice tall, thin slices, transferring them to dessert plates, laying them down on the side. Love watching people dig in and take their first bite. Always lots of oohs and aahs, and every so often someone will say, “Tastes like summer!” Music to a summer cake-maker’s ears.
PIN IT!
This scrumptious recipe is so amazing and beautiful, make it and go viral by posting it on Facebook and Instagram with the hashtag #weekendatthecottage. Also, remember to PIN it to a favourite dessert or holiday board on PINTEREST or BOOKMARK this tab for easy access. SHARE it with friends so they can make it too. Thanks!
Share the sweet taste of summer with this SUMMER CHANTILLY CAKE. So good!
Cook Mode Use cook mode to keep your screen on while cooking.
Ingredients
For the white cake:
2¾ cups (330g) cake and pastry flour
1 ⅔ cups (333g) superfine sugar
1 tablespoon baking powder
¾ teaspoon kosher salt
12 tablespoons (170g) unsalted butter, softened
4 large egg whites plus 1 whole large egg, at room temperature
1 cup (227g) full-fat plain yogurt, at room temperature
2 teaspoons vanilla extract
1 teaspoon almond extract
For the filling:
1 8oz. package cream cheese, at room temperature
1 cup granulated sugar
1 teaspoon vanilla extract
2 cups 35% whipping cream
2 cups mini-marshmallows
3 cups assorted fresh fruit such as strawberries, blueberries, apricots, peaches
fresh mint to garnish
Directions
Prep steps: Preheat the oven to 350°F. Grease two 8 x 2-inch round cake pans. Add a round of parchment to the bottom of each. Grease the parchment, then flour the pans. Set to the side.
Prepare fruit: Rinse fruit under cool water. Pat dry and slice, if required.
Prepare cakes: Place flour, sugar, baking powder and salt into the bowl of a stand mixer stirring ingredients together to combine. Add the butter to the bowl then run the mixer on low with paddle attachment to create a mixture that resembles coarse sand. Add the egg whites one at a time, then the whole egg, beating well after each addition to begin building the structure of the cake. Scrape down the sides and bottom of the bowl after each addition.
In a small bowl, whisk the yogurt with the vanilla and almond extracts. Add this mixture to the batter in thirds. Beat 1 to 2 minutes after each addition, until fluffy. Be sure to scrape down the sides and bottom of the bowl.
Pour the batter into the prepared pans. Bake for 25 to 30 minutes until top is golden or a toothpick or cake tester inserted into the centre comes out clean.
Remove from the oven and let cakes cool in pans on a wire rack for 5 minutes. Remove cakes from the pans and peel off parchment. Cool cakes completely on a wire rack.
Prepare filling: Using a hand mixer, whip 35% whipping cream until it forms stiff peaks. In a second bowl, blend cream cheese together with sugar and vanilla until light and fluffy. Reserve two tablespoons of the cream cheese mixture to the side. Gently fold the whipped cream into the cream cheese mixture. Once incorporated, fold in the marshmallows.
To assemble: Cut the rounded domes off the cakes, then slice each one horizontally, creating 4 cake layers. Smear the reserved cream cheese whip on a level cake plate or footed cake stand. Place the first layer of cake into the centre of the plate, cut side facing up. Smear some jam across the surface, spreading it out evenly using an icing spatula. Add 3 or 4 dollops of the cream filling, smoothing it out across the surface but leaving some room at the edge. Dot the filling with berries and sliced fruit. Repeat until all the layers are decorated. For the top layer, place fruit in attractive groupings. Add a few sprigs of fresh mint.
Loosely cover with wrap and refrigerate for at least two hours before serving.

 Until Labour Day