9 tablespoons (128 grams) cold unsalted butter, cut into small pieces
1 large egg yolk
For the filling, pastry cream:
1¾ cups whole milk
1 vanilla bean
6 large egg yolks
¾ cup granulated sugar
3 tablespoons cornstarch
¼ teaspoon kosher salt
2 tablespoons butter
To decorate:
2 pints fresh strawberries, rinsed, hulled and sliced
4 tablespoons of pale-coloured fruit jelly such as apple
Takes ,
serves 8.
Instructions
Lightly grease a 9-inch tart pan with a removable bottom. Also spritz a square of foil with cooking spray. Set both aside with some pie weights, beans or rice.
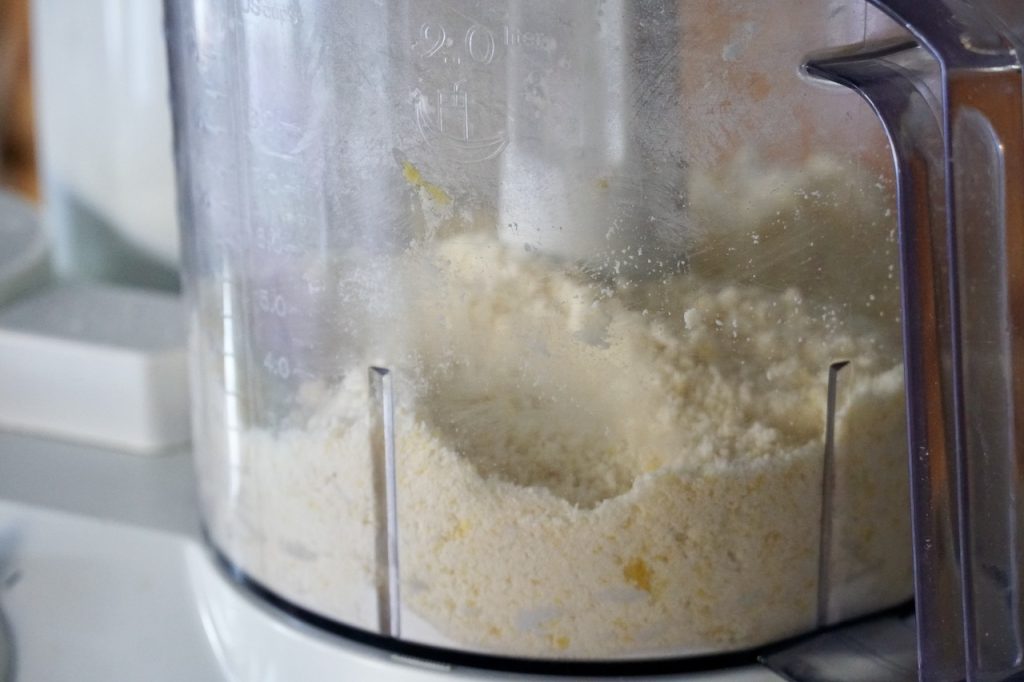
Prepare the tart dough: Whisk flour, sugar and salt together in a medium bowl then drop half the quantity into the canister of a food processor fitted with a blade attachment. Drop the butter into the canister followed by the remaining dry mix. Pulse 12 to 15 times to cut the butter into the dry mix. Stir the egg yolk to lightly to break it open. Add it in 3 parts down the chute, little by little, pulsing after each addition. Pulse until the dough holds together when you pinch it.
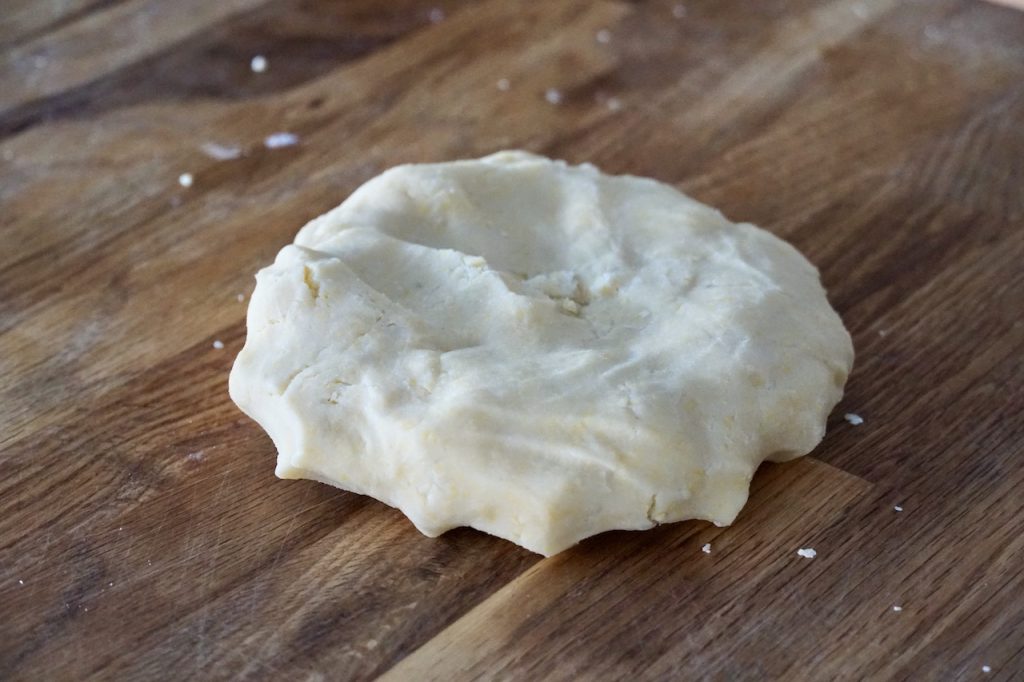
Turn mixture out onto your work surface, working it with the heel of your palm to fully incorporate. Gather and shape into a flattened disc.
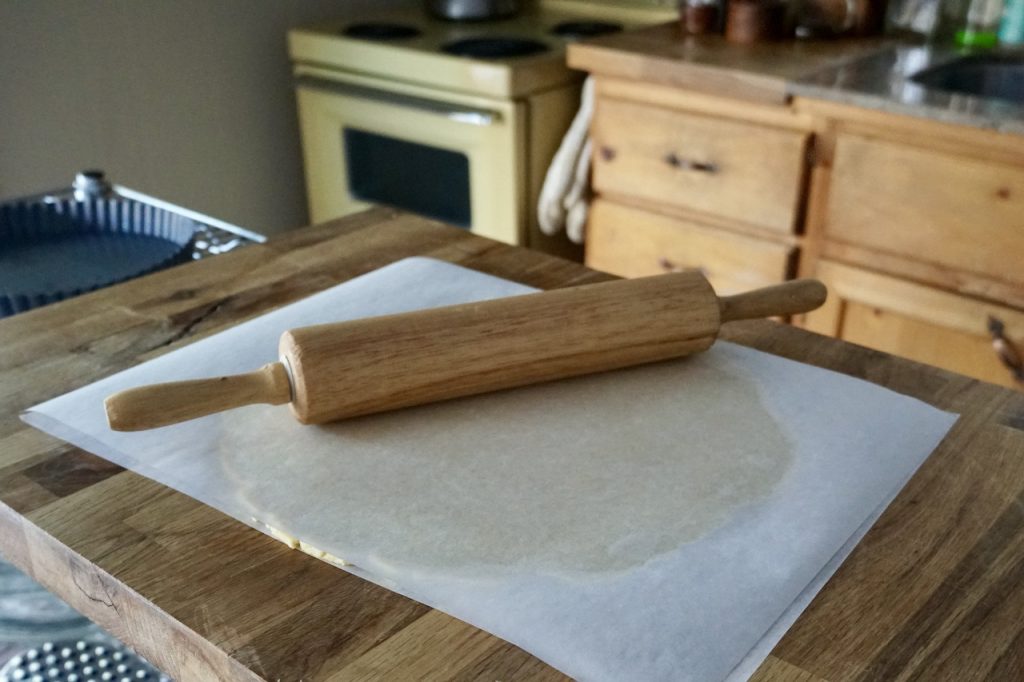
Line the tart pan: Roll the dough into an 11-inch circle between layers of parchment. Remove top piece of parchment then invert dough onto the tart pan. Lift edges to push dough down into the pan. Trim away excess dough from the edge, then press firmly into the sides of the pan. Cover with wrap and transfer to the refrigerator to chill for at least 30 minutes, we recommend 60.
Prepare the tart: Preheat oven to 375°F.
Remove shell from fridge. Prick bottom will fork. Invert square of greased foil over the shell. Add pie weights or a cup of dry beans or dry rice to weigh down the foil. Place tart pan onto a parchment-lined baking sheet then transfer to oven. Blind bake for 15 minutes. Then remove foil and weights. Return shell to the oven to bake for 5 minutes more or until crust is a light golden colour. Remove from oven, leaving to cool completely.
Prepare pastry cream: Whisk egg yolks, sugar, kosher salt and cornstarch in a medium bowl until light in colour. Cut vanilla bean in half. Draw a knife across each half to extract black paste or seeds. Pour milk into saucepan. Add vanilla seeds and pod. Heat over medium heat until scalded. Discard vanilla pod, then transfer milk to liquid measure. Slowly—really slowly—pour hot milk into egg mixture, whisking continuously to temper the eggs. Continue until all of the milk is added. Place strainer over saucepan, pour egg mixture through to catch any lumps. Return saucepan to medium heat. Stir custard continuously as it cooks for about 4 minutes or until very thick and smooth. Remove from heat stirring in the butter until melted. Transfer to a bowl adding plastic wrap directly to surface to prevent a skin from forming. Cool for about 30 minutes then transfer to the refrigerator to cool for 2 hours.
Assemble tart: Pour custard into cooled shell, smoothing it out to an even layer.
Add strawberries in concentric circles starting from the outside and working in.
Glaze tart: Warm jelly in a small saucepan to melt. Brush top of tart with jelly to make berries glisten.
Cover loosely with wrap and chill tart for at least 6 hours to set.
To serve: cut wedges and serve as is, or present with a dollop of whipped cream, mint sprig and extra berries.
Strawberry Custard Tart
Ingredients
For the shortcrust pastry:
1½ cup (204 grams) unbleached all-purpose flour
½ cup (60 grams) icing (confectioners’) sugar
¼ teaspoon kosher salt
9 tablespoons (128 grams) cold unsalted butter, cut into small pieces
1 large egg yolk
For the filling, pastry cream:
1¾ cups whole milk
1 vanilla bean
6 large egg yolks
¾ cup granulated sugar
3 tablespoons cornstarch
¼ teaspoon kosher salt
2 tablespoons butter
To decorate:
2 pints fresh strawberries, rinsed, hulled and sliced
4 tablespoons of pale-coloured fruit jelly such as apple
Directions
Lightly grease a 9-inch tart pan with a removable bottom. Also spritz a square of foil with cooking spray. Set both aside with some pie weights, beans or rice.
Prepare the tart dough: Whisk flour, sugar and salt together in a medium bowl then drop half the quantity into the canister of a food processor fitted with a blade attachment. Drop the butter into the canister followed by the remaining dry mix. Pulse 12 to 15 times to cut the butter into the dry mix. Stir the egg yolk to lightly to break it open. Add it in 3 parts down the chute, little by little, pulsing after each addition. Pulse until the dough holds together when you pinch it.
Turn mixture out onto your work surface, working it with the heel of your palm to fully incorporate. Gather and shape into a flattened disc.
Line the tart pan: Roll the dough into an 11-inch circle between layers of parchment. Remove top piece of parchment then invert dough onto the tart pan. Lift edges to push dough down into the pan. Trim away excess dough from the edge, then press firmly into the sides of the pan. Cover with wrap and transfer to the refrigerator to chill for at least 30 minutes, we recommend 60.
Prepare the tart: Preheat oven to 375°F.
Remove shell from fridge. Prick bottom will fork. Invert square of greased foil over the shell. Add pie weights or a cup of dry beans or dry rice to weigh down the foil. Place tart pan onto a parchment-lined baking sheet then transfer to oven. Blind bake for 15 minutes. Then remove foil and weights. Return shell to the oven to bake for 5 minutes more or until crust is a light golden colour. Remove from oven, leaving to cool completely.
Prepare pastry cream: Whisk egg yolks, sugar, kosher salt and cornstarch in a medium bowl until light in colour. Cut vanilla bean in half. Draw a knife across each half to extract black paste or seeds. Pour milk into saucepan. Add vanilla seeds and pod. Heat over medium heat until scalded. Discard vanilla pod, then transfer milk to liquid measure. Slowly—really slowly—pour hot milk into egg mixture, whisking continuously to temper the eggs. Continue until all of the milk is added. Place strainer over saucepan, pour egg mixture through to catch any lumps. Return saucepan to medium heat. Stir custard continuously as it cooks for about 4 minutes or until very thick and smooth. Remove from heat stirring in the butter until melted. Transfer to a bowl adding plastic wrap directly to surface to prevent a skin from forming. Cool for about 30 minutes then transfer to the refrigerator to cool for 2 hours.
Assemble tart: Pour custard into cooled shell, smoothing it out to an even layer.
Add strawberries in concentric circles starting from the outside and working in.
Glaze tart: Warm jelly in a small saucepan to melt. Brush top of tart with jelly to make berries glisten.
Cover loosely with wrap and chill tart for at least 6 hours to set.
To serve: cut wedges and serve as is, or present with a dollop of whipped cream, mint sprig and extra berries.
Strawberry Custard Tart
5 / 5. 1
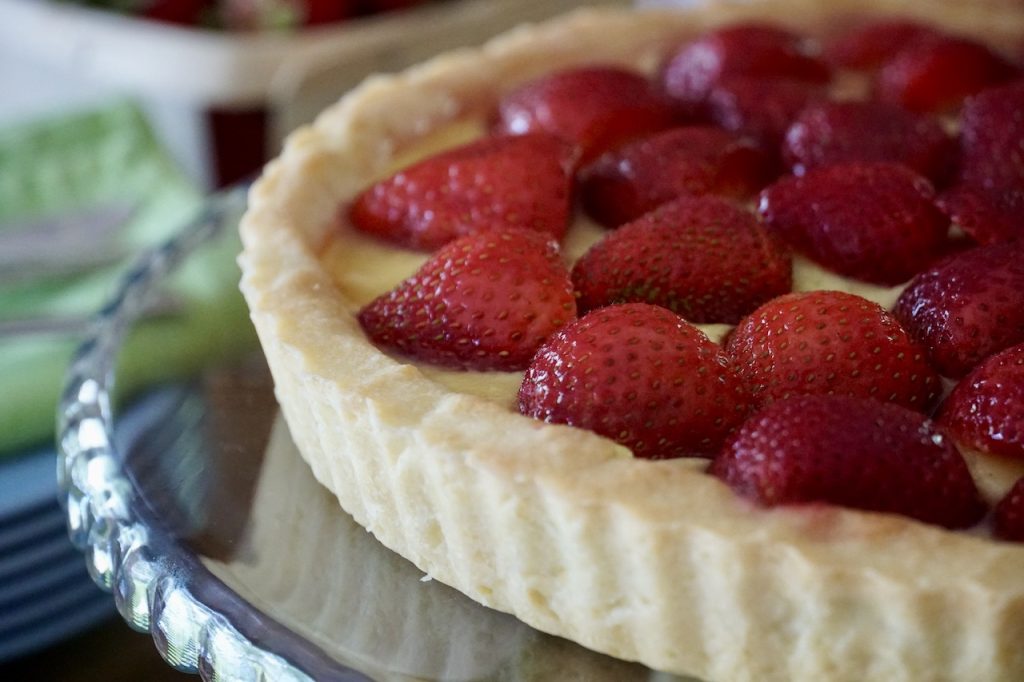
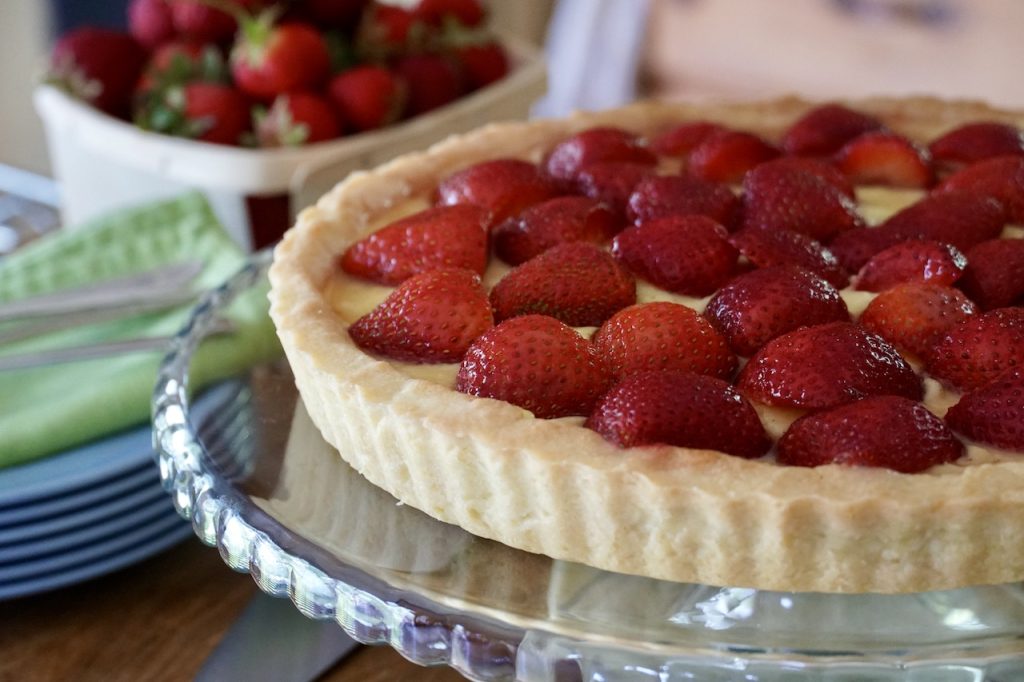
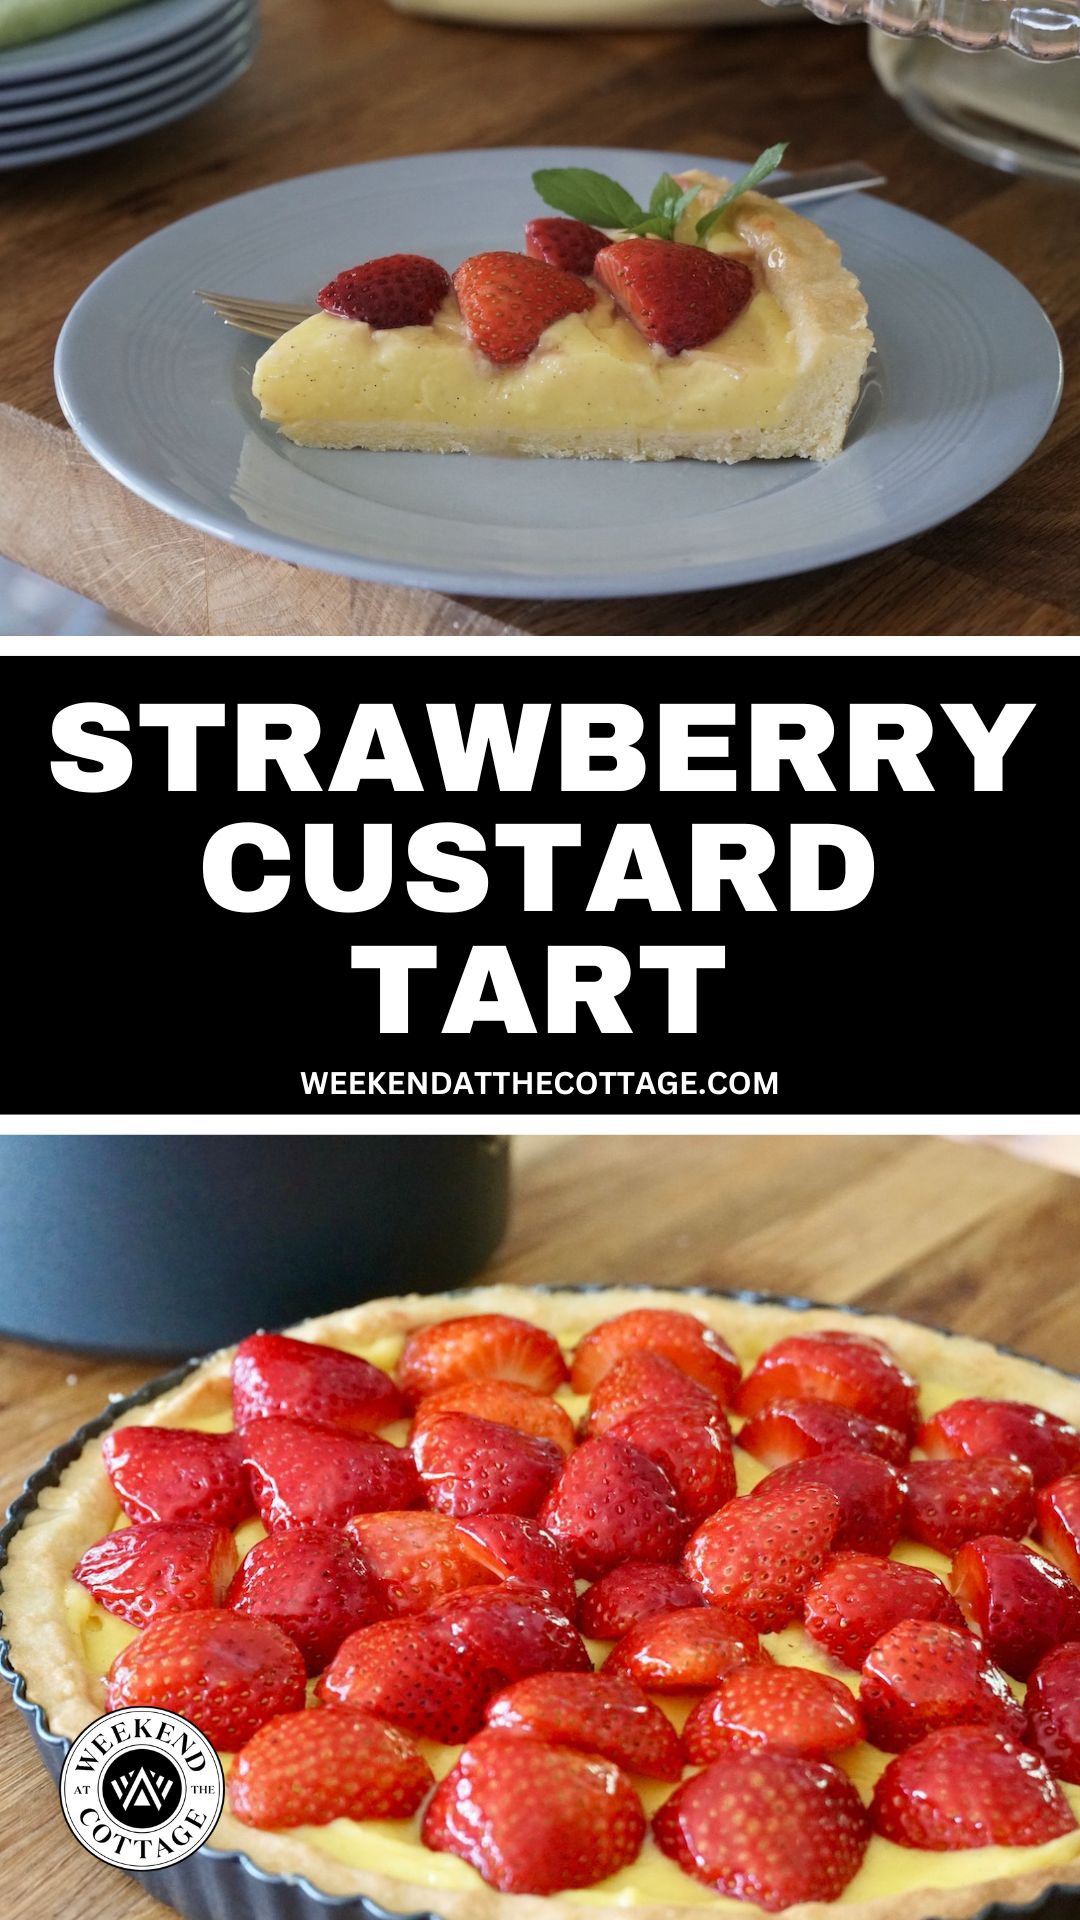
A buttery tart shell filled with creamy vanilla custard, topped with juicy strawberries and a fruit jelly glaze…
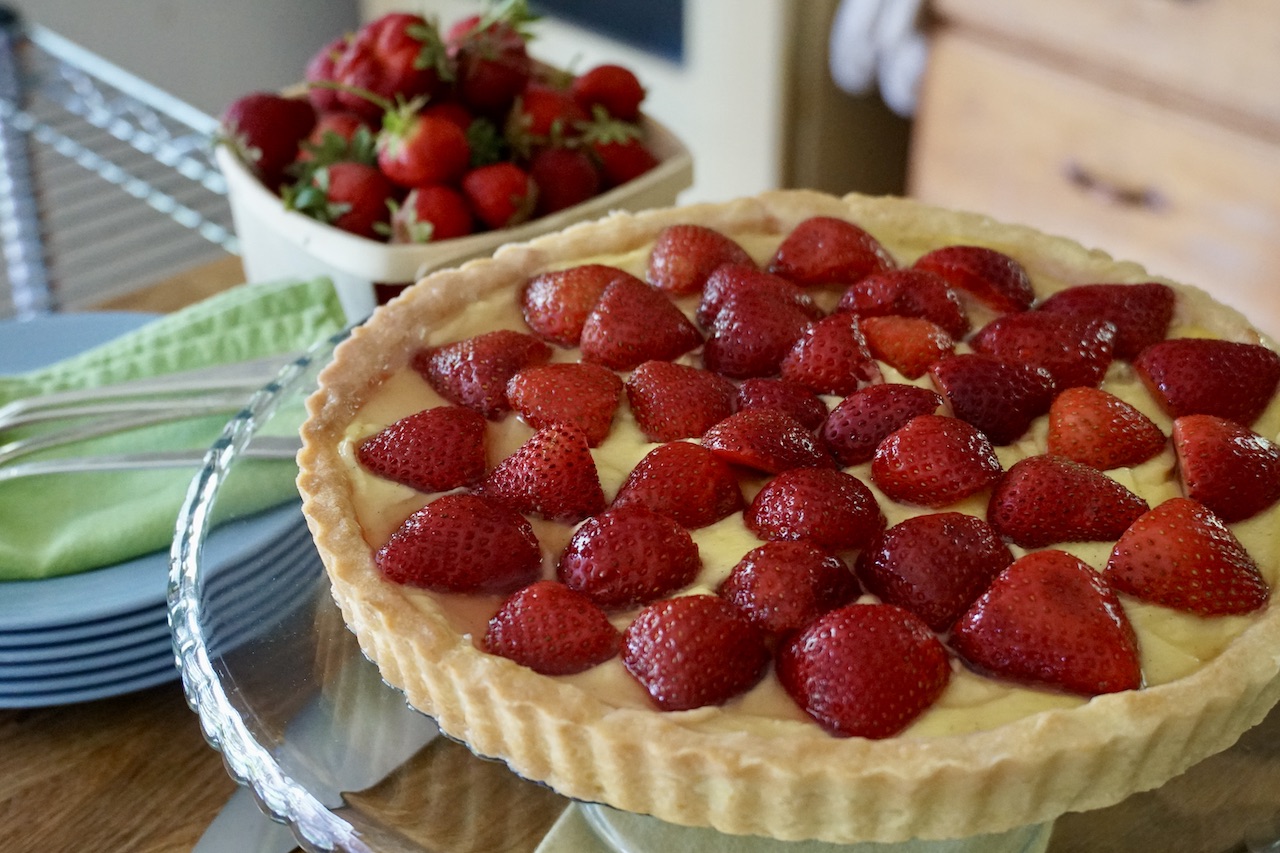
When it comes to summer desserts, this STRAWBERRY CUSTARD TART takes the cake!
We seriously love everything about this recipe. Some say it’s how it captures the flavour of freshly picked, locally grown strawberries, but we think it’s so much more. From the flaky, buttery tart crust to the rich, creamy vanilla custard filling, this STRAWBERRY CUSTARD TART is like all the flavours of the summer captured in one sensational dessert.
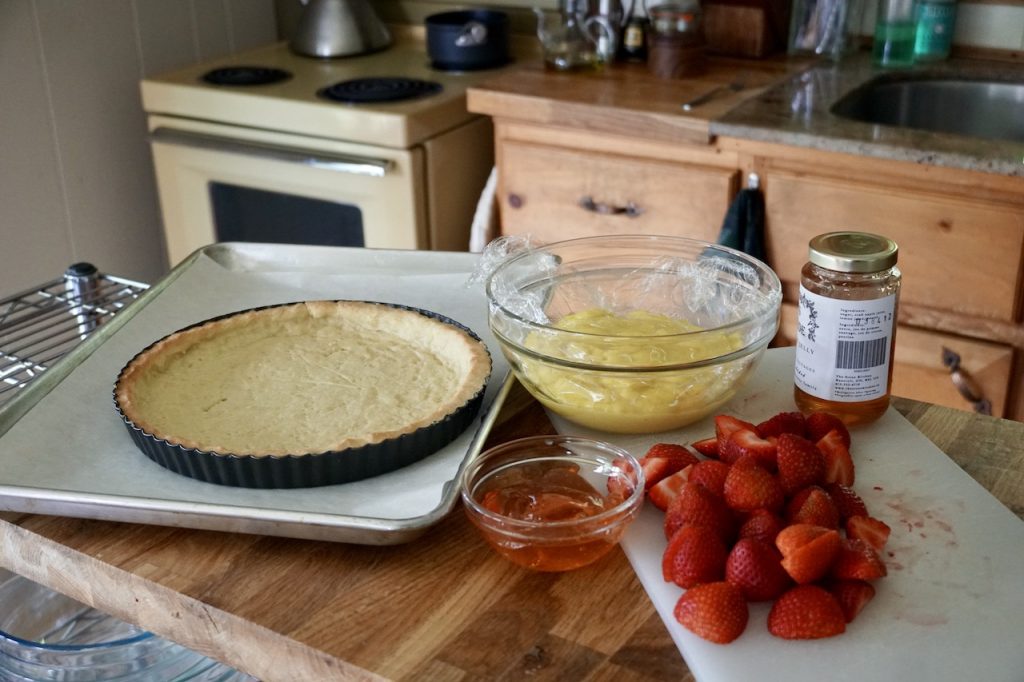
And now for something completely different. Sounds a bit dramatic, but hear me out. Here’s a photo of the three components needed to make this recipe. Normally, we start the post with photos of the ingredients (those will come later), but the above photo reflects what your work station will look like when you assemble this STRAWBERRY CUSTARD TART. You’ll need a tart shell, vanilla custard, fresh strawberries and then a favourite fruit jelly. Making the tart shell and custard is easier than you might think. Let’s start with them.
SHORTCRUST DOUGH
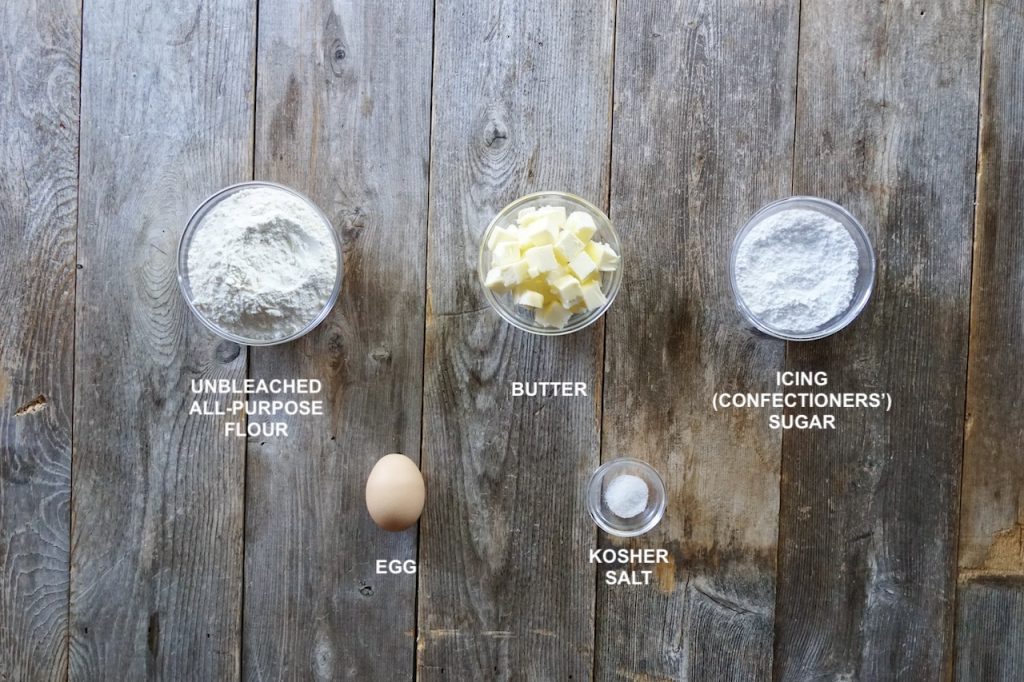
I thought I’d include a second photo of the exact ingredients you’ll need to craft the traditional sweetened shortcrust tart dough used in this recipe. You caught that, right? This dough is sweetened, so no savoury tarts in sight. There are basically four types of shortcrust:
Pâte à foncer, where egg and water are used to bind
Pâte brisée, with a higher ratio of butter to flour
Pâte sablée, more sugar
Pâte sucrée, where the butter is more blended, creating less puff, more snap to the dough
This dough is a combination of sablée and sucrée, where we first incorporate the flour, sugar and salt with the butter and then add just one simple wet ingredient, the yolk of a large egg. Going forward, it really is the only dough we’ll ever use when making frangipane.
HOW TO MAKE SHORTCRUST DOUGH
It’s important to pause for a brief moment and assure novice (read: nervous) bakers that making tart dough is easy. Why? Because we streamlined the process with a food processor. The instructions listed below explain the process of cutting the butter into the dry mix of flour, icing sugar and salt, then pulse the machine to add the yolk in three parts. How do you know if you’ve accomplished the process correctly? Collect a small amount of the processed ingredients in your hand and squeeze. When it clumps together, you’re ready to continue.
The final step of making this easy shortcrust dough is to work the dough and create a disc by hand. Of course, there’s a term and methodology for this process; it’s called fraisage. Once the crumbled dough is on the work surface, use the heel of your hand to sort of smear it together. I kind of worked it a bit with the heel of my hand, then squeezed and smushed everything together, repeating the process a few times. The heat from my hands warmed the dough, helping it come together. As soon as I could work it into one unified disc, I stopped—beware of overworking the dough. Head HERE for more information regarding shortcrust pastry.
Once the dough is shaped, we immediately roll it out and transfer it to a 9-inch fluted metal tart pan with a removable bottom. Unlike making pie dough, where we wrap and refrigerate the dough before rolling, this dough goes straight to the pan. Laying the dough between two sheets of parchment paper and rolling it out to a large 11- or 12-inch round makes for easy work and also a mess-free rolling experience. It also allowed me to make sure the dough was evenly distributed just by running my hand over the parchment.
FLUTED TART PAN
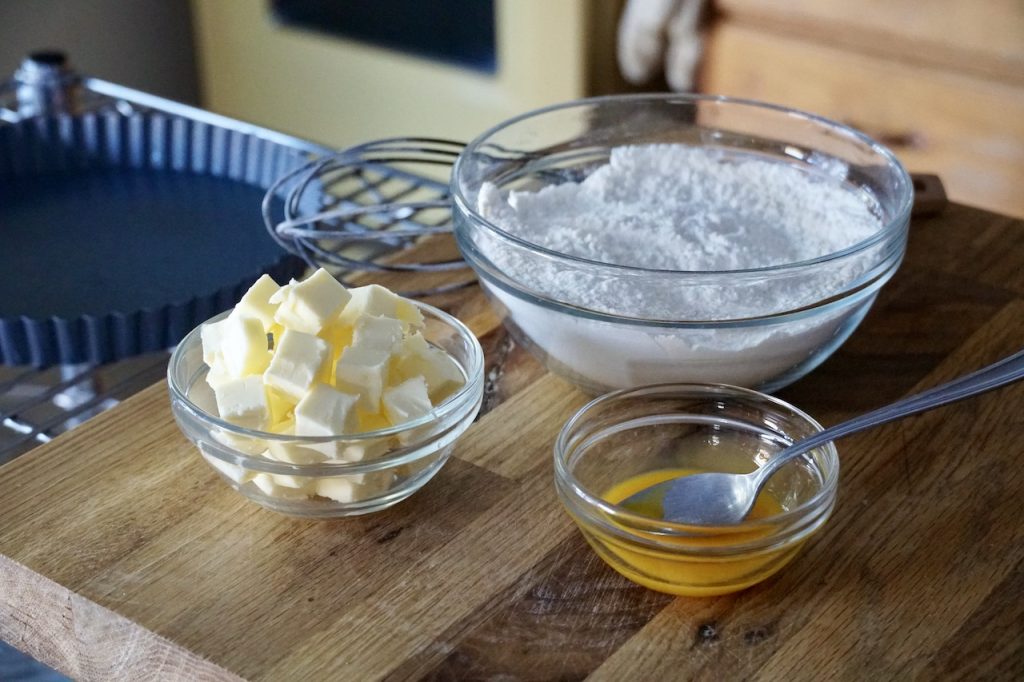
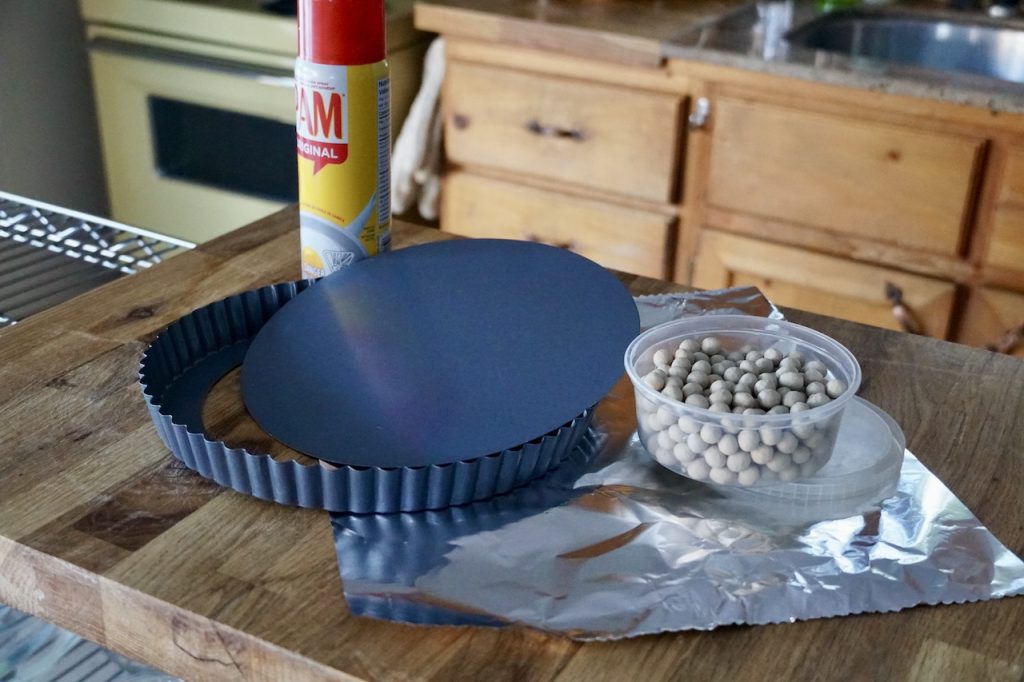
Before explaining how we transferred the dough to the pan, let’s talk about the pan itself. If you don’t already have one, you’re going to need to purchase a 9-inch fluted metal tart pan. Make sure it has a removable bottom. Although you’d be able to make this dessert in a fluted quiche dish or pie plate, don’t; it becomes way too difficult to remove slices. I also included a few important tools in the above photo: cooking spray, a square of foil and a container of clay pie weights. If you don’t have weights to blind bake the tart shell, you can use beans or rice instead.
HOW TO MAKE THE TART CRUST
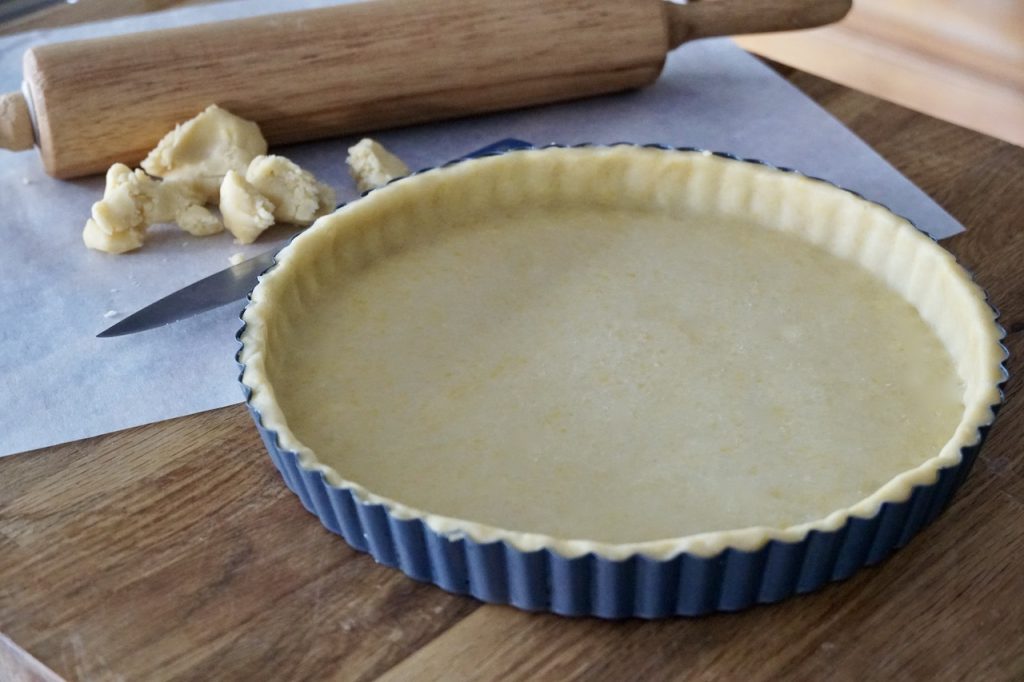
Back to the round of dough we just rolled out. Carefully invert the round of dough onto the tart pan. The dough is quite pliable, so you’ll be able to lift the edges slightly and then push the dough down into the centre of the pan. Then trim away the excess dough from the edge of the pan. Last step is to push the side of the tart shell into the side of the pan; you want the dough to take on that wavy, fluted detail. I also suggest running your finger across the lip of the pan so that the dough has a clean edge at the top, too. Seriously, we’re all suddenly looking like pastry chefs making this treat.
BLIND BAKING
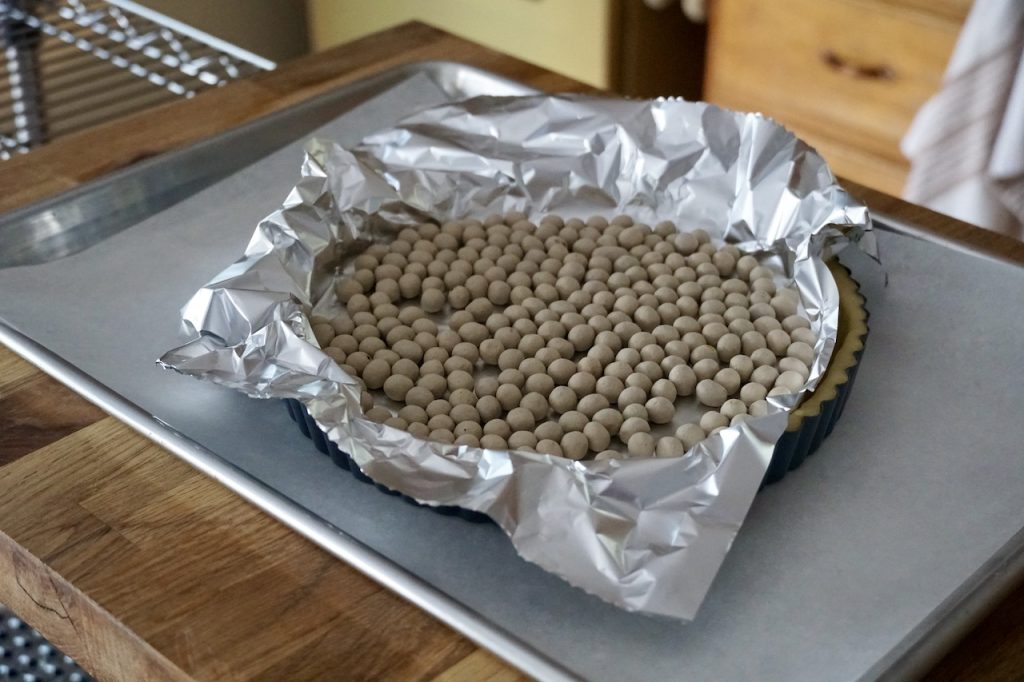
When the crust is shaped, then and only then do we chill. We did a 30-minute chill time where the tart shell is covered with wrap, then placed into the fridge. Once chilled, we prick the surface with a fork, a technique called docking. Then we spritz a square of foil with cooking spray, invert it onto the shell and add the pie weights. The tart shell can then be transferred to the oven and baked for 15 minutes. After that, carefully lift off the foil and weights and return the shell to the oven for an additional 5 minutes.
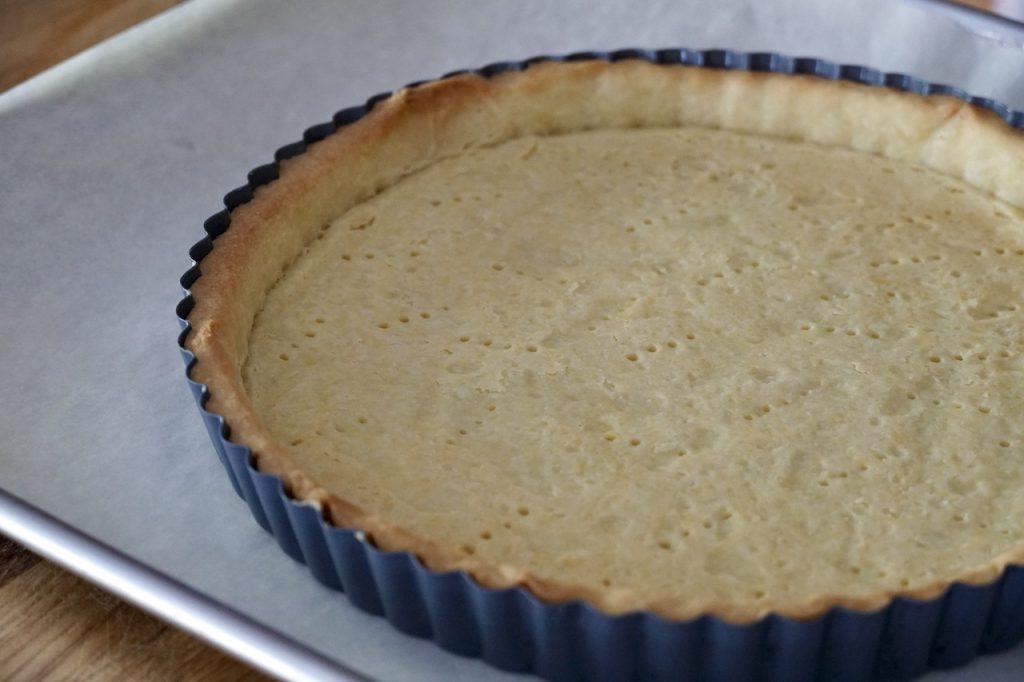
Once the blind baking is complete, you’ll notice the top of the crust is no longer glossy, but rather dry-looking. Additionally, the edge of the crust is a light golden brown. Leave the shell to cool while you make the vanilla custard and prepare the fresh strawberries. They’re both up next.
VANILLA CUSTARD
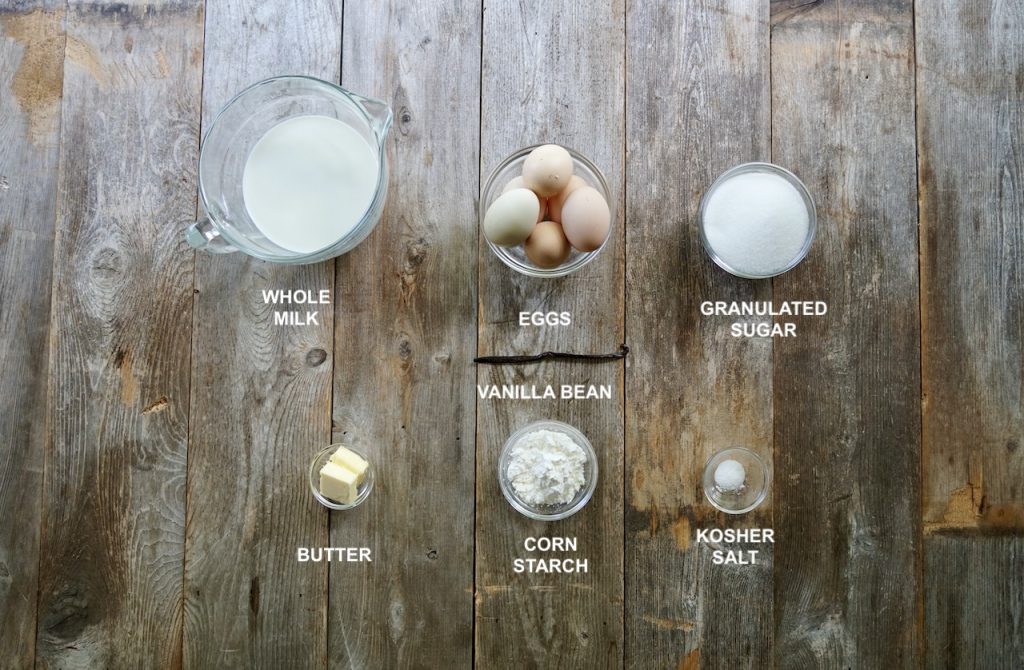
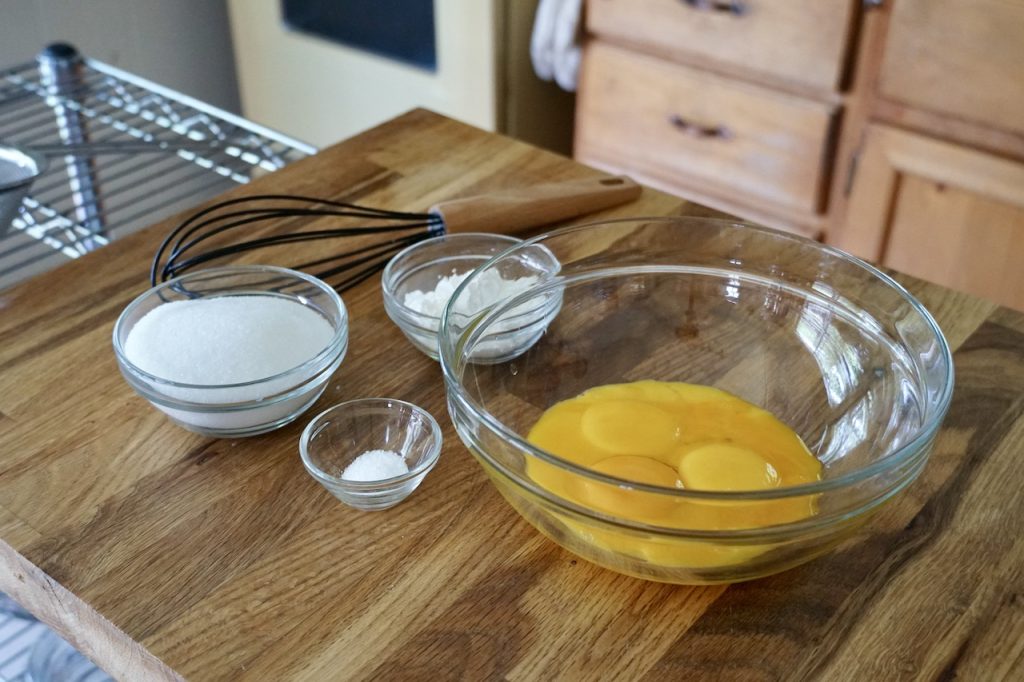
The idea for this homemade vanilla custard actually came to mind while I was working on the recipe for our now-famous LEMON MERINGUE PIE. The process of incorporating granulated sugar with egg yolks, cornstarch and kosher salt and a hot liquid, scalded milk in this case, is quite magical. For this recipe, you’ll need the same ingredients plus one vanilla bean and butter.
VANILLA BEAN
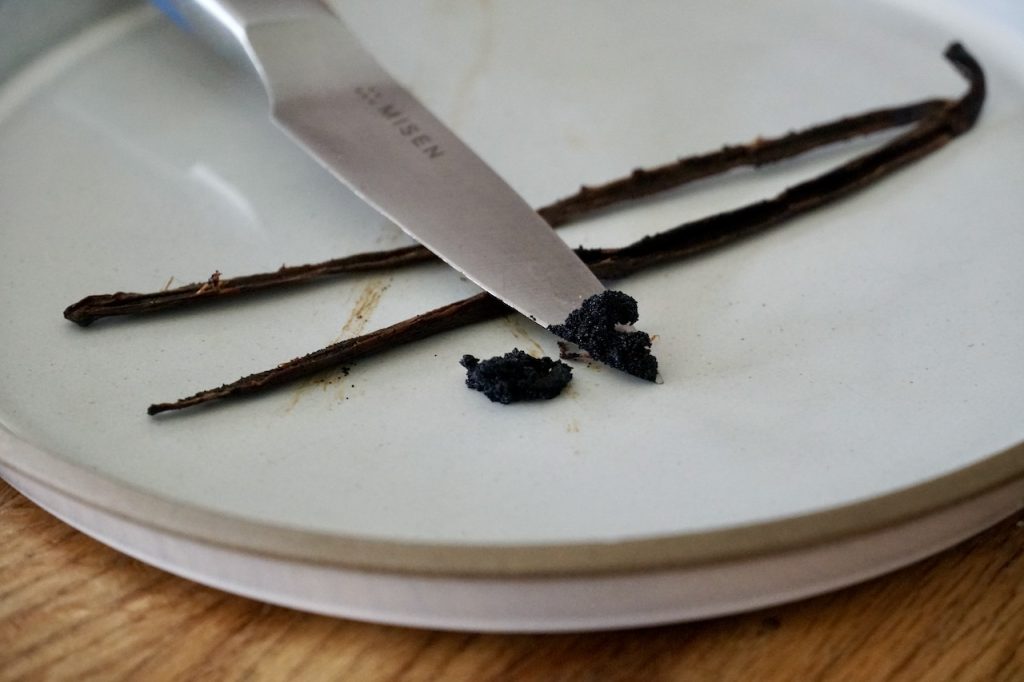
During the testing of this recipe, we discovered you can amp up the vanilla flavour in a homemade custard by using a vanilla bean instead of pure vanilla extract. To do so, carefully slice the bean lengthwise from end to end. Then, using a small pairing knife, draw the blade of the knife along the inside of each half. A sticky black paste will come away. That’s the good stuff: natural flavour compounds, essential oils, most notably vanillin, plus the tiny seeds, sometimes referred to as vanilla caviar! That extract is added to the milk and dissolves into the milk as it heats.
EGG MIXTURE
Here’s the tricky part in the recipe: tempering the eggs. The goal is to craft a smooth, creamy custard, and we’re confident our technique works like a charm. To begin, we whisk the egg yolks together with the sugar, salt and cornstarch. Whisk until well-combined and pale yellow in colour. The next step is to slowly whisk in the hot milk mixture without cooking or scrambling the eggs. Just remember, add the hot liquid slowly, whisking continuously.
COOKING THE CUSTARD
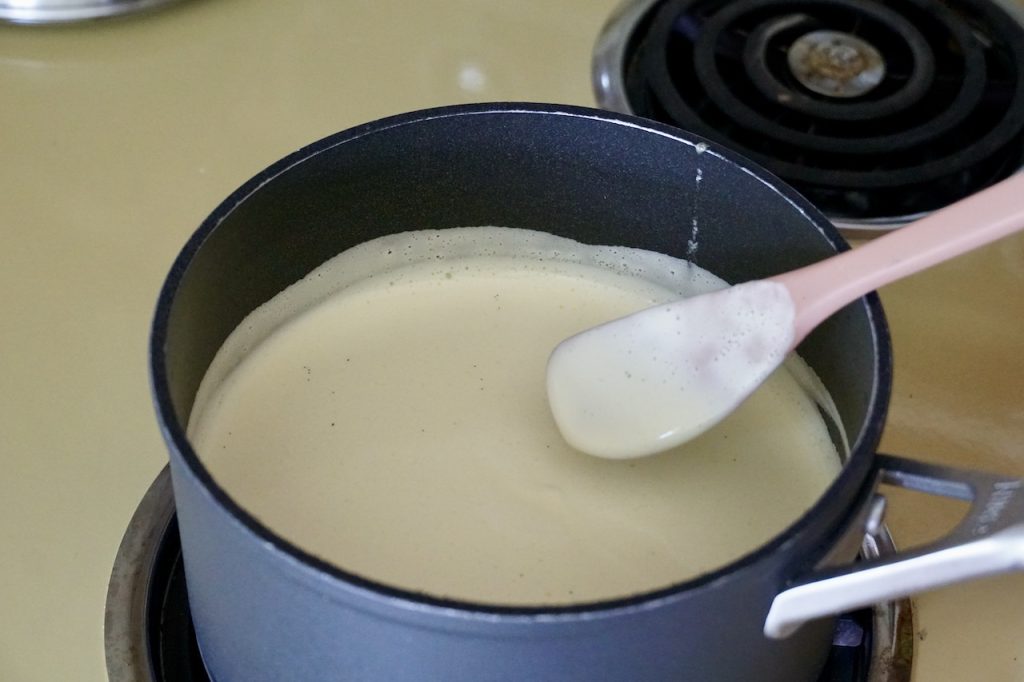
Once the hot milk is incorporated into the egg mixture, the next step is to cook the custard. If you’re worried the eggs may have cooked a bit, pour the mixture through a strainer before cooking it. Bring to a temperature over moderate heat, stirring continuously. Fair warning, the mixture gets all weird looking, but just keep stirring and then, like magic, everything suddenly goes smooth, and the custard takes on a pudding-like consistency.
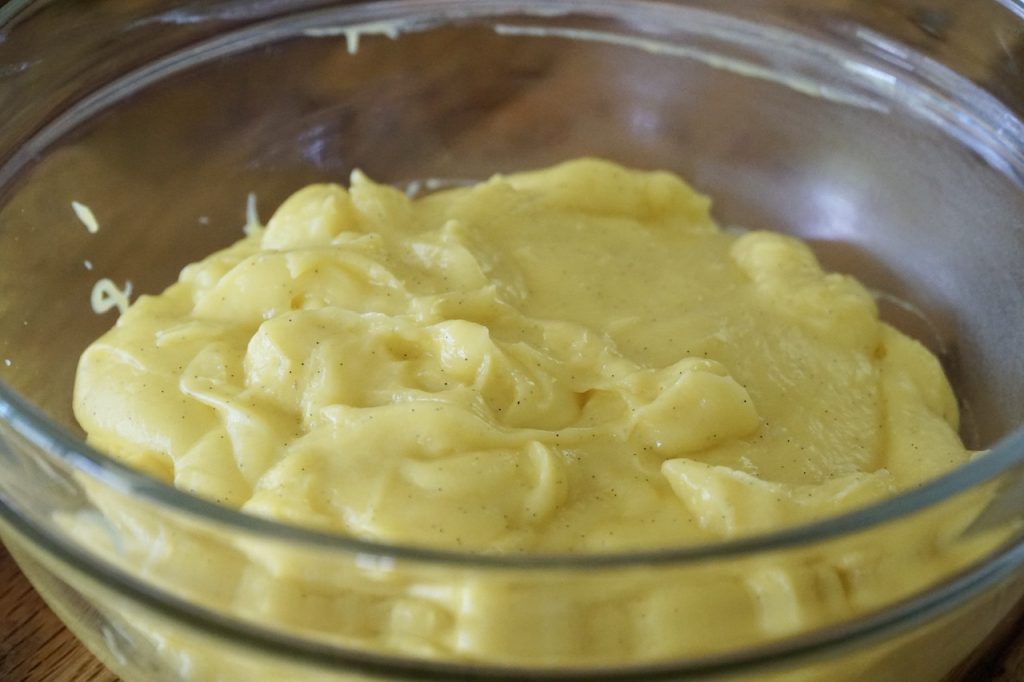
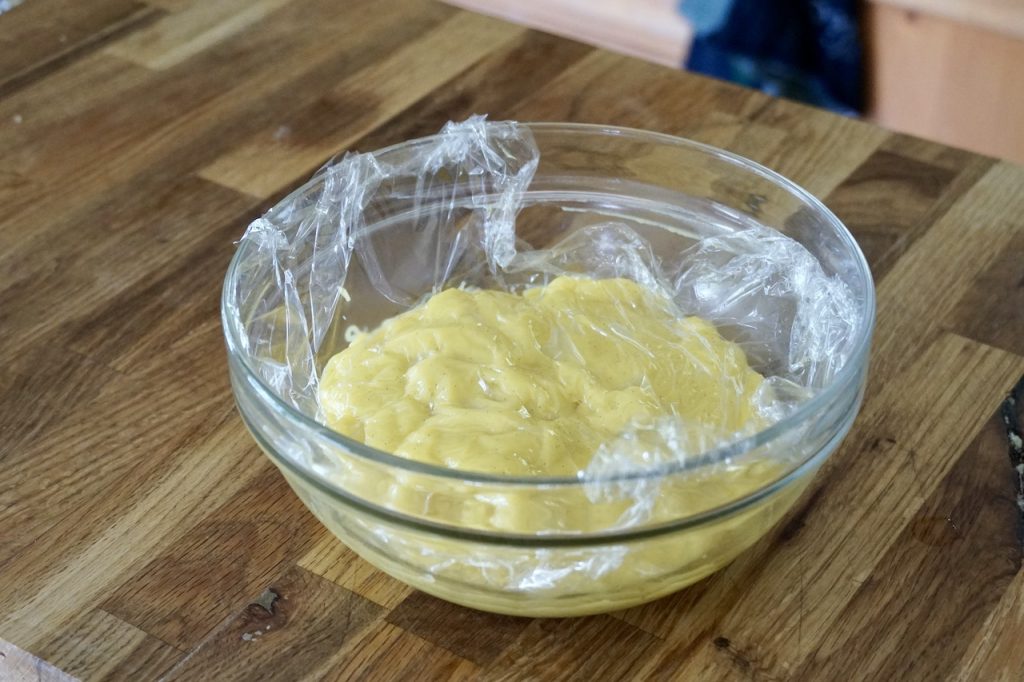
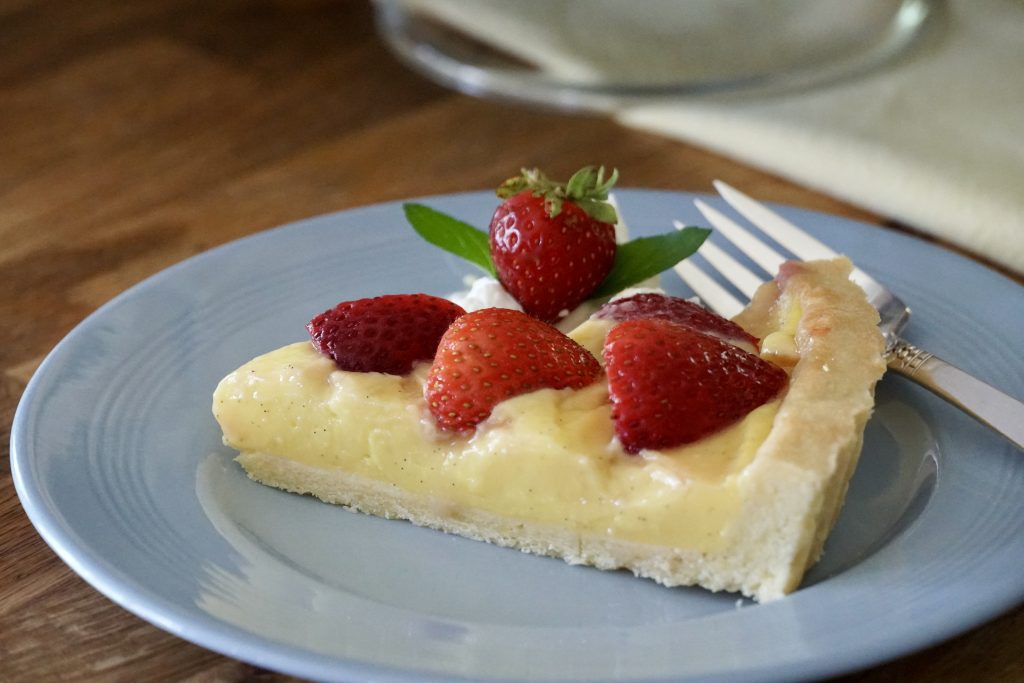
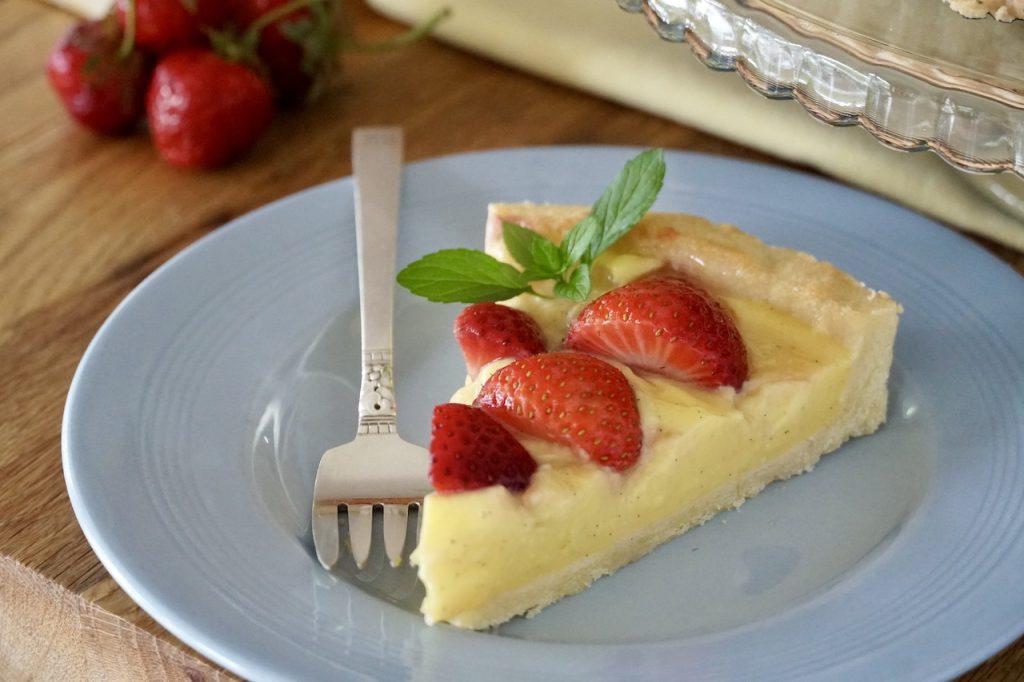
Once the custard is cooked, transfer it to a bowl. Here again, if you’re worried the custard may not be smooth, simply pass it through a fine mesh sieve. Couple things to note at this point. First, check out all those little vanilla seeds! In our humble opinion, this is the telltale sign of an expertly prepared vanilla custard. Second thing here, sneak a little taste, even if it’s just a finger swipe across the spatula. Isn’t it amazing?!
Once the custard is complete, we need to cool it down for maybe an hour before we assemble the tart. Run a square of plastic wrap over the custard, tucking it in tight to the surface. This will prevent skin from forming while it chills.
FRESH STRAWBERRIES
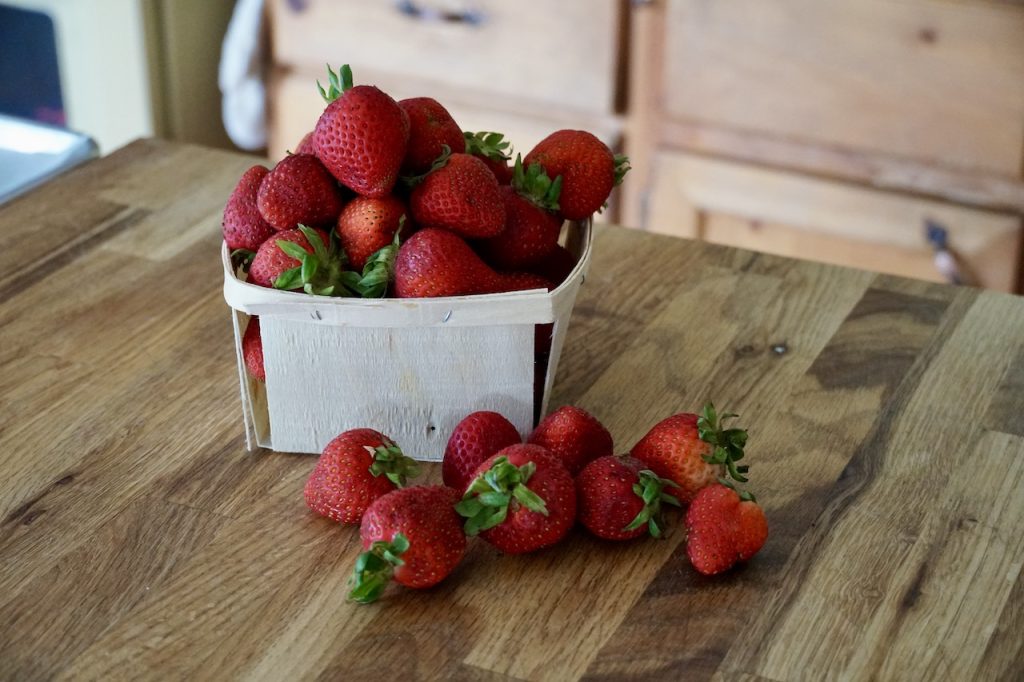
In a perfect world, you’ll be able to make this STRAWBERRY CUSTARD TART using freshly picked, locally grown strawberries. We find the local berries not only have a more vibrant colour but, more importantly, are juicier and just taste better. Preparing them is easy: give them a rinse under cool running water, then either hull the caps away or trim off the very ends using a sharp knife. After that, we’re suggesting cutting each berry in half from stem to end. The half berries look pretty assembled on the top of the tart.
ASSEMBLING A STRAWBERRY TART
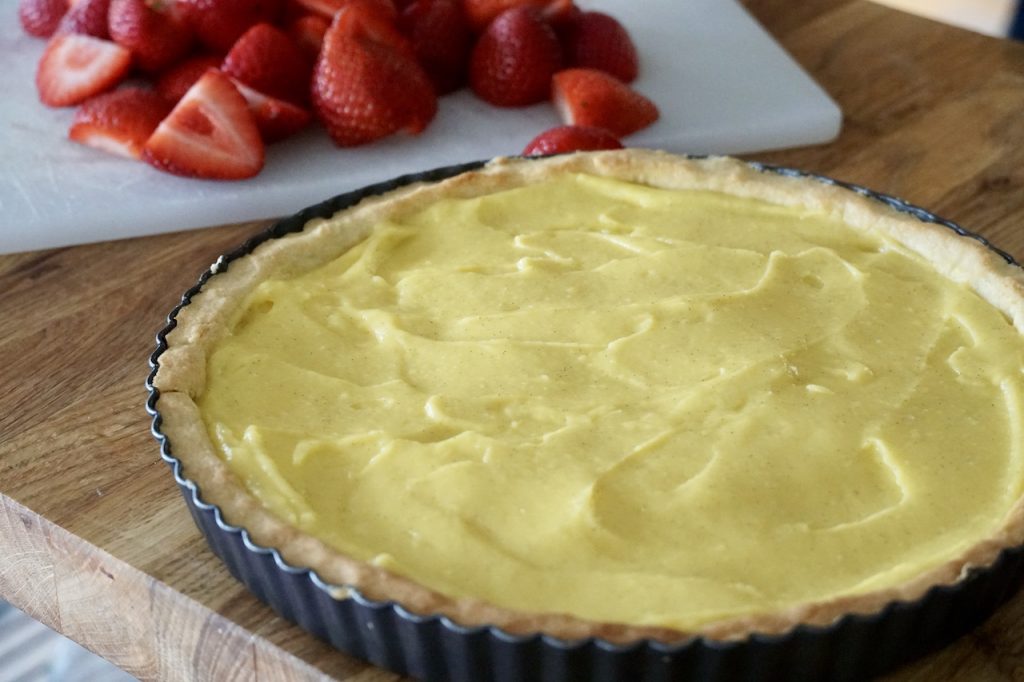
So check out how easy this is. First, we transfer the cooled custard into the cooled tart shell, smoothing it out to an even layer. Then lay the strawberry halves on the custard. We suggest beginning with a circle on the outer edge of the shell using the larger strawberries first. Then, working in towards the centre, use up any of the small halves.
JELLY GLAZE
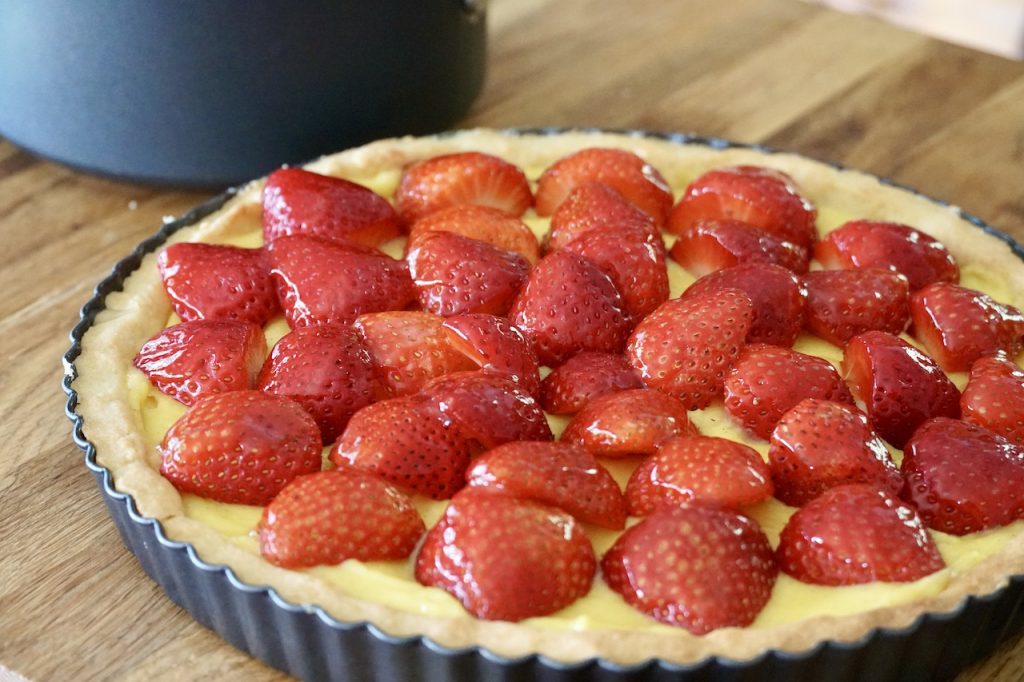
The final step in assembling this STRAWBERRY CUSTARD TART is to add a pretty glossy finish to the berry topper. The easiest way to accomplish this is by melting a clean fruit jelly and then brushing the fruit with it. We used a wild crabapple jelly, but apple jelly or strawberry jelly will work too. Don’t use a dark jelly as this may change the colour of the custard. After brushing the berries lightly with the melted jelly, cover the tart loosely with plastic wrap and refrigerate for at least six hours. This will give the tart filling ample time to properly set.
SERVE
To serve this fresh fruit tart, cut wedges using a sharp knife. The sharp knife is key to cutting the strawberries before the knife continues down through the custard filling and pastry crust. You can transfer each wedge to a dessert plate and serve as is, or add a tiny dollop of whipped cream, a sprig of mint and some extra berries.
A final warning about this tart: the flavour is so pleasing, you’ll likely be serving seconds. Be prepared!
PIN IT!
Before you go to make this fruit tart, we ask one favour: SHARE! Please PIN it to a favourite weekend baking or dessert board on Pinterest. After that, send some love our way and please subscribe to our monthly newsletter HERE, where we share our top recipes and give a sneak peek at upcoming posts. You’ll also receive Gather, our mid-month missive focused on ideas to entertain family and friends.
Cook Mode Use cook mode to keep your screen on while cooking.
Ingredients
For the shortcrust pastry:
1½ cup (204 grams) unbleached all-purpose flour
½ cup (60 grams) icing (confectioners’) sugar
¼ teaspoon kosher salt
9 tablespoons (128 grams) cold unsalted butter, cut into small pieces
1 large egg yolk
For the filling, pastry cream:
1¾ cups whole milk
1 vanilla bean
6 large egg yolks
¾ cup granulated sugar
3 tablespoons cornstarch
¼ teaspoon kosher salt
2 tablespoons butter
To decorate:
2 pints fresh strawberries, rinsed, hulled and sliced
4 tablespoons of pale-coloured fruit jelly such as apple
Directions
Lightly grease a 9-inch tart pan with a removable bottom. Also spritz a square of foil with cooking spray. Set both aside with some pie weights, beans or rice.
Prepare the tart dough: Whisk flour, sugar and salt together in a medium bowl then drop half the quantity into the canister of a food processor fitted with a blade attachment. Drop the butter into the canister followed by the remaining dry mix. Pulse 12 to 15 times to cut the butter into the dry mix. Stir the egg yolk to lightly to break it open. Add it in 3 parts down the chute, little by little, pulsing after each addition. Pulse until the dough holds together when you pinch it.
Turn mixture out onto your work surface, working it with the heel of your palm to fully incorporate. Gather and shape into a flattened disc.
Line the tart pan: Roll the dough into an 11-inch circle between layers of parchment. Remove top piece of parchment then invert dough onto the tart pan. Lift edges to push dough down into the pan. Trim away excess dough from the edge, then press firmly into the sides of the pan. Cover with wrap and transfer to the refrigerator to chill for at least 30 minutes, we recommend 60.
Prepare the tart: Preheat oven to 375°F.
Remove shell from fridge. Prick bottom will fork. Invert square of greased foil over the shell. Add pie weights or a cup of dry beans or dry rice to weigh down the foil. Place tart pan onto a parchment-lined baking sheet then transfer to oven. Blind bake for 15 minutes. Then remove foil and weights. Return shell to the oven to bake for 5 minutes more or until crust is a light golden colour. Remove from oven, leaving to cool completely.
Prepare pastry cream: Whisk egg yolks, sugar, kosher salt and cornstarch in a medium bowl until light in colour. Cut vanilla bean in half. Draw a knife across each half to extract black paste or seeds. Pour milk into saucepan. Add vanilla seeds and pod. Heat over medium heat until scalded. Discard vanilla pod, then transfer milk to liquid measure. Slowly—really slowly—pour hot milk into egg mixture, whisking continuously to temper the eggs. Continue until all of the milk is added. Place strainer over saucepan, pour egg mixture through to catch any lumps. Return saucepan to medium heat. Stir custard continuously as it cooks for about 4 minutes or until very thick and smooth. Remove from heat stirring in the butter until melted. Transfer to a bowl adding plastic wrap directly to surface to prevent a skin from forming. Cool for about 30 minutes then transfer to the refrigerator to cool for 2 hours.
Assemble tart: Pour custard into cooled shell, smoothing it out to an even layer.
Add strawberries in concentric circles starting from the outside and working in.
Glaze tart: Warm jelly in a small saucepan to melt. Brush top of tart with jelly to make berries glisten.
Cover loosely with wrap and chill tart for at least 6 hours to set.
To serve: cut wedges and serve as is, or present with a dollop of whipped cream, mint sprig and extra berries.
 Until Thanksgiving