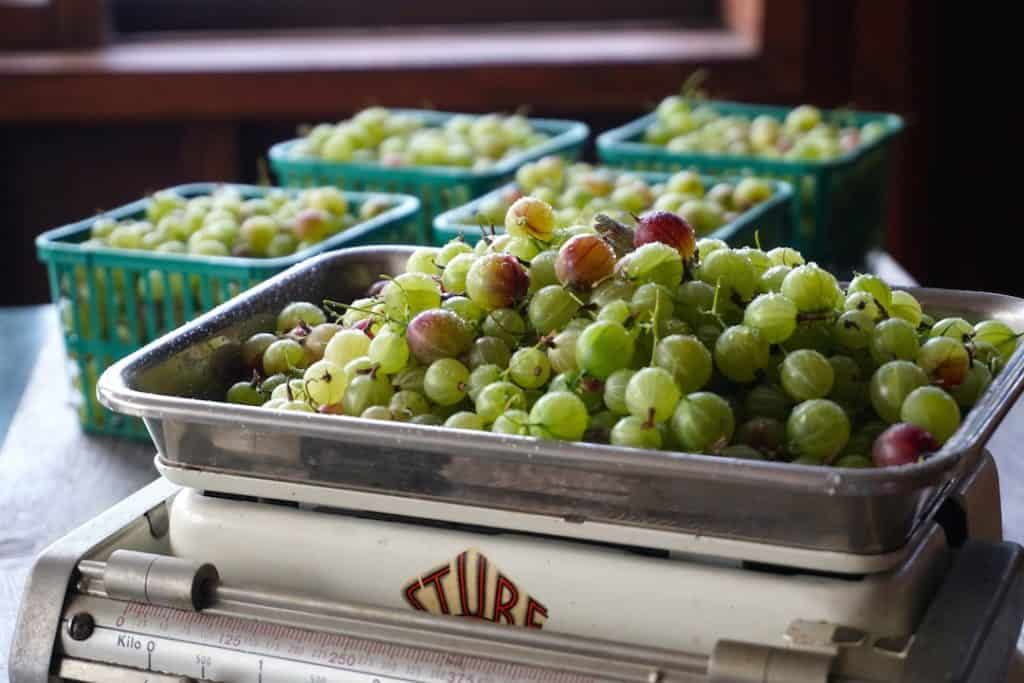
Prepare the jam: Place three small plates in the freezer. Wash gooseberries and then trim away the tops and tails from each. Weigh prepared gooseberries using a kitchen scale. Weight sugar to compliment the fruit using a 3:2 ratio.
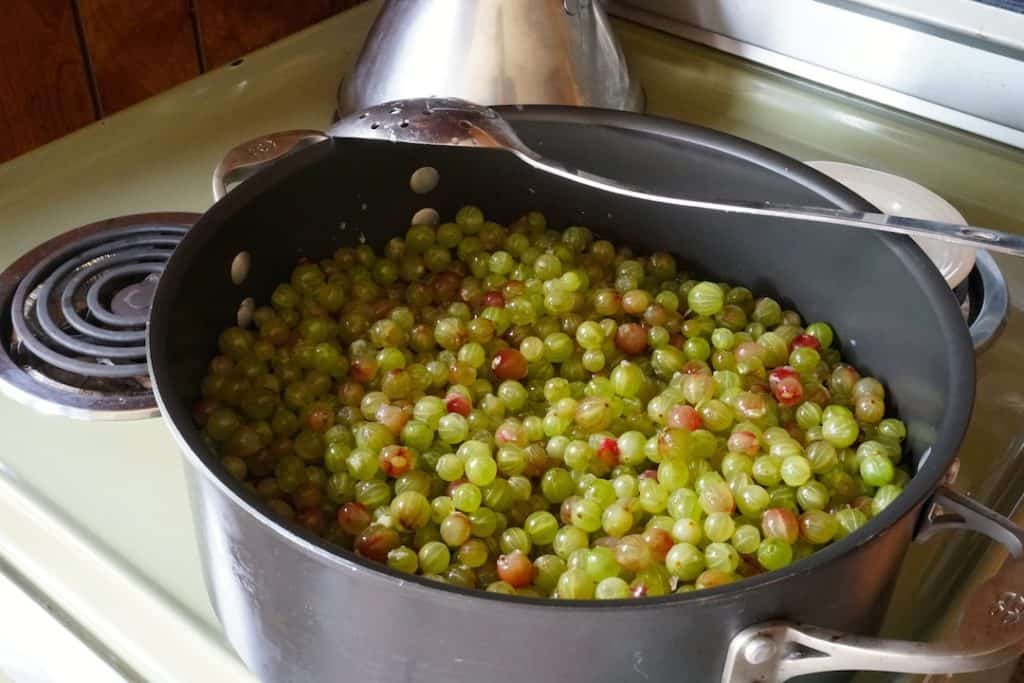
Place gooseberries into a wide pan with a heavy base. Add water, lime juice and ginger and stir. Turn heat to high and bring to a boil before reducing to simmer and cooking for 15 minutes to soften the fruit. Stir often.
Turn the heat to medium, add the sugar and stir constantly until the sugar is completely dissolved, about 10 minutes. Turn the heat up to medium-high and hard boil the jam for 25 minutes, stirring every minute or so. Skim the foam from the top and discard.
Test the jam using the frozen plate method mentioned above to ensure it is completely cooked.
Once the jam is fully cooked, remove it from the heat letting it cool for 10 minutes.
For home canning: Place 12 8oz. canning jars in the dishwasher and run the wash cycle without the addition of soap to sterilize the jars.
Place lids and rings into a medium-sized pot and cover with boiling water. Set to the side.
Submerge funnel and ladle in a large pot of boiling water for at least 10 minutes.
Place jars onto a clean work surface. Place sterilized funnel on top of the first jar and scoop cooked jam in using the sterilized ladle. Leave 3/4-inch of headspace at the top.
Place sterilized lid on top using magnet wand or tongs. Place ring on top and turn just until finger tight. Repeat process until all jars are filled.
Place filled jars in a cool location and leave undisturbed for 24 hours. Check the following day to that all of the lids have popped down to seal.
Homemade Gooseberry Jam
Ingredients
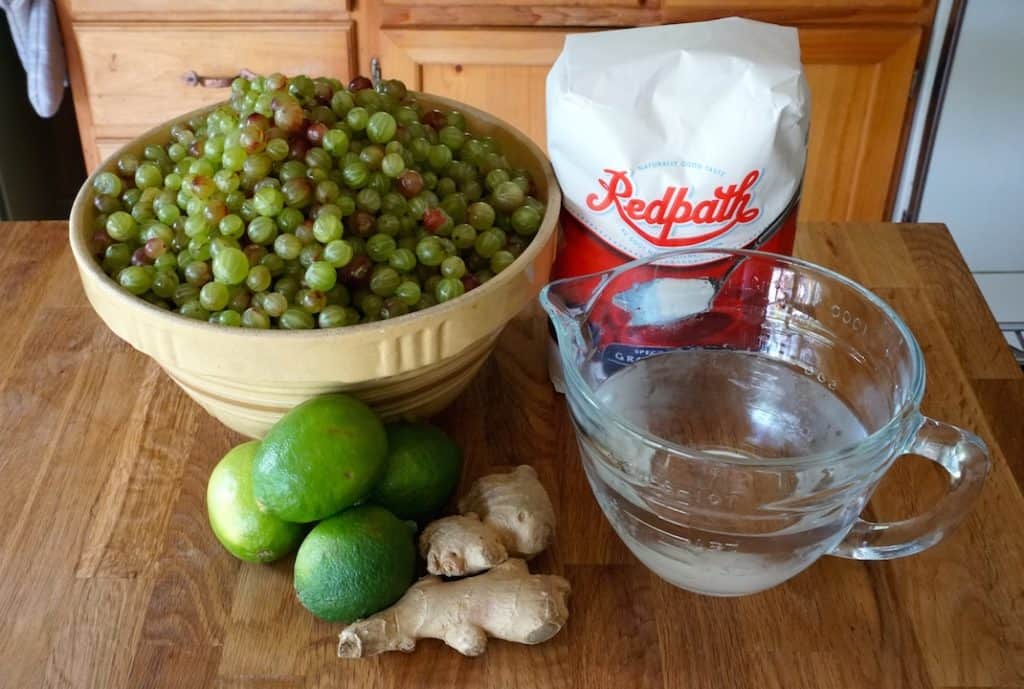
2.4 kg fresh gooseberries, topped and tailed
3½ cups water
juice of 3 limes
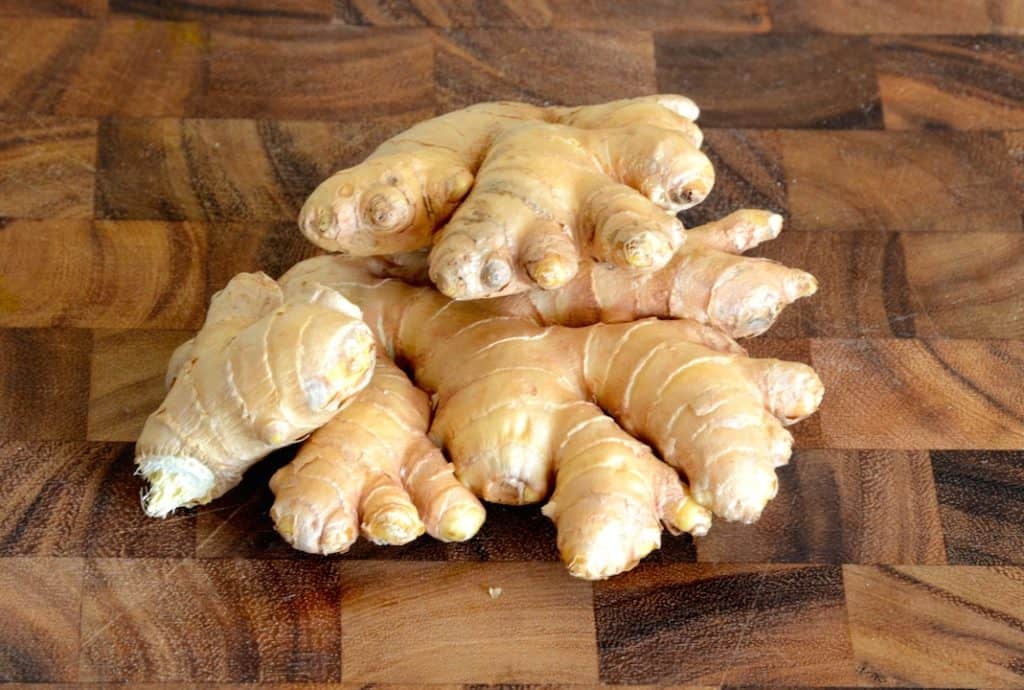
3 tablespoons fresh ginger, grated
1.6 kg granulated sugar
Directions
Prepare the jam: Place three small plates in the freezer. Wash gooseberries and then trim away the tops and tails from each. Weigh prepared gooseberries using a kitchen scale. Weight sugar to compliment the fruit using a 3:2 ratio.
Place gooseberries into a wide pan with a heavy base. Add water, lime juice and ginger and stir. Turn heat to high and bring to a boil before reducing to simmer and cooking for 15 minutes to soften the fruit. Stir often.
Turn the heat to medium, add the sugar and stir constantly until the sugar is completely dissolved, about 10 minutes. Turn the heat up to medium-high and hard boil the jam for 25 minutes, stirring every minute or so. Skim the foam from the top and discard.
Test the jam using the frozen plate method mentioned above to ensure it is completely cooked.
Once the jam is fully cooked, remove it from the heat letting it cool for 10 minutes.
For home canning: Place 12 8oz. canning jars in the dishwasher and run the wash cycle without the addition of soap to sterilize the jars.
Place lids and rings into a medium-sized pot and cover with boiling water. Set to the side.
Submerge funnel and ladle in a large pot of boiling water for at least 10 minutes.
Place jars onto a clean work surface. Place sterilized funnel on top of the first jar and scoop cooked jam in using the sterilized ladle. Leave 3/4-inch of headspace at the top.
Place sterilized lid on top using magnet wand or tongs. Place ring on top and turn just until finger tight. Repeat process until all jars are filled.
Place filled jars in a cool location and leave undisturbed for 24 hours. Check the following day to that all of the lids have popped down to seal.
Homemade Gooseberry Jam
Loading...
Tangy, tart gooseberries cooked with ginger, lime and sugar to create a heavenly jam…
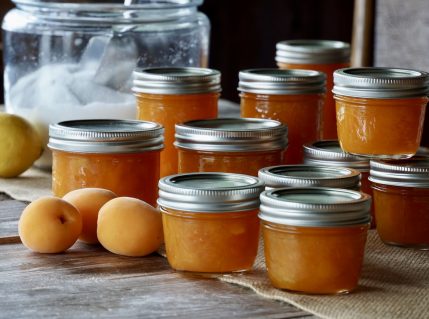
There’s nothing quite like wild blueberry jam! Hey, wait a second, isn’t this a post about GOOSEBERRY JAM? It is, but it didn’t start out that way. We originally thought we’d piggyback off of our dear friend NANCY’S APRICOT JAM. It takes the enjoyment of breakfast or fine cheese to a whole new level.
The intention for this was to make a jam using wild blueberries but I quickly realized how hard it was to find them at my local farm stands, and they were crazy expensive to boot. Although we did end up making one glorious WILD BLUEBERRY PIE, my sights soon turned towards a more unusual offering – gooseberries. In hindsight, I couldn’t be happier because this GOOSEBERRY JAM is quite remarkable.
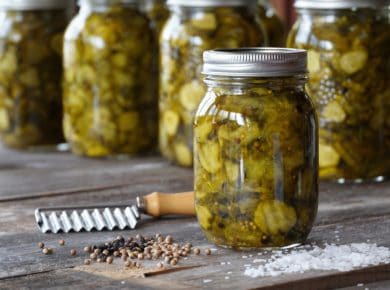
Before sharing what I learned during this adventure in jam making, let me remind you to click HERE for a quick lesson on canning. It’s essential to get the canning process down right, and with just a few tried and trusted steps, you’ll be an expert jam maker in no time.
I’d also like to suggest you read THIS ARTICLE by my friend Lucy Waverman for The Globe and Mail. It came out the same weekend we were making this jam, and after following some of Lucy’s suggestions, no surprise, we had great success.
Here’s what makes this GOOSEBERRY JAM so fabulous:
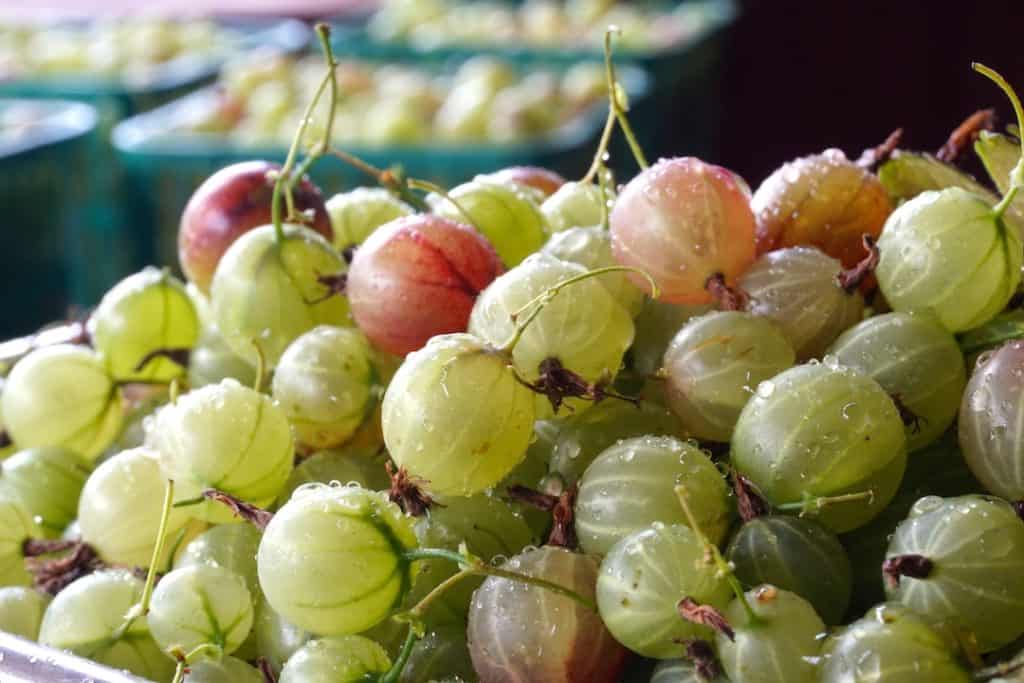
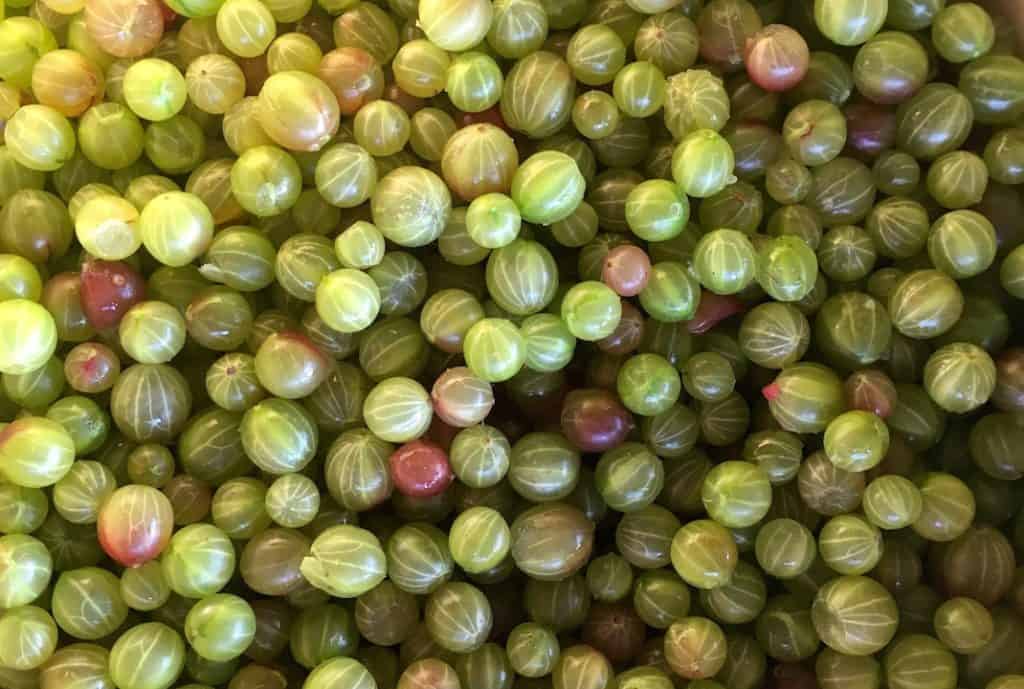
GOOSEBERRIES
Pronounced /ˈɡuːzbɛri/, gooseberries are quite distinct in both appearance and taste. Their skin is marked by a somewhat transparent veining that makes them look like dinky watermelons. Their flesh, though sweet, has a pleasing tartness. Head HERE to learn more about them.
TOPS AND TAILS
This recipe is time-consuming, no two ways about it. Gooseberry recipes require something called “topping and tailing”, where we trim the top, the stem and also the tail, where the flower once was.
If you’re a type-A personality like me, the process of topping and tailing becomes a quest. It took close to 3 hours to trim all of the berries for this recipe, as I was relentless in removing those stems and tiny black specks from each and every one. Doing so produced a uniformly coloured and textured jam without blemishes.
WEIGHING IN
For the first time ever, I used a kitchen scale to weigh the fruit rather than simply adding the berries using liquid or dry measures. This is a much better way of determining the true volume of the fruit. I also weighed my sugar using the same method, and suggest you do the same.
FRUIT TO SUGAR RATIO
I followed Lucy’s suggestion and prepared this jam using a 3:2 ratio of fruit to sugar. Even though the quantity of sugar may seem less than what we’re accustomed to, the finished jam exceeded my expectations. It ended up being perfectly sweetened yet still allowed the flavour of the berries to shine through. It also set just right, hitting that sweet spot of firmness that can still be spread easily across a piece of toast or onto a cracker.
FLAVOUR BOOST
Topping and tailing five pints of gooseberries gives you time to think about lots of things: How many berries are in a pint? Who should I give a finished jar to? Why am I making jam on the hottest day of the year? What should I add to the pot to give the jam a bit of a flavour boost?
I think I nailed that last question with the addition of ginger and lime juice. In a way, I’m thankful for the simplicity of it all; you can’t help but marvel when something ends up tasting so phenomenal and uses only 5 ingredients.
CONSISTENCY IS KEY
The actual cooking of the jam is perhaps the most important step, and again, we’re looking for that sweet spot – the jam needs to thicken enough to set without overcooking. Thankfully, gooseberries contain high levels of pectin, so this happens in relatively short order, after a hard boil of about 25 minutes.
We recommend testing the consistency of your jam using the frozen side plate method. When you think your jam is done, add a spoonful of the jam onto a frozen plate. After about two minutes tilt the plate. If the jam stays in place, so far so good. Then push the jam gently with your finger and if the top wrinkles up, your jam is done. If not, cook for an additional 5 minutes and repeat the process.
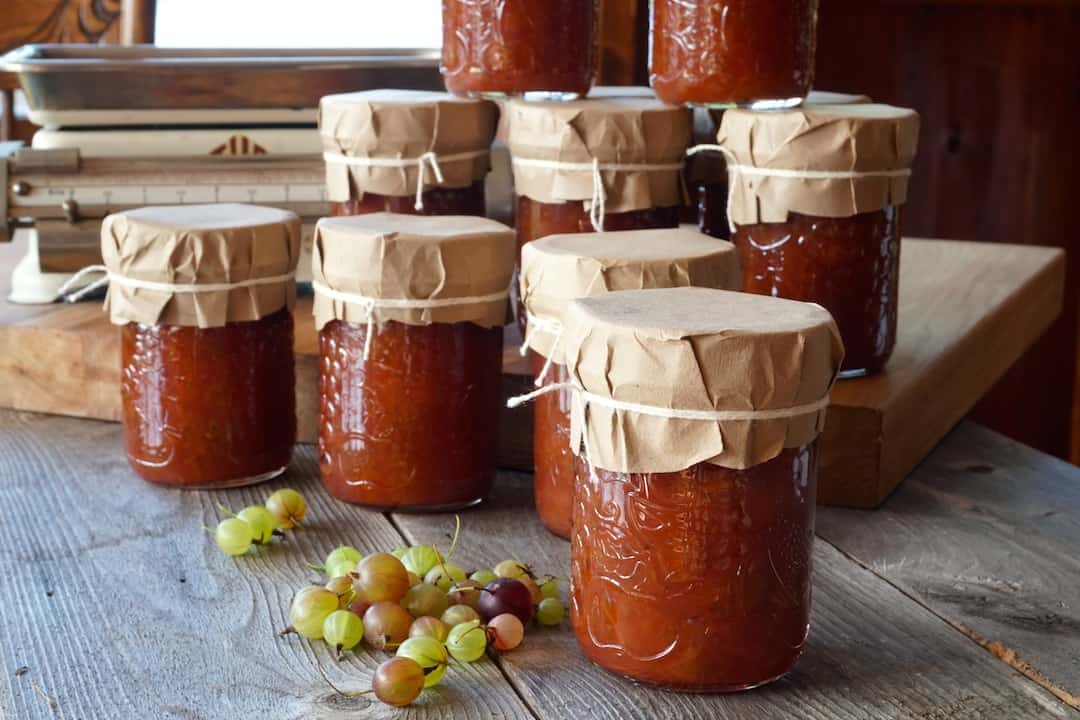
JOY TO BEHOLD
Something absolutely amazing happened during the cooking of this jam and it truly was a joy to behold; these vibrant green berries slowly cooked down to reveal a lovely pink, then deep rose-coloured hue. In fact, I was thinking the jam looked way too dark, and it wasn’t until I started ladling it into the jars that I first saw its true colour. The colour of gooseberry jam is like no other.
FINISHING TOUCHES
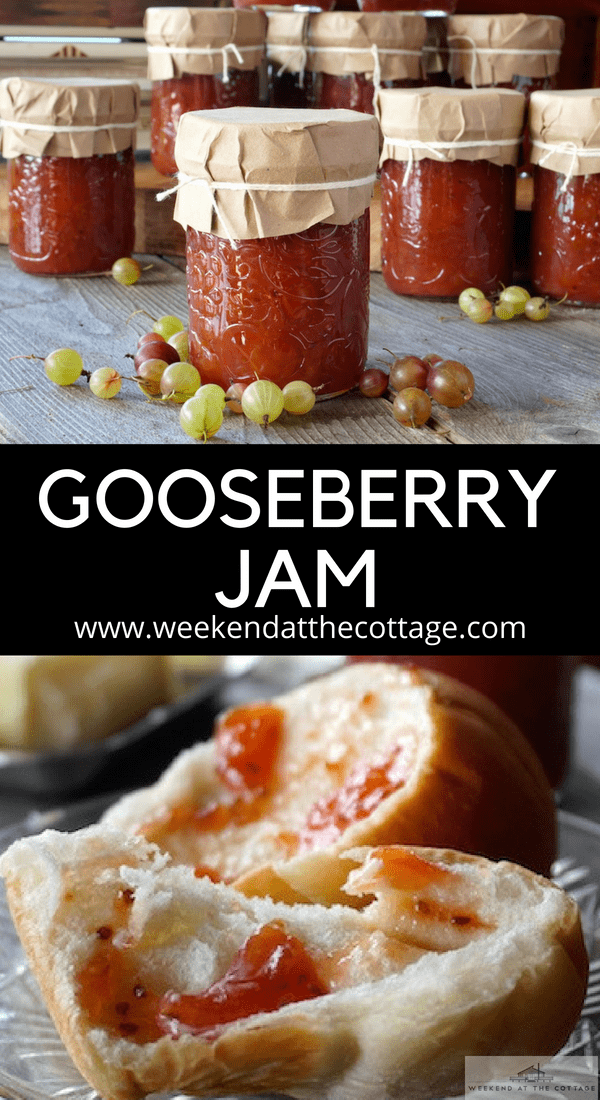
As with all jam recipes, the key indicator of a successful processing is waiting for the pop – where the lids contract on the top of the jars to form a seal. All of my jars popped without incident. Once completely cooled I thought it might be nice to complete the process with a simple finishing touch to make them more attractive when I give them to family members and friends.
No need to get too fancy with this step, simply cut out rounds of brown craft paper, wrapping them around the lids and tying them using white butcher’s string.
If making homemade jam is in your wheelhouse, and if we’ve inspired you to try your hand at this rewarding endeavour, let this be the recipe you attempt.
There truly is nothing quite like homemade GOOSEBERRY JAM!
Cook Mode Use cook mode to keep your screen on while cooking.
Ingredients
2.4 kg fresh gooseberries, topped and tailed
3½ cups water
juice of 3 limes
3 tablespoons fresh ginger, grated
1.6 kg granulated sugar
Directions
Prepare the jam: Place three small plates in the freezer. Wash gooseberries and then trim away the tops and tails from each. Weigh prepared gooseberries using a kitchen scale. Weight sugar to compliment the fruit using a 3:2 ratio.
Place gooseberries into a wide pan with a heavy base. Add water, lime juice and ginger and stir. Turn heat to high and bring to a boil before reducing to simmer and cooking for 15 minutes to soften the fruit. Stir often.
Turn the heat to medium, add the sugar and stir constantly until the sugar is completely dissolved, about 10 minutes. Turn the heat up to medium-high and hard boil the jam for 25 minutes, stirring every minute or so. Skim the foam from the top and discard.
Test the jam using the frozen plate method mentioned above to ensure it is completely cooked.
Once the jam is fully cooked, remove it from the heat letting it cool for 10 minutes.
For home canning: Place 12 8oz. canning jars in the dishwasher and run the wash cycle without the addition of soap to sterilize the jars.
Place lids and rings into a medium-sized pot and cover with boiling water. Set to the side.
Submerge funnel and ladle in a large pot of boiling water for at least 10 minutes.
Place jars onto a clean work surface. Place sterilized funnel on top of the first jar and scoop cooked jam in using the sterilized ladle. Leave 3/4-inch of headspace at the top.
Place sterilized lid on top using magnet wand or tongs. Place ring on top and turn just until finger tight. Repeat process until all jars are filled.
Place filled jars in a cool location and leave undisturbed for 24 hours. Check the following day to that all of the lids have popped down to seal.