Trace the shape of the circular pans onto two sheets of parchment paper. Cut the shapes out. Butter the bottoms and sides of the pans. Place one piece of parchment into each, pressing it down into the bottom of the pan. Grease the top of the parchment paper, then sprinkle in a few tablespoons of flour. Tap the flour around in the pans so that the bottom and sides are greased and floured. Tap out and discard excess flour. Set pans to the side.
Preheat the oven to 325°F.
Place water into a small saucepan and bring to a boil. Add the cocoa powder and stir to dissolve. Blend until smooth. Remove from heat and set aside to cool.
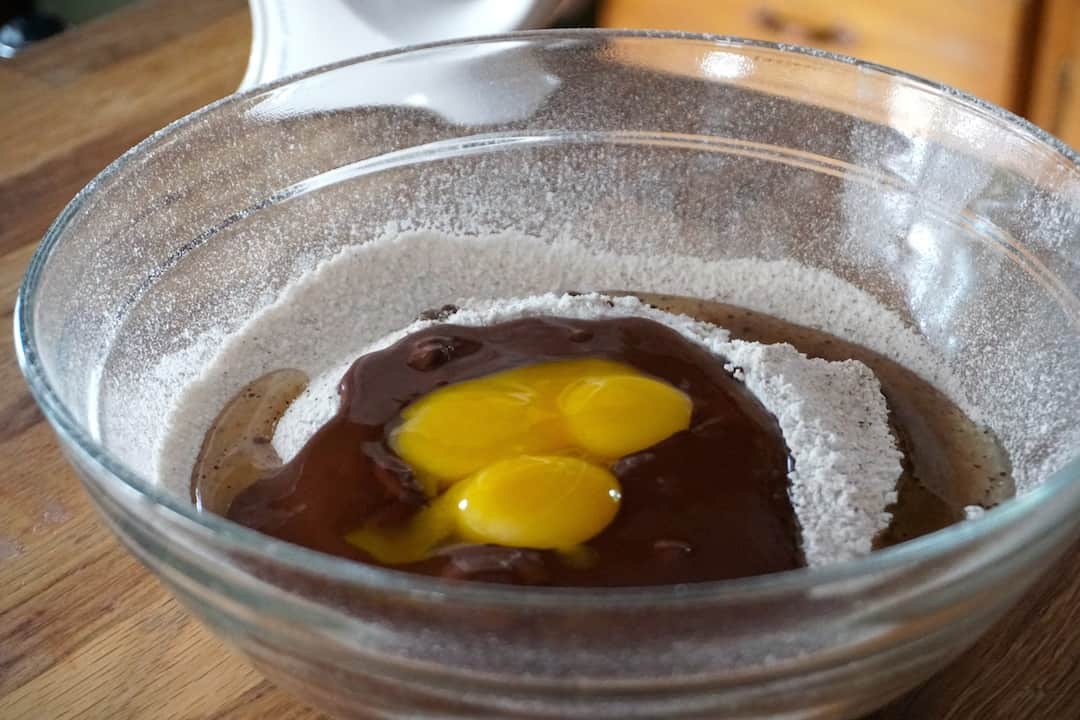
Place the cake flour, baking powder, baking soda, 2/3 cup of granulated sugar, kosher salt, instant coffee and cinnamon into a bowl. Sift together at least 3 times. Transfer to a large mixing bowl. Using your fingers, create a well in the centre of this mixture.
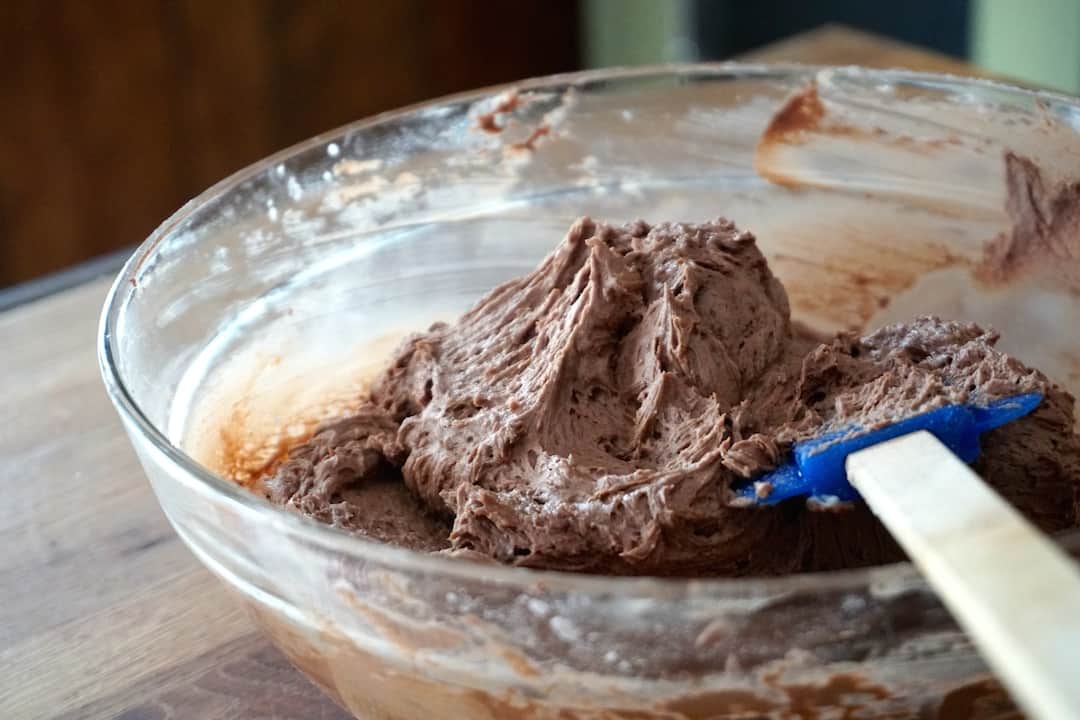
Into the well, add the oil, cooled cocoa mixture and three egg yolks. Beat together using a hand mixer until the batter is smooth. Set aside for a moment.
Add the cream of tartar to the egg whites in a medium-sized bowl and beat until foamy. Increase the speed of the mixer and slowly add the remaining 1/3 cup of granulated sugar, sprinkling it onto the whites in ¼ teaspoon intervals. Beat until egg whites are stiff and stand in peaks.
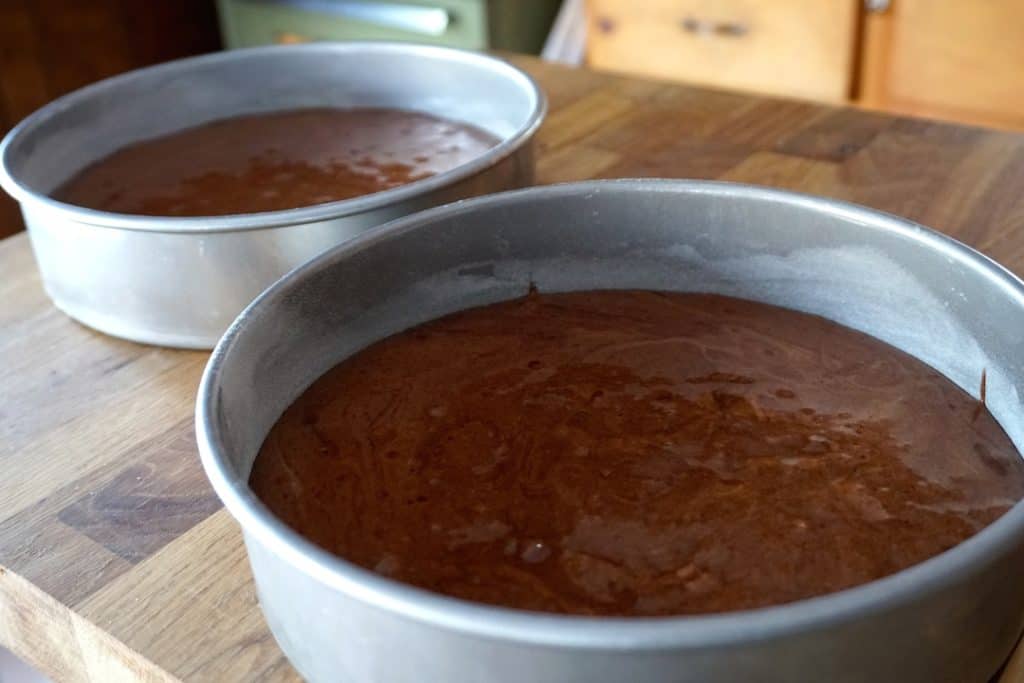
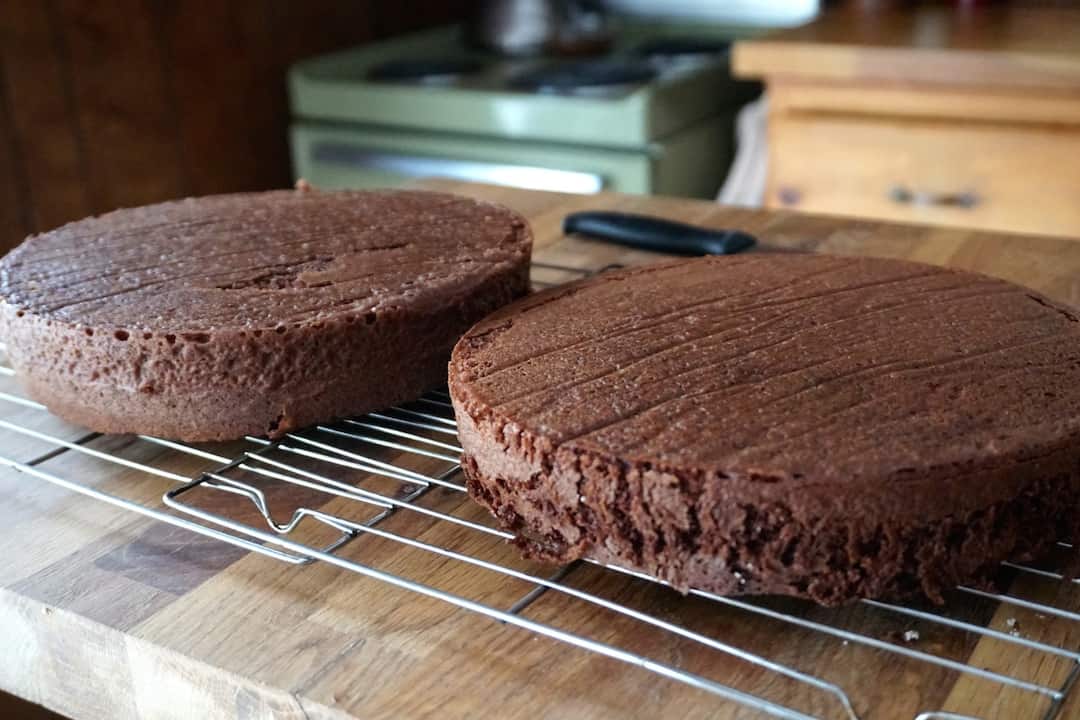
Gently fold the egg whites into the chocolate batter until combined. Divide the batter evenly between the two pans. Gently tap the pans on the counter once or twice to eliminate air bubbles before transferring the pans to the oven. Transfer the cakes to the oven and bake for 30 minutes or until a cake tester comes away clean.
Cool pans on a wire rack for 15 minutes before inverting the cakes. Remove parchment paper and allow the cakes to cool completely before icing.
To make the icing: Place the ingredients for the icing into a large bowl. Using a hand mixer, gently combine on a low speed until all the ingredients are incorporated. Increase the speed of the mixer to create a light and fluffy icing to your liking. Add a bit more of the cream if the icing seems too thick. If the icing seems too thin, add a bit more icing sugar.
Assemble the cake: Cut 4, 2-inch, strips of parchment paper and place them around the edge of your presentation plate to create a square.
Place a small dollop of icing onto the centre of your cake service plate (if you have a lazy Susan, place the cake plate on that to make icing easier). Place the first round of cake onto the centre of the plate with the smooth bottom facing up. The parchment strips should be underneath it, covering the exposed area of the cake plate.
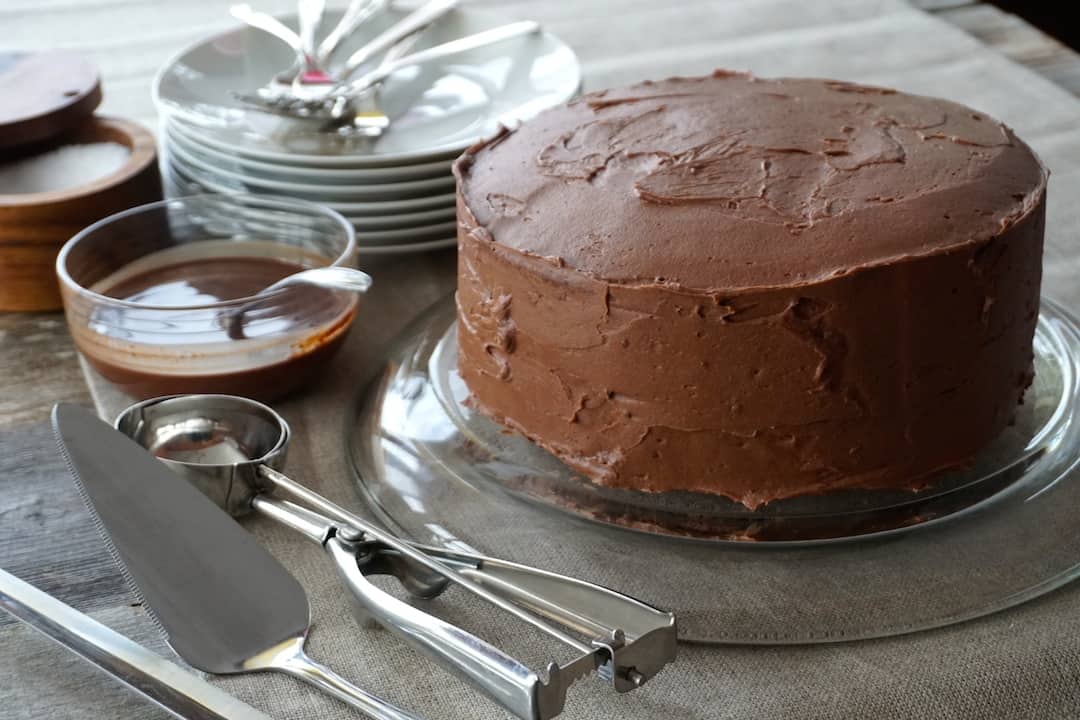
Add a generous dollop of icing onto the top of the cake, smoothing it out evenly to the edge of the round. Place the second cake on top of that, with the smooth bottom side facing up. Add a generous dollop of icing onto the top of this cake too, smoothing it out to the edge.
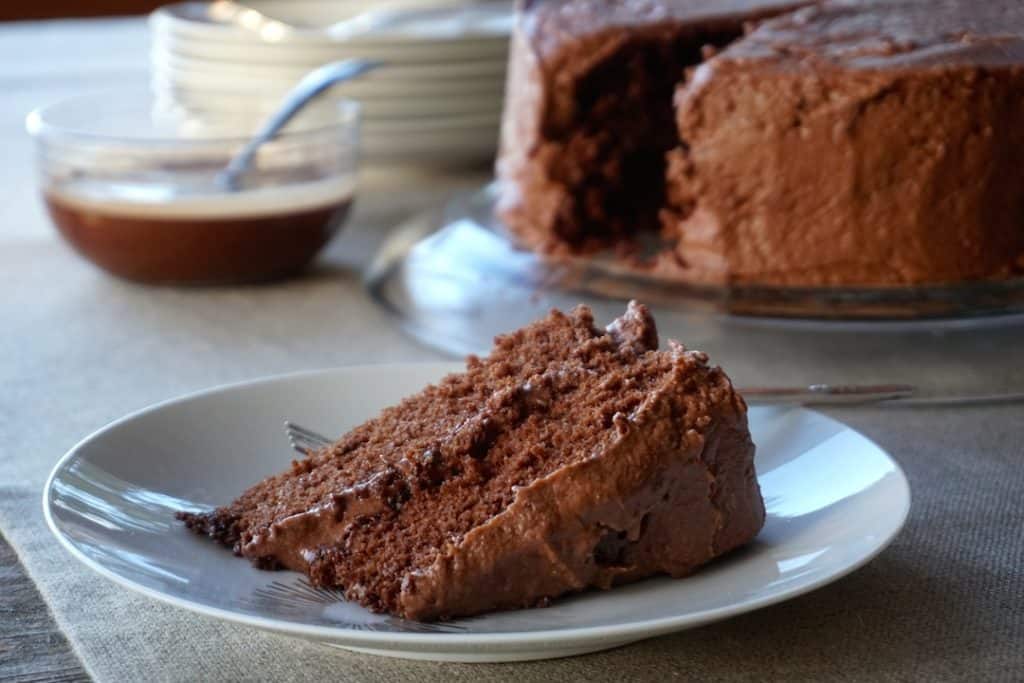
Now add a dollop of icing to the side of the two layers, smoothing it out evenly. Turn the plate slightly and add a bit more icing, smoothing it out as you go along. Continue in this fashion until the exposed areas of the cake are covered evenly with icing. Smooth the top of the cake to meet the edge of the side.
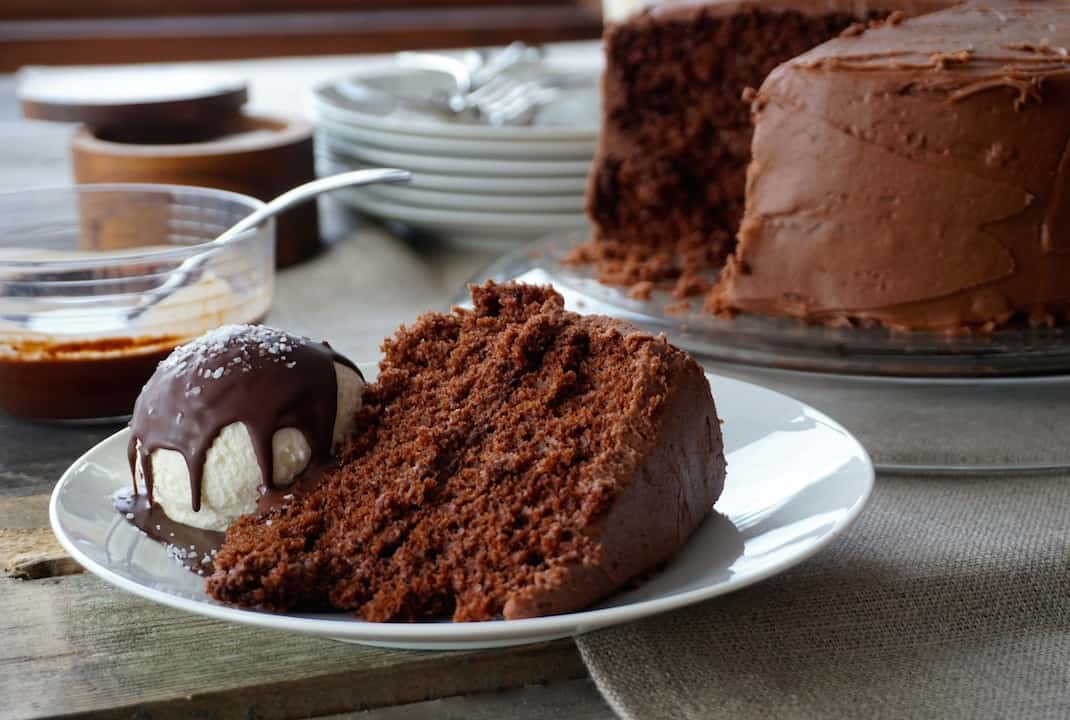
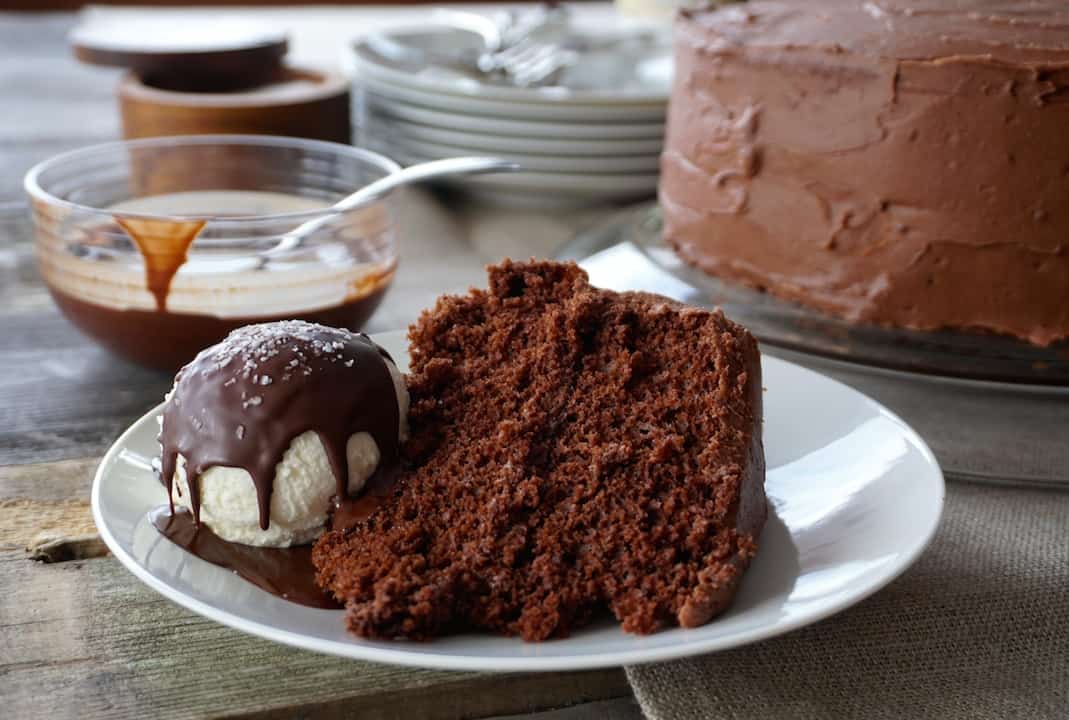
Once the cake is iced, gently and carefully remove the strips of parchment paper. The cake is ready to be served. Further decorate with celebratory greeting using a different coloured icing, if you wish. Serve this cake with ice cream and chocolate crack sauce (see story for details).
Homemade Chocolate Cake
Ingredients
For the cake:
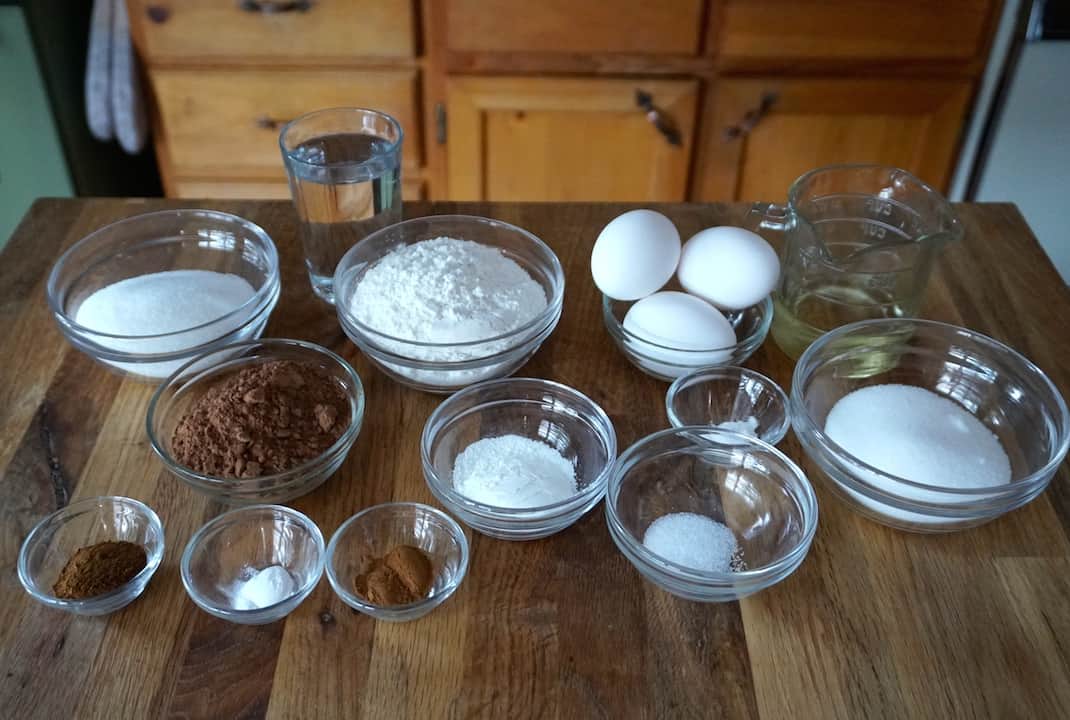
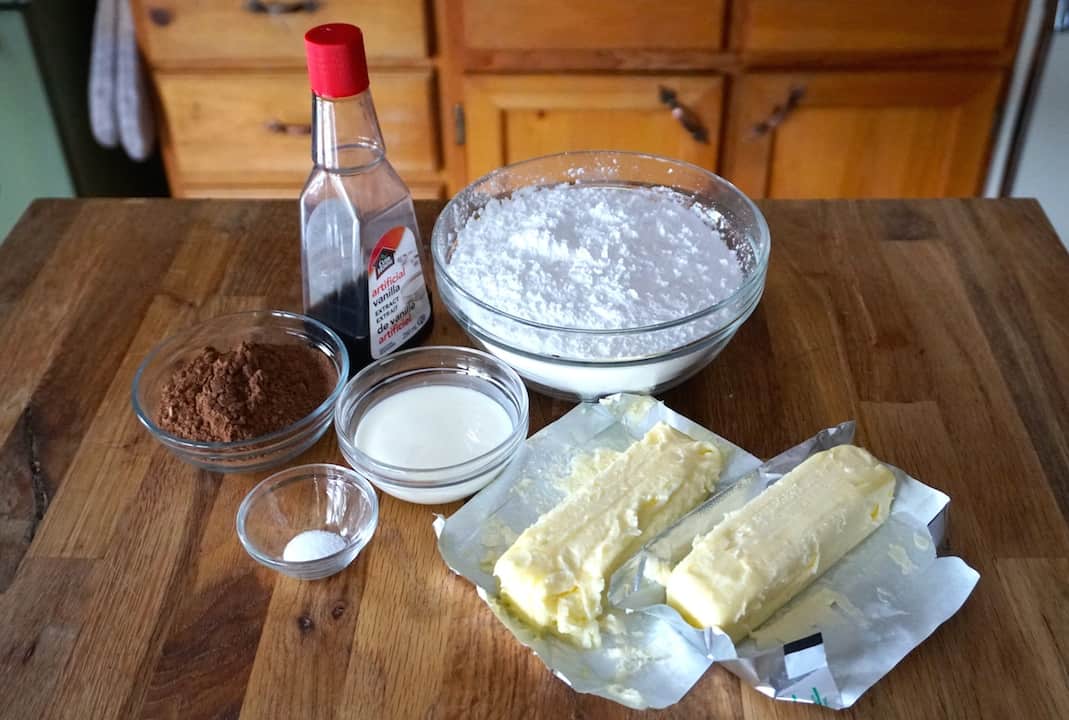
½ cup cocoa powder, sifted
¾ cup hot water
1 cup sifted cake flour
1 tablespoon baking powder
¼ teaspoon baking soda
1 cup granulated sugar
½ teaspoon kosher salt
2 teaspoons instant coffee
¼ teaspoon cinnamon
¼ cup vegetable oil
3 eggs separated
¼ teaspoon cream of tartar
For the Icing:
1 cup (2 sticks) butter, room temperature
3½ cups icing sugar
½ cup cocoa powder, sifted
¼ teaspoon kosher salt
2 teaspoons pure vanilla extract
3 tablespoons 35% cream, room temperature
Directions
To make the cakes: Creating 8-inch round x 2
Trace the shape of the circular pans onto two sheets of parchment paper. Cut the shapes out. Butter the bottoms and sides of the pans. Place one piece of parchment into each, pressing it down into the bottom of the pan. Grease the top of the parchment paper, then sprinkle in a few tablespoons of flour. Tap the flour around in the pans so that the bottom and sides are greased and floured. Tap out and discard excess flour. Set pans to the side.
Preheat the oven to 325°F.
Place water into a small saucepan and bring to a boil. Add the cocoa powder and stir to dissolve. Blend until smooth. Remove from heat and set aside to cool.
Place the cake flour, baking powder, baking soda, 2/3 cup of granulated sugar, kosher salt, instant coffee and cinnamon into a bowl. Sift together at least 3 times. Transfer to a large mixing bowl. Using your fingers, create a well in the centre of this mixture.
Into the well, add the oil, cooled cocoa mixture and three egg yolks. Beat together using a hand mixer until the batter is smooth. Set aside for a moment.
Add the cream of tartar to the egg whites in a medium-sized bowl and beat until foamy. Increase the speed of the mixer and slowly add the remaining 1/3 cup of granulated sugar, sprinkling it onto the whites in ¼ teaspoon intervals. Beat until egg whites are stiff and stand in peaks.
Gently fold the egg whites into the chocolate batter until combined. Divide the batter evenly between the two pans. Gently tap the pans on the counter once or twice to eliminate air bubbles before transferring the pans to the oven. Transfer the cakes to the oven and bake for 30 minutes or until a cake tester comes away clean.
Cool pans on a wire rack for 15 minutes before inverting the cakes. Remove parchment paper and allow the cakes to cool completely before icing.
To make the icing: Place the ingredients for the icing into a large bowl. Using a hand mixer, gently combine on a low speed until all the ingredients are incorporated. Increase the speed of the mixer to create a light and fluffy icing to your liking. Add a bit more of the cream if the icing seems too thick. If the icing seems too thin, add a bit more icing sugar.
Assemble the cake: Cut 4, 2-inch, strips of parchment paper and place them around the edge of your presentation plate to create a square.
Place a small dollop of icing onto the centre of your cake service plate (if you have a lazy Susan, place the cake plate on that to make icing easier). Place the first round of cake onto the centre of the plate with the smooth bottom facing up. The parchment strips should be underneath it, covering the exposed area of the cake plate.
Add a generous dollop of icing onto the top of the cake, smoothing it out evenly to the edge of the round. Place the second cake on top of that, with the smooth bottom side facing up. Add a generous dollop of icing onto the top of this cake too, smoothing it out to the edge.
Now add a dollop of icing to the side of the two layers, smoothing it out evenly. Turn the plate slightly and add a bit more icing, smoothing it out as you go along. Continue in this fashion until the exposed areas of the cake are covered evenly with icing. Smooth the top of the cake to meet the edge of the side.
Once the cake is iced, gently and carefully remove the strips of parchment paper. The cake is ready to be served. Further decorate with celebratory greeting using a different coloured icing, if you wish. Serve this cake with ice cream and chocolate crack sauce (see story for details).
Homemade Chocolate Cake
Loading...
A moist soft-crumbed cake loaded with a rich chocolate flavour finished with a scrumptious chocolate icing…
If my mom were still around, she’d be the first to say that this is by far my absolute, without a doubt, hands down, most favourite cake in the entire world. She’d say, “Since Nik was knee-high to a grasshopper, I made this for his birthday!”
Yup, it’s my favourite cake in the universe, and that really tells you how exceptionally good it is.
I’m going to encourage you to BOOKMARK the page and also PIN it to a favourite recipe or dessert board. I was also going to suggest that you share this recipe with a friend, but why not make it for their next birthday, anniversary or going away party? Whatever the special occasion, this is the cake to make! I know you’re going to love it.
Here’s why it holds a special place in my heart… and tummy!
FROM SCRATCH
There is something to be said about a cake made from scratch. I think a little bit of magic happens when a group of choice ingredients are brought together and baked into a rich-tasting, moist, crumbly cake. In my mind, a well-made cake is a party for the senses thus I’ve never been big on piping or decorating this cake too much. Let the flavour of the cake tell the tale!
If the thought of this has piqued your cake-baking spidey senses, consider it for birthdays, anniversaries, graduations, new home, new baby, New Year’s. Hopefully, I’ve given you every option. As Kool & the Gang would say, “Celebration time, come on!”
THE CAKE
This recipe comes straight out of my mom’s recipe box, and as you can see in the photos attached to this story, it’s been referenced many, many times. Repeat visitors to Weekend at the Cottage know I often play around with a recipe, but not this time. No need to play around with perfection.
There are just two steps that will help make the cake effortless. First, sift the dry ingredients back and forth at least three times, if not more. You want the dry ingredients, especially that instant coffee (what?) mixed in well. Doing so makes a uniform cake with a good crumb.
Second thing is to bring the eggs to room temperature before you begin and really whip those egg whites into stiff peaks. Folding voluminous whites in, to create the batter, makes for lots of height and texture.
THE ICING
This icing is a classic buttercream and I especially love the ease of working with it. Note – it’s very important to make sure the butter and heavy cream is at room temperature before you begin.
True story, I shot this video on a rather cold day. The cottage kitchen was quite cool, and sure enough, I started having trouble with my icing getting too hard. Make and spread your icing in the warmest spot of your kitchen for best results. My story ends with an extension cord and me sitting in front of the fireplace until things warmed up. I had to get it perfect, just for YOU!
ASSEMBLE
Make sure to watch the VIDEO attached to this post to see how I assemble this two-layer chocolate cake recipe. I’m by no means a professional cake decorator, but I have watched some seriously talented ones in action and have picked up a trick or two.
My favourites are things like using a lazy Susan (brilliant), anchoring the cake to the presentation surface with a dollop of icing (great idea), tucking strips of parchment under the edge of the cake to make for a clean finish (smart) and using an icing spatula to help create a uniform look. You’ll be a cake pro in no time!
MORE REASONS
Now, if serving this cake wasn’t already special enough, let’s push the envelope, shall we? Serving ice cream with cake is always a good idea, especially for your wee one’s birthday or important milestone. Add a favourite flavour to your shopping list.
With ice cream nestled up against this CHOCOLATE CELEBRATION CAKE, how about we blow the roof off this party with some CHOCOLATE CRACK SAUCE – click HERE to watch our 1-minute video on how to make it. Ladle it over the ice cream and add a sprinkle of kosher salt for a sweet and salty finish. The crack hardens in seconds and then just waits for the squeals of delight as guests crack and dig in for that first bite.
I’ve added some of my key cake-making tools to the Amazon section of this post. I make cakes a lot, so these items are in both my cottage kitchen and city one, as they’re all super helpful in making cakes right.
Like the idea of this cake but were hoping for something with fewer steps? Try our fabulous IRISH WHISKY CAKE or our equally stellar SOUR CREAM COFFEE CAKE. Last thing, adults enjoy this boozy HARVEY WALLBANGER CAKE. When it comes to cake, your friends here at Weekend at the Cottage say, “Bring it!”, and yes, we mean it literally!
Throwing a party? This HOMEMADE CHOCOLATE CAKE is the icing on your party cake!
Cook Mode Use cook mode to keep your screen on while cooking.
Ingredients
For the cake:
½ cup cocoa powder, sifted
¾ cup hot water
1 cup sifted cake flour
1 tablespoon baking powder
¼ teaspoon baking soda
1 cup granulated sugar
½ teaspoon kosher salt
2 teaspoons instant coffee
¼ teaspoon cinnamon
¼ cup vegetable oil
3 eggs separated
¼ teaspoon cream of tartar
For the Icing:
1 cup (2 sticks) butter, room temperature
3½ cups icing sugar
½ cup cocoa powder, sifted
¼ teaspoon kosher salt
2 teaspoons pure vanilla extract
3 tablespoons 35% cream, room temperature
Directions
To make the cakes: Creating 8-inch round x 2
Trace the shape of the circular pans onto two sheets of parchment paper. Cut the shapes out. Butter the bottoms and sides of the pans. Place one piece of parchment into each, pressing it down into the bottom of the pan. Grease the top of the parchment paper, then sprinkle in a few tablespoons of flour. Tap the flour around in the pans so that the bottom and sides are greased and floured. Tap out and discard excess flour. Set pans to the side.
Preheat the oven to 325°F.
Place water into a small saucepan and bring to a boil. Add the cocoa powder and stir to dissolve. Blend until smooth. Remove from heat and set aside to cool.
Place the cake flour, baking powder, baking soda, 2/3 cup of granulated sugar, kosher salt, instant coffee and cinnamon into a bowl. Sift together at least 3 times. Transfer to a large mixing bowl. Using your fingers, create a well in the centre of this mixture.
Into the well, add the oil, cooled cocoa mixture and three egg yolks. Beat together using a hand mixer until the batter is smooth. Set aside for a moment.
Add the cream of tartar to the egg whites in a medium-sized bowl and beat until foamy. Increase the speed of the mixer and slowly add the remaining 1/3 cup of granulated sugar, sprinkling it onto the whites in ¼ teaspoon intervals. Beat until egg whites are stiff and stand in peaks.
Gently fold the egg whites into the chocolate batter until combined. Divide the batter evenly between the two pans. Gently tap the pans on the counter once or twice to eliminate air bubbles before transferring the pans to the oven. Transfer the cakes to the oven and bake for 30 minutes or until a cake tester comes away clean.
Cool pans on a wire rack for 15 minutes before inverting the cakes. Remove parchment paper and allow the cakes to cool completely before icing.
To make the icing: Place the ingredients for the icing into a large bowl. Using a hand mixer, gently combine on a low speed until all the ingredients are incorporated. Increase the speed of the mixer to create a light and fluffy icing to your liking. Add a bit more of the cream if the icing seems too thick. If the icing seems too thin, add a bit more icing sugar.
Assemble the cake: Cut 4, 2-inch, strips of parchment paper and place them around the edge of your presentation plate to create a square.
Place a small dollop of icing onto the centre of your cake service plate (if you have a lazy Susan, place the cake plate on that to make icing easier). Place the first round of cake onto the centre of the plate with the smooth bottom facing up. The parchment strips should be underneath it, covering the exposed area of the cake plate.
Add a generous dollop of icing onto the top of the cake, smoothing it out evenly to the edge of the round. Place the second cake on top of that, with the smooth bottom side facing up. Add a generous dollop of icing onto the top of this cake too, smoothing it out to the edge.
Now add a dollop of icing to the side of the two layers, smoothing it out evenly. Turn the plate slightly and add a bit more icing, smoothing it out as you go along. Continue in this fashion until the exposed areas of the cake are covered evenly with icing. Smooth the top of the cake to meet the edge of the side.
Once the cake is iced, gently and carefully remove the strips of parchment paper. The cake is ready to be served. Further decorate with celebratory greeting using a different coloured icing, if you wish. Serve this cake with ice cream and chocolate crack sauce (see story for details).